crwdns2933423:0crwdne2933423:0

Changer le rail de chargement du Joy-Con gauche

crwdns2936315:0crwdne2936315:0
crwdns2936317:0crwdne2936317:0
crwdns2931653:010crwdne2931653:0
Left Joy-Con Charging Rail Replacement: crwdns2935265:00crwdnd2935265:01crwdnd2935265:03crwdne2935265:0 Left Joy-Con Charging Rail Replacement: crwdns2935265:00crwdnd2935265:02crwdnd2935265:03crwdne2935265:0 Left Joy-Con Charging Rail Replacement: crwdns2935265:00crwdnd2935265:03crwdnd2935265:03crwdne2935265:0
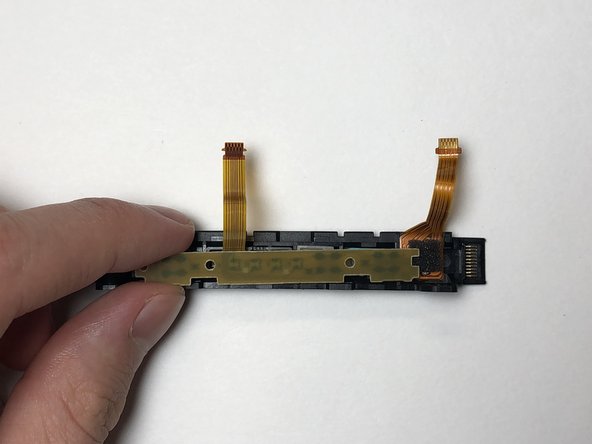
  • Place the SL, SR and sync buttons into the new charging rail and make sure the tabs on the SL and SR buttons fit into their respective socket grooves.

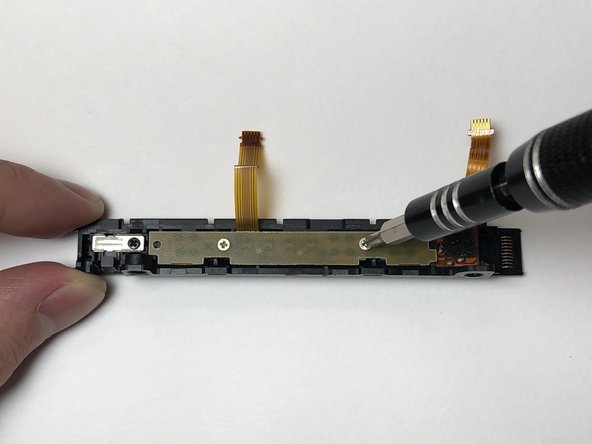
  • Place the PCB over the buttons and secure it in place using the two golden 3 mm Phillips #000 screws.

  • Potential for device damage. If the buttons are not properly placed into the charging rail, proceeding to screw in the PCB will cause it to warp.

Placez les boutons SL, SR et de synchronisation dans le nouveau rail de chargement et assurez-vous que les languettes des boutons SL et SR s'insèrent dans leurs rainures respectives.

Placez le PCB sur les boutons et fixez-le à l'aide des deux vis dorées cruciformes #000 de 3 mm.

Risque d'endommagement de l'appareil. Si les boutons ne sont pas correctement placés dans le rail de charge, continuer à visser le PCB le déformera.

crwdns2944171:0crwdnd2944171:0crwdnd2944171:0crwdnd2944171:0crwdne2944171:0