crwdns2933423:0crwdne2933423:0

ロジクール MX Master

crwdns2936315:0crwdne2936315:0
crwdns2936323:0crwdne2936323:0
crwdns2931653:05crwdne2931653:0
Logitech MX Master Battery Replacement, Separate the battery adhesive: crwdns2935265:00crwdnd2935265:01crwdnd2935265:03crwdne2935265:0 Logitech MX Master Battery Replacement, Separate the battery adhesive: crwdns2935265:00crwdnd2935265:02crwdnd2935265:03crwdne2935265:0 Logitech MX Master Battery Replacement, Separate the battery adhesive: crwdns2935265:00crwdnd2935265:03crwdnd2935265:03crwdne2935265:0
Separate the battery adhesive
  • Try not to bend, crease, deform, poke, or puncture the battery with your tool—a damaged battery is a potential fire hazard.

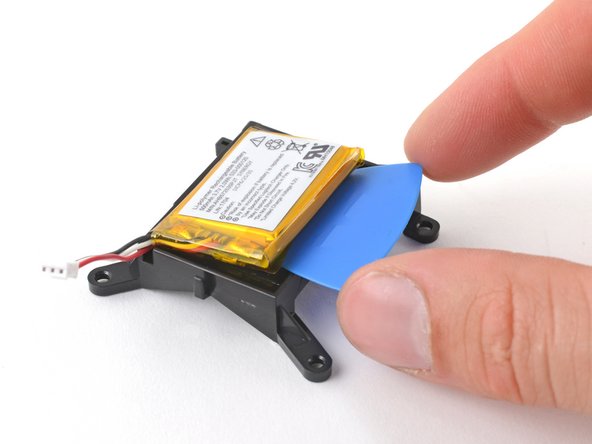
  • Insert your opening pick between the long edge of the battery and its housing, opposite the cable.

  • Slide your pick under the battery to slice the adhesive.

  • Pull up to peel the battery away from the adhesive.

工具でバッテリーを曲げたり、折り目をつけたり、変形させたり、突いたり、穴を開けたりしないでください。

オープニングピックをバッテリーの長辺とハウジングの間、ケーブルの反対側に差し込みます。

ピックをバッテリーの下に滑らせ、接着剤をスライスします。

バッテリーを接着剤から剥がしながら引き上げます。

crwdns2944171:0crwdnd2944171:0crwdnd2944171:0crwdnd2944171:0crwdne2944171:0