crwdns2933423:0crwdne2933423:0

Sostituzione digitizer iPad 7

crwdns2936315:0crwdne2936315:0
crwdns2936321:0crwdne2936321:0
crwdns2931653:018crwdne2931653:0
iPad 7 Cracked Digitizer Replacement: crwdns2935265:00crwdnd2935265:01crwdnd2935265:02crwdne2935265:0 iPad 7 Cracked Digitizer Replacement: crwdns2935265:00crwdnd2935265:02crwdnd2935265:02crwdne2935265:0
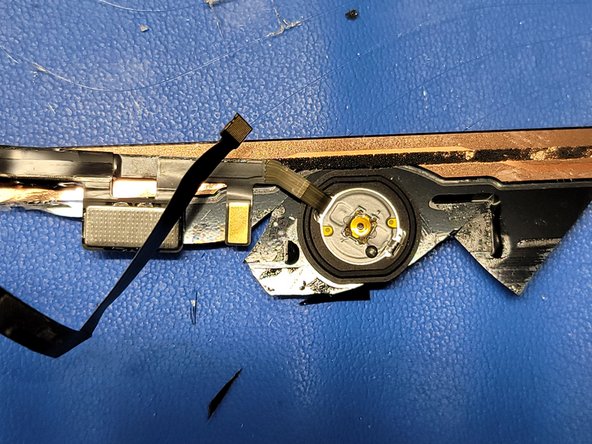
  • Once the flex cable is free from the bracket, you may now remove the metal bracket.

  • This may require a bit of force and heat. Apply about 3-6 seconds worth of heat to the front of the digitizer about 3-5 in away from the digitizer.

  • Take the cutting end of the Halberd Spudger and separate the bracket from the digitizer

  • Again, be careful not to rip, tear, or otherwise break the home button flex cable. This will cause irreparable damage to the touch ID function and home button.

  • Once the bracket is removed, either throw it away or keep it for the new digitizer.

  • Depending where you get the new digitizer will determine if it comes with a new bracket and gasket. If your new digitizer doesn't, simply apply some Tesa tape or glue to the bottom of the bracket, and apply it to the new digitizer after installing the home button. Make sure it is not loose as this could cause home button clicking issues.

Una volta separato il cavo a nastro dal supporto, puoi rimuovere il supporto in metallo.

Questo può richiedere della forza e di riscaldare. Scaldalo per 3/6 secondi con un getto d'aria calda a 7/13 cm dal digitizer.

Separa il supporto dal digitizer con la parte piatta dello spudger ad alabarda.

Stai attento a non tirare, piegare, strappare o rompere il cavo a nastro del tasto Home. Ricorda che potrebbe causare dei danni irreparabili al tasto Home e al Touch ID.

Una volta rimosso il supporto, buttala o riusala per il nuovo digitizer.

A seconda del digitizer che hai preso, possono essere già installate il supporto o la guarnizione. Se il tuo non li ha, Semplicemente applica del nastro Tesa o della colla al bordo inferiore del supporto e incollalo al nuovo digitizer dopo aver installato il tasto Home. assicurati che sia ben saldo, altrimenti non potrebbe premersi correttamente.

crwdns2944171:0crwdnd2944171:0crwdnd2944171:0crwdnd2944171:0crwdne2944171:0