crwdns2933423:0crwdne2933423:0

Remplacement du commutateur du Ducky One 2 Mini Cherry MX

crwdns2936315:0crwdne2936315:0
crwdns2936317:0crwdne2936317:0
crwdns2931653:04crwdne2931653:0
Ducky One 2 Mini Cherry MX Switch Replacement: crwdns2935265:00crwdnd2935265:01crwdnd2935265:03crwdne2935265:0 Ducky One 2 Mini Cherry MX Switch Replacement: crwdns2935265:00crwdnd2935265:02crwdnd2935265:03crwdne2935265:0 Ducky One 2 Mini Cherry MX Switch Replacement: crwdns2935265:00crwdnd2935265:03crwdnd2935265:03crwdne2935265:0
  • Flip the board over and you will notice two soldered pins near each letter on the keyboard.

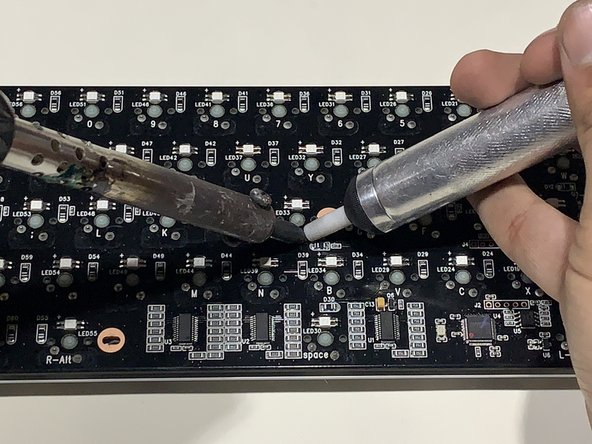
  • Hold the soldering iron on the pins for a few seconds and remove with the de-soldering pump.

  • Once both the pins are clear of solder, the pins should move freely in the slots.

  • When heating the soldered pins, do not let the iron touch the board to avoid any damage.

  • Do Not Touch the neck of the solder iron when plugged in to avoid any harm.

Retournez la carte et vous remarquerez deux broches soudées près de chaque lettre sur le clavier.

Maintenez le fer à souder sur les broches pendant quelques secondes et retirez-le avec la pompe à dessouder.

Une fois que les deux broches sont exemptes de soudure, les broches doivent se déplacer librement dans les fentes.

Lorsque vous chauffez les broches soudées, ne laissez pas le fer toucher la carte pour éviter tout dommage.

Ne touchez pas le cou du fer à souder lorsqu'il est branché pour éviter tout dommage.

crwdns2944171:0crwdnd2944171:0crwdnd2944171:0crwdnd2944171:0crwdne2944171:0