crwdns2933423:0crwdne2933423:0

Reparación de un iPhone X que No Carga

crwdns2936315:0crwdne2936315:0
crwdns2936331:0crwdne2936331:0
crwdns2931653:09crwdne2931653:0
Repair an iPhone X That Won't Charge: crwdns2935265:00crwdnd2935265:01crwdnd2935265:03crwdne2935265:0 Repair an iPhone X That Won't Charge: crwdns2935265:00crwdnd2935265:02crwdnd2935265:03crwdne2935265:0 Repair an iPhone X That Won't Charge: crwdns2935265:00crwdnd2935265:03crwdnd2935265:03crwdne2935265:0
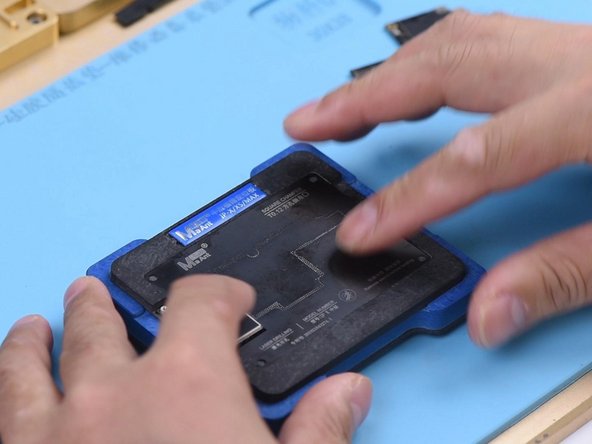
  • The next thing we need to do is to solder the two layers together. We need to get the lower layer reballed first. Put the lower layer into the reballing mold and get the BGA Reballing Stencil in position.

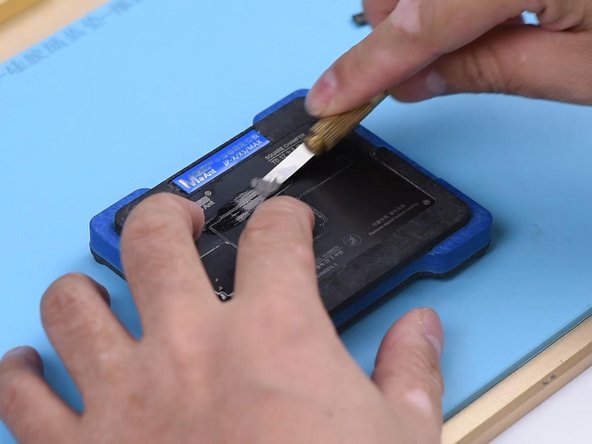
  • Place the mold onto the base. The stencil is tightly attached to the lower layer because of the magnetic structure of the base. Then we smear some low-temp solder paste on the stencil and wipe off excess solder paste with a lint-free wipe.

Lo siguiente que debemos hacer es soldar las dos capas juntas. Primero tenemos que volver a colocar la bola en la capa inferior. Coloca la capa inferior en el molde de reballing y coloca la plantilla de reballing BGA en su posición.

Coloca el molde sobre la base. La plantilla está firmemente unida a la capa inferior debido a la estructura magnética de la base. Luego untamos un poco de pasta de soldar de baja temperatura en la plantilla y limpiamos el exceso de pasta de soldar con un paño sin pelusa.

crwdns2944171:0crwdnd2944171:0crwdnd2944171:0crwdnd2944171:0crwdne2944171:0