crwdns2933423:0crwdne2933423:0

¿El iPhone X dice que No Hay Servicio? ¡Aquí está la solución!

crwdns2936315:0crwdne2936315:0
crwdns2936331:0crwdne2936331:0
crwdns2931653:011crwdne2931653:0
iPhone X Says No Service? Here's the fix!: crwdns2935265:00crwdnd2935265:01crwdnd2935265:03crwdne2935265:0 iPhone X Says No Service? Here's the fix!: crwdns2935265:00crwdnd2935265:02crwdnd2935265:03crwdne2935265:0 iPhone X Says No Service? Here's the fix!: crwdns2935265:00crwdnd2935265:03crwdnd2935265:03crwdne2935265:0
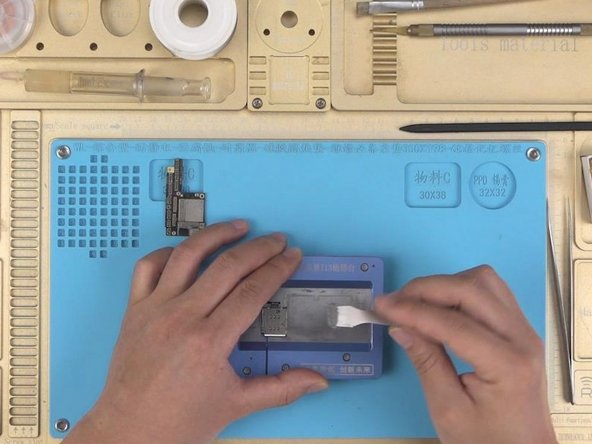
  • Next thing we need to do is to solder the two layers together. Attach the lower layer to iPhone X specialized reballing mold.

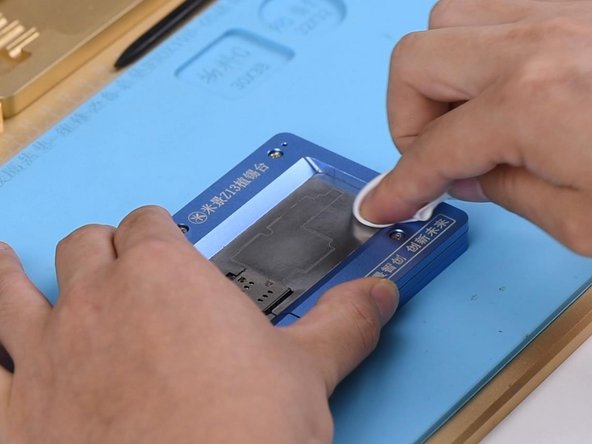
  • Cover the lower layer with the matched reballing stencil.

  • Smear some low-temp Solder Paste on the stencil. Wipe off excess solder paste with the lint-free wipe. Once done, remove the matched reballing stencil carefully. Make sure solder paste has been applied evenly and perfectly.

Lo siguiente que debemos hacer es soldar las dos capas juntas. Fija la capa inferior al molde especial para reballing del iPhone X.

Cubre la capa inferior con la plantilla de reballing combinada.

Unte un poco de pasta de soldadura de baja temperatura en la plantilla. Limpia el exceso de pasta de soldar con la toallita sin pelusa. Una vez hecho esto, retira la plantilla reballing emparejada con cuidado. Asegúrate de que la soldadura en pasta se haya aplicado de manera uniforme y perfecta.

crwdns2944171:0crwdnd2944171:0crwdnd2944171:0crwdnd2944171:0crwdne2944171:0