crwdns2935425:010crwdne2935425:0


-
Attach the upper layer and the lower layer to the test fixture. Get the back glass assembly connected. Connect the battery connector with the DC Power Supply.
-
Connect the iPhone to the computer with the USB cable. Restore the phone via iTunes. Once done, disconnect the USB cable, the power supply, and the back glass assembly.
-
Again, let’s get the display assembly installed. Connect the battery connector with the Power Supplier. The phone goes with activation process.
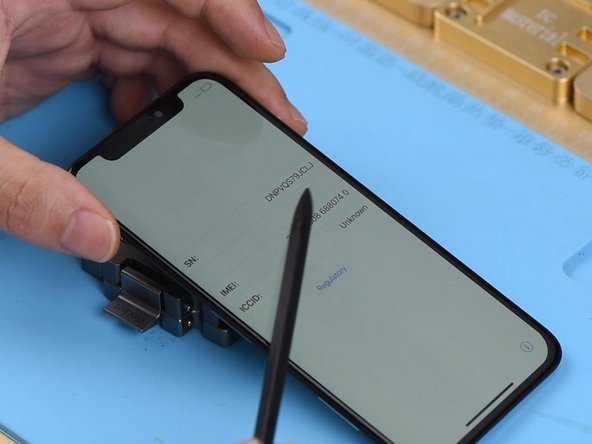
-
Click the icon at the bottom right corner. Serial number and IMEI number display normally on the screen. Signal bars in the upper-right corner is back to normal. We can confirm now that the No Service problem is caused by U_PMIC_E.
crwdns2944171:0crwdnd2944171:0crwdnd2944171:0crwdnd2944171:0crwdne2944171:0