crwdns2931529:0crwdnd2931529:0crwdnd2931529:0crwdnd2931529:02crwdnd2931529:0crwdne2931529:0
crwdns2935425:07crwdne2935425:0


-
Beginning the Disassembly
-
I recommend performing this on top of an old towel, or something similar, to protect the coffee maker as well as the work surface and because some ground coffee tends to fall out of various crevices in the machine.
-
Remove: all four tray pieces (marked with red squares in the first photo), and the frothing attachment(s) (marked with a green circle in the first photo; you may have a second frothing attachment in the top storage area (blue circle, photo 2)).
-
Remove: the water container (marked with a red square), the coffee scoop (yellow circle), and the coffee bean aroma preservation cover (pink square), all the unground beans from the hopper (you can gently dump them out after you have removed everything else by turning the machine over).
-
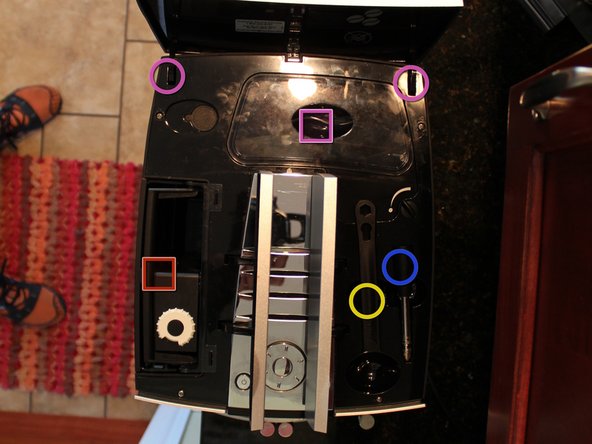
You can (optionally) remove the top back cover by gently wiggling each of the hinge points (marked with pink circles) up while it is open. Gentle pressure from side to side may release the hinges. Also loosen the captive screw on the bean area and then you can remove that grate by gently squeezing together the two hinge points.
-
[You can click on the photos to see them enlarged. Alternatively, 1. choose the orange cog wheel in the photo and choose 'Full Screen', or, 2. use Ctrl and + (incl =) in your browser to enlarge the whole page. Use Ctrl - to shrink.]
crwdns2944171:0crwdnd2944171:0crwdnd2944171:0crwdnd2944171:0crwdne2944171:0