crwdns2931529:0crwdnd2931529:0crwdnd2931529:0crwdnd2931529:02crwdnd2931529:0crwdne2931529:0
crwdns2935425:08crwdne2935425:0


-
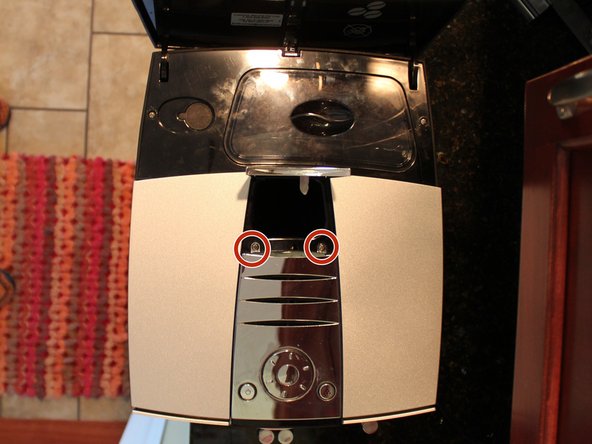
Six screws labeled with the red circles need to be removed before the top can be taken off. One under each of the left and right top hinged covers, two under the top back cover and of the two under the ground coffee top door, the one nearest the water tank (the other one holds the chrome plastic to the top).
-
The original black screws were very hard to get out but I had luck with the needle nose pliers in my trusty Leatherman Charge model multi-tool. I tried with several alternative needle nose pliers.
-
There are specific Jura tools available from internet auction sites, tools that accept the slightly oval shaped heads of the recessed 'blind' screws. Just use oval head bit from iFixit.
-
I threw those screws away and replaced them with simple Phillips-head ones - that is why they appear silver in the photo while yours are probably black. I am pretty sure the manufacture does not want us to peek inside :o)
-
Note: when putting the top back on you need to align the position of the bean grinder adjustment knob with the linkage below. It should line up easily unless you accidentally moved it (marked with a green circle).
-
Taking a close-up photo of the mechanism, in 'macro' mode, is recommended. If you find the photo is too dark, set the flash to 'On', and place a finger over 3/4 of the flash light when you take the photo - since full flash would be far too intense for a close shot.
crwdns2944171:0crwdnd2944171:0crwdnd2944171:0crwdnd2944171:0crwdne2944171:0