crwdns2933423:0crwdne2933423:0

iPhone 12 und 12 Pro Teardown

crwdns2936315:0crwdne2936315:0
crwdns2936319:0crwdne2936319:0
crwdns2931653:019crwdne2931653:0
iPhone 12 and 12 Pro Teardown: crwdns2935265:00crwdnd2935265:01crwdnd2935265:03crwdne2935265:0 iPhone 12 and 12 Pro Teardown: crwdns2935265:00crwdnd2935265:02crwdnd2935265:03crwdne2935265:0 iPhone 12 and 12 Pro Teardown: crwdns2935265:00crwdnd2935265:03crwdnd2935265:03crwdne2935265:0
  • The only seam to be found is where the rubber meets the metal, making that the obvious entry point.

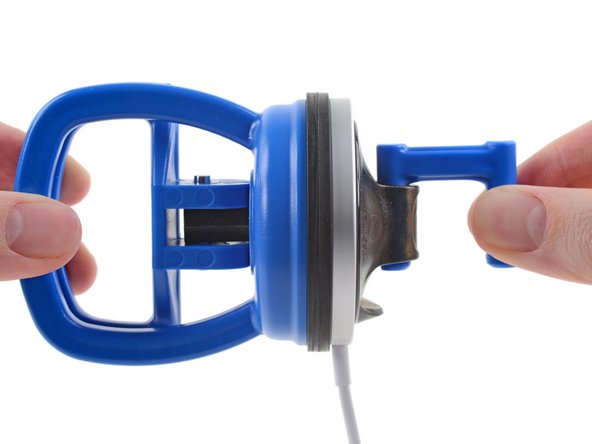
  • Optimistically, we blast it with some heat in order to soften the adhesive which, presumably, holds this thing together. Then we attach two perfectly-fitting suction cups, one to either side, and start tug-of-warring.

  • The white cover material on the charging surface starts to stretch slightly, but the actual gap doesn’t budge. (Sometimes we're too optimistic.)

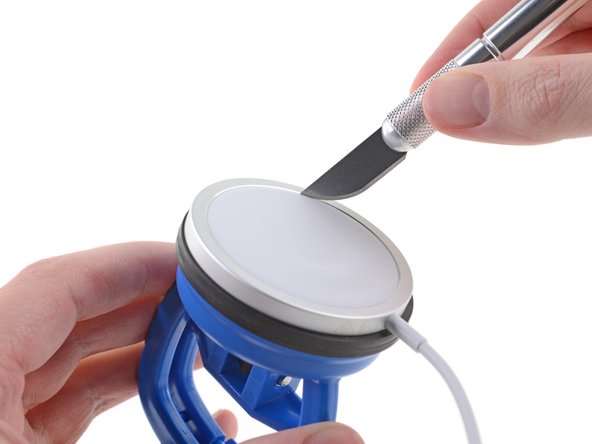
  • So, under the knife it goes! Some persuasion from our razor knife gets us past the white cover, between the plastic and metal underneath, where we can start prying.

Die einzige Fuge, die zu finden ist, befindet sich zwischen dem Gummi und dem Metall, was daher der offensichtliche Eingangspunkt ist.

Sehr optimistisch pusten wir etwas Hitze darauf, um den Kleber aufzuweichen, der dieses Teil wohl zusammenhält. Dann befestigen wir zwei perfekt passende Saugnäpfe auf jede Seite und fangen mit dem Tauziehen an.

Das weiße Abdeckungsmaterial auf der Oberseite des Gerätes fängt an, sich leicht zu dehnen, aber die Fuge an sich bewegt sich keinen Millimeter. (Manchmal sind wir einfach zu optimistisch.)

Also kommt das Teil unters Messer! Unser X-Acto-Messer hat viel Überzeugungskraft und schafft es an der weißen Abdeckung vorbei zwischen das Plastik und das Metall darunter, wo wir anfangen können, zu hebeln.

crwdns2944171:0crwdnd2944171:0crwdnd2944171:0crwdnd2944171:0crwdne2944171:0