crwdns2933423:0crwdne2933423:0

Reemplazo de la placa calefactora de AirSense 10 ResMed

crwdns2936315:0crwdne2936315:0
crwdns2936331:0crwdne2936331:0
crwdns2931653:03crwdne2931653:0
ResMed AirSense 10  Heater Fuse Replacement: crwdns2935265:00crwdnd2935265:01crwdnd2935265:03crwdne2935265:0 ResMed AirSense 10  Heater Fuse Replacement: crwdns2935265:00crwdnd2935265:02crwdnd2935265:03crwdne2935265:0 ResMed AirSense 10  Heater Fuse Replacement: crwdns2935265:00crwdnd2935265:03crwdnd2935265:03crwdne2935265:0
  • After the plastic cover has been removed you will be able to see the back of the heater plate. We will remove it from the device to making it easier to remove the fuse.

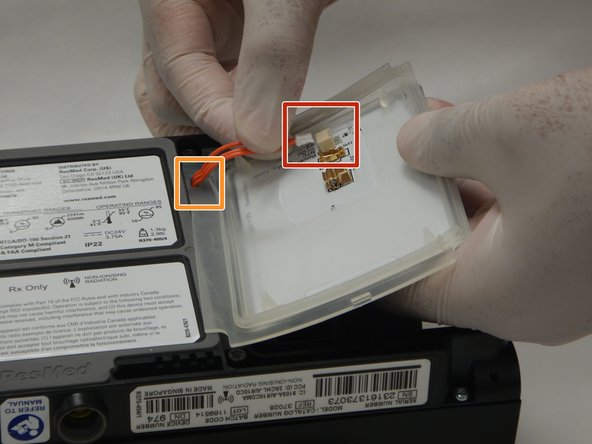
  • Pinching the three red cords, pull straight back on the heater plate power cord until it is removed from the connector.

  • After the cord has been removed from the connector, it will need to be pulled through the rubber grommet.

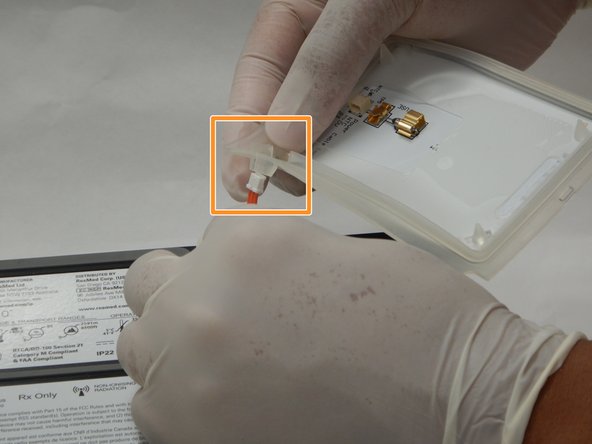
  • Gently pull the wires to the connector until the white connector is touching the rubber grommet.

  • Using light force, push the white connector on the end of the heater plate power cords through the rubber grommet.

Después de quitar la cubierta de plástico, podrás ver la parte posterior de la placa calefactora. La quitaremos del dispositivo para facilitar la extracción del fusible.

Sujeta los tres cables rojos y tire hacia atrás del cable de alimentación de la placa calefactora hasta que se separe del conector.

Después de quitar el cable del conector, deberás pasarlo por el ojal de goma.

Tira suavemente de los cables hacia el conector hasta que el conector blanco toque el ojal de goma.

Con una ligera fuerza, empuja el conector blanco en el extremo de los cables de alimentación de la placa calefactora a través del ojal de goma.

crwdns2944171:0crwdnd2944171:0crwdnd2944171:0crwdnd2944171:0crwdne2944171:0