crwdns2935425:05crwdne2935425:0
crwdns2931653:05crwdne2931653:0


-
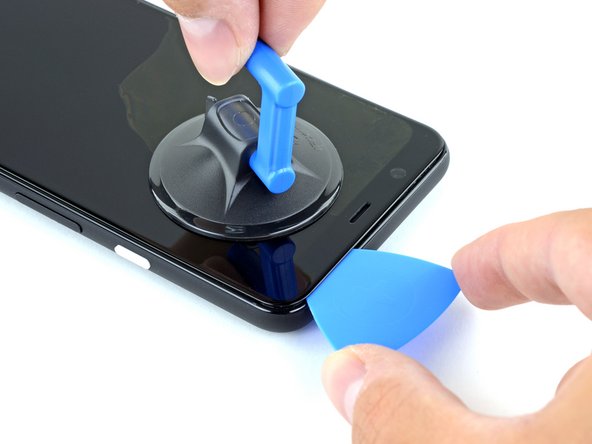
Apply a suction cup to the heated edge of the display assembly.
-
Pull up on the suction cup with strong, steady force to create a gap between the display assembly and the frame.
-
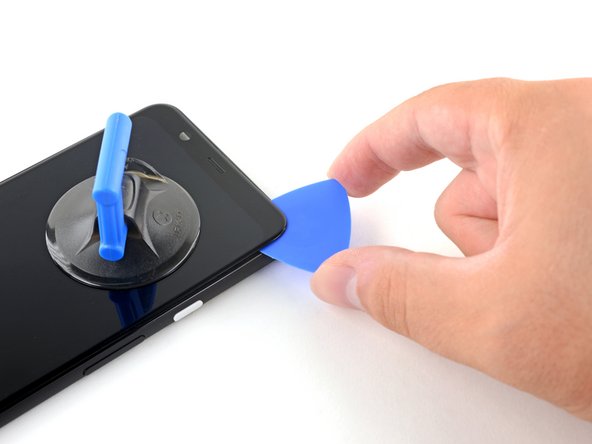
Insert the point of an opening pick into the gap.
| - | [* icon_caution] This process will almost always destroy the OLED display panel. Only proceed if you are replacing an already-broken |
|---|---|
| - | [* black] Apply a suction cup to the heated edge of the |
| - | [* icon_note] If your display is badly cracked, covering it with a layer of clear packing tape may allow the suction cup to adhere. Alternatively, very strong tape may be used instead of the suction cup. If all else fails, you can superglue the suction cup to the broken |
| - | [* black] Pull up on the suction cup with strong, steady force to create a gap between the |
| + | [* icon_caution] This process will almost always destroy the OLED display panel. Only proceed if you are replacing an already-broken display assembly. |
| + | [* black] Apply a suction cup to the heated edge of the display assembly. |
| + | [* icon_note] If your display is badly cracked, covering it with a layer of clear packing tape may allow the suction cup to adhere. Alternatively, very strong tape may be used instead of the suction cup. If all else fails, you can superglue the suction cup to the broken display assembly. |
| + | [* black] Pull up on the suction cup with strong, steady force to create a gap between the display assembly and the frame. |
| [* icon_note] Depending on the age of your phone, this may be difficult. If you are having trouble, apply heat to the edge and try again. | |
| [* black] Insert the point of an opening pick into the gap. | |
| [* icon_note] Depending on the age of your phone, this may take significant force. If you are having trouble, apply more heat and try again. |
crwdns2944171:0crwdnd2944171:0crwdnd2944171:0crwdnd2944171:0crwdne2944171:0