crwdns2933423:0crwdne2933423:0

Démontage de la Wacom Cintiq Pro 13

crwdns2936315:0crwdne2936315:0
crwdns2936317:0crwdne2936317:0
crwdns2931653:016crwdne2931653:0
Wacom Cintiq Pro 13 Disassembly: crwdns2935265:00crwdnd2935265:01crwdnd2935265:03crwdne2935265:0 Wacom Cintiq Pro 13 Disassembly: crwdns2935265:00crwdnd2935265:02crwdnd2935265:03crwdne2935265:0 Wacom Cintiq Pro 13 Disassembly: crwdns2935265:00crwdnd2935265:03crwdnd2935265:03crwdne2935265:0
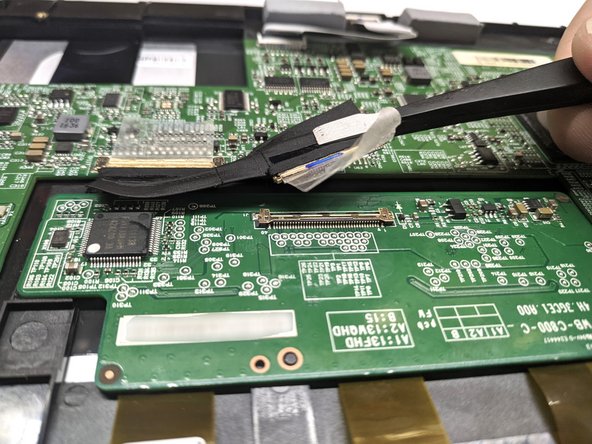
  • Remove the adhesive from the mainboard

  • Do not remove it entirely - it's a part of the cable

  • Slide the cable towards the mainboard by holding it as near the connector as possible

  • Do not pull by the middle or other end of the cable

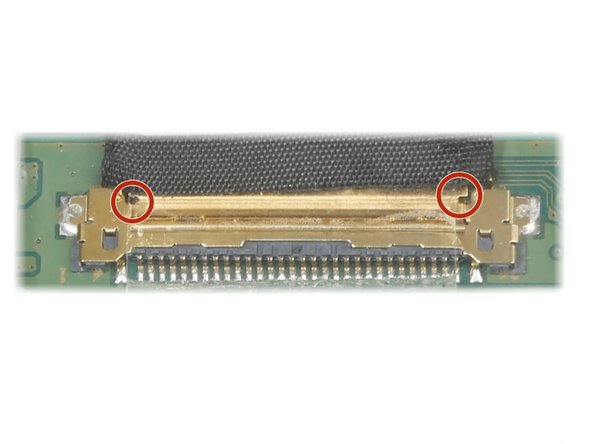
  • If cable seems hard to remove, try to push one side of the connector using a pair of tweezers by spots marked on third image

  • Do not push center part of the connector as it can be easily bent

  • Repeat the steps for another end of the cable connected to the mainboard

Retirez l'adhésif de la carte mère

Ne le retirez pas entièrement - c'est une partie du câble

Faites glisser la nappe vers la carte mère en la tenant le plus près possible du connecteur

Ne tirez pas par le milieu ou l'autre extrémité du câble

Si le câble semble difficile à retirer, essayez de pousser un côté du connecteur à l'aide de pincettes de précision par les points marqués sur la troisième image

Ne poussez pas la partie centrale du connecteur car elle peut être facilement pliée

Répétez les étapes pour une autre extrémité du câble connecté à la carte mère

crwdns2944171:0crwdnd2944171:0crwdnd2944171:0crwdnd2944171:0crwdne2944171:0