crwdns2933423:0crwdne2933423:0

Reemplazo de la pantalla de la MacBook Pro 13" Touch Bar 2018

crwdns2931529:0crwdnd2931529:0crwdnd2931529:0crwdnd2931529:02crwdnd2931529:0crwdne2931529:0

crwdns2935425:06crwdne2935425:0

crwdns2936315:0crwdne2936315:0
crwdns2936331:0crwdne2936331:0
crwdns2931653:06crwdne2931653:0
MacBook Pro 13" Touch Bar 2018 Screen Replacement, Remove the screen: crwdns2935265:00crwdnd2935265:01crwdnd2935265:03crwdne2935265:0 MacBook Pro 13" Touch Bar 2018 Screen Replacement, Remove the screen: crwdns2935265:00crwdnd2935265:02crwdnd2935265:03crwdne2935265:0 MacBook Pro 13" Touch Bar 2018 Screen Replacement, Remove the screen: crwdns2935265:00crwdnd2935265:03crwdnd2935265:03crwdne2935265:0
Remove the screen
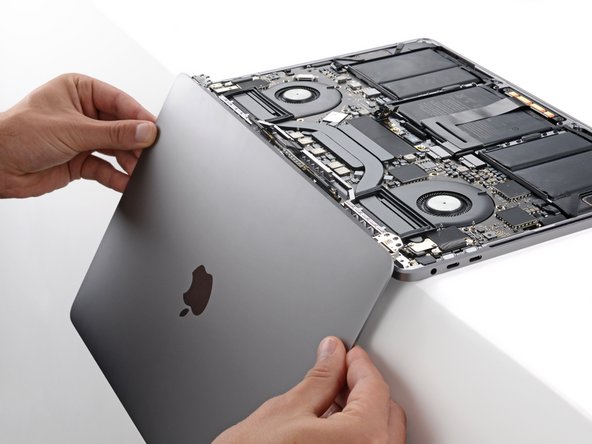
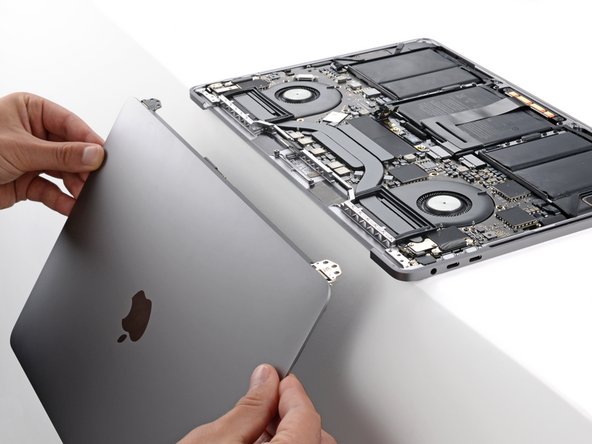
  • Free the right hinge and remove the screen.

  • During reassembly:

  • Make sure the screen hinges are fully open and guide them into their recesses in the frame.

  • Be very careful not to damage the Touch Bar connector when inserting the left hinge.

  • Partially tighten the six hinge screws.

  • Close your laptop and make sure the screen is properly aligned. If it clicks or snaps, readjust the alignment.

  • Fully tighten the hinge screws.

Libera la bisagra derecha y retira la pantalla.

Durante el reensamblaje:

Asegúrate de que las bisagras de la pantalla estén completamente abiertas y guíalas hacia sus huecos en el marco.

Ten mucho cuidado de no dañar el conector de la Touch Bar al insertar la bisagra izquierda.

Aprieta parcialmente los seis tornillos de las bisagras.

Cierra tu computadora portátil y asegúrate de que la pantalla esté correctamente alineada. Si hace clic o se rompe, reajusta la alineación.

Aprieta completamente los tornillos de las bisagras.

crwdns2944171:0crwdnd2944171:0crwdnd2944171:0crwdnd2944171:0crwdne2944171:0