crwdns2933423:0crwdne2933423:0

Gaggia Cubica vervangen afdichting verwarmingselement.

crwdns2936315:0crwdne2936315:0
crwdns2936313:0crwdne2936313:0
crwdns2931653:06crwdne2931653:0
Gaggia Cubika Seal for the heating tank Replacement: crwdns2935265:00crwdnd2935265:01crwdnd2935265:03crwdne2935265:0 Gaggia Cubika Seal for the heating tank Replacement: crwdns2935265:00crwdnd2935265:02crwdnd2935265:03crwdne2935265:0 Gaggia Cubika Seal for the heating tank Replacement: crwdns2935265:00crwdnd2935265:03crwdnd2935265:03crwdne2935265:0
  • Install a new "o" ring (available from e.g. eBay).

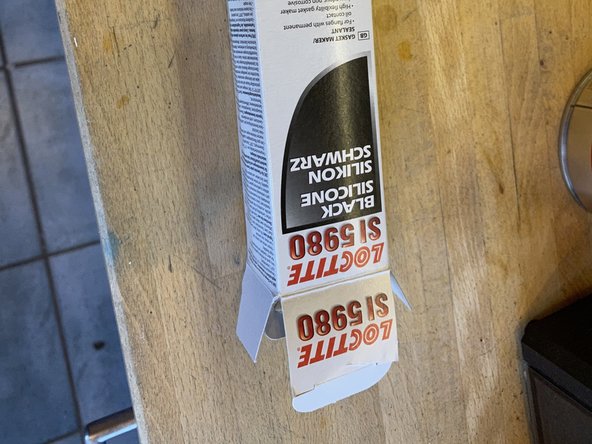
  • I added liquid gasket to make sure the pitting was not going to cause me problems. In my case I used Loctite SI 5980 which is avaialble from motoring shops. See the key photo.

  • Present the top to the bottom of the heater, there are keys so make sure it is the right way around. Gently push together, and adding the coffee press body to the bottom of the heater, put the four bolts back into the heater.

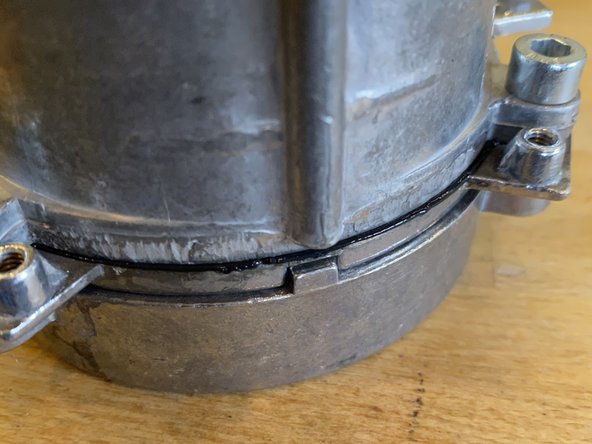
  • Tighten them up on the opposite corners. e.g. there are four bolts, say one is North, one South, East and West. Tighten the North until it grips. Then tighten South until it grips, followed by East and West. Then Tighten them up a little more. You should see a little liquid gasket come out of the joint all the way around. (photo 2)

Installeer een nieuwe o-ring (verkrijgbaar bij bijvoorbeeld eBay).

Ik heb vloeibare pakking gebruikt om er zeker van te zijn dat de putjes geen problemen zouden veroorzaken. In mijn geval gebruikte ik Loctite SI 5980 dat verkrijgbaar is bij motorzaken. Zie de foto 3.

Plaats de bovenkant tegen de onderkant van het verwarmingselement, er zijn spieën dus zorg ervoor dat het de goede kant op is. Duw het geheel voorzichtig in elkaar en voeg de koffiepers toe aan de onderkant van het verwarmingselement, plaats de vier bouten terug in het verwarmingselement.

Draai ze vast op de tegenoverliggende hoeken. Draai Noord hand vast. Draai dan Zuid hand vast, gevolgd door Oost en West. Draai ze dan nog iets vaster aan. Je zou rondom een beetje vloeibare pakking uit de verbinding moeten zien komen. (foto 2)

crwdns2944171:0crwdnd2944171:0crwdnd2944171:0crwdnd2944171:0crwdne2944171:0