crwdns2933423:0crwdne2933423:0

任天堂Switch 右Joy-Con外壳替换

crwdns2936315:0crwdne2936315:0
crwdns2936311:0crwdne2936311:0
crwdns2931653:07crwdne2931653:0
Nintendo Switch Right Joy-Con Shell Replacement: crwdns2935265:00crwdnd2935265:01crwdnd2935265:03crwdne2935265:0 Nintendo Switch Right Joy-Con Shell Replacement: crwdns2935265:00crwdnd2935265:02crwdnd2935265:03crwdne2935265:0 Nintendo Switch Right Joy-Con Shell Replacement: crwdns2935265:00crwdnd2935265:03crwdnd2935265:03crwdne2935265:0
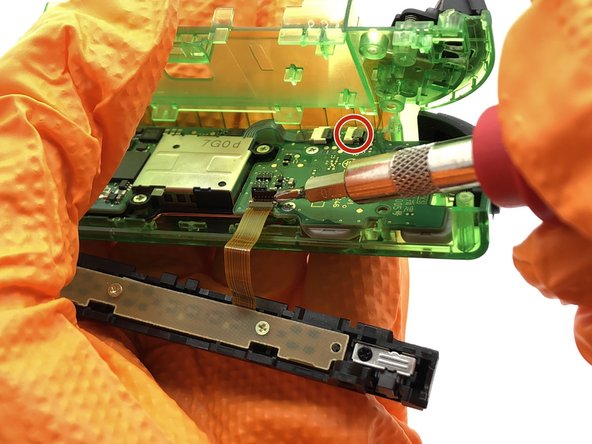
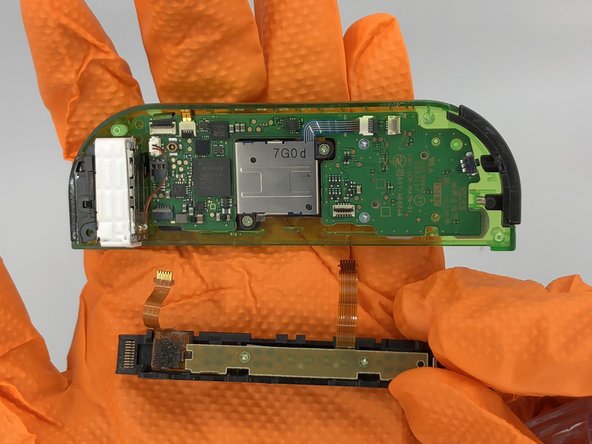
  • Remove the ribbon cables connecting the rail and battery casing to the motherboard. Unlock the cables by flipping the connector upwards with a spudger, then pull the cable out of the connector.

  • You may even choose to leave the rail connected, though it will be unwieldy.

  • Be careful not to lift the connectors in the wrong direction. The connection nearest to the shoulder buttons lifts up away from the rail (the black part), and the connection nearest to the rumble motor lifts in the opposite direction, up toward the rail (the thin grey part.)

卸下LED排线。用撬棒向上打开卡扣,然后将排线从底座中拉出。

你甚至可以选择保持LED排线连接,尽管这会影响操作。

注意不要以错误的方向抬起卡扣。靠近扳机的底座从滑轨方向(黑色部分)抬起,靠近马达的底座从滑轨相反方向抬起,朝向导轨(浅灰色部分)。

crwdns2944171:0crwdnd2944171:0crwdnd2944171:0crwdnd2944171:0crwdne2944171:0