crwdns2933423:0crwdne2933423:0

Nintendo Switch 右側ジョイコンシェルの交換

crwdns2936315:0crwdne2936315:0
crwdns2936323:0crwdne2936323:0
crwdns2931653:07crwdne2931653:0
Nintendo Switch Right Joy-Con Shell Replacement: crwdns2935265:00crwdnd2935265:01crwdnd2935265:03crwdne2935265:0 Nintendo Switch Right Joy-Con Shell Replacement: crwdns2935265:00crwdnd2935265:02crwdnd2935265:03crwdne2935265:0 Nintendo Switch Right Joy-Con Shell Replacement: crwdns2935265:00crwdnd2935265:03crwdnd2935265:03crwdne2935265:0
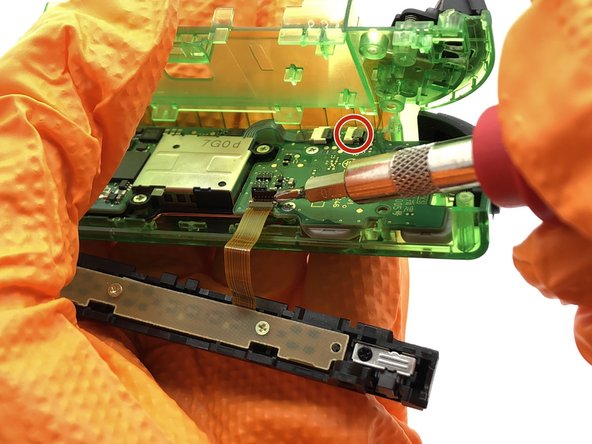
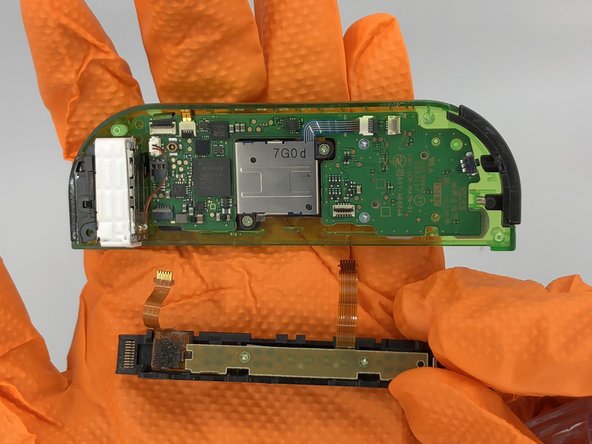
  • Remove the ribbon cables connecting the rail and battery casing to the motherboard. Unlock the cables by flipping the connector upwards with a spudger, then pull the cable out of the connector.

  • You may even choose to leave the rail connected, though it will be unwieldy.

  • Be careful not to lift the connectors in the wrong direction. The connection nearest to the shoulder buttons lifts up away from the rail (the black part), and the connection nearest to the rumble motor lifts in the opposite direction, up toward the rail (the thin grey part.)

レールとバッテリーケースをマザーボードに接続しているリボンケーブルを取り外します。スパッジャーでコネクタを上向きにひっくり返してケーブルのロックを解除し、ケーブルをコネクタから引き出します。

作業はしにくくなりますが、レールをつないだままにしておくこともできます。

コネクタを持ち上げる方向を間違えないように注意してください。ショルダーボタンに近いコネクタはレールから離れる方向に持ち上がり(黒い部分)、ランブルモーターに近いコネクターは反対方向、レールの方向に持ち上がります(薄いグレーの部分)。

crwdns2944171:0crwdnd2944171:0crwdnd2944171:0crwdnd2944171:0crwdne2944171:0