crwdns2933423:0crwdne2933423:0

Austausch des rechten Nintendo Switch Joy-Con Gehäuse

crwdns2936315:0crwdne2936315:0
crwdns2936319:0crwdne2936319:0
crwdns2931653:07crwdne2931653:0
Nintendo Switch Right Joy-Con Shell Replacement: crwdns2935265:00crwdnd2935265:01crwdnd2935265:03crwdne2935265:0 Nintendo Switch Right Joy-Con Shell Replacement: crwdns2935265:00crwdnd2935265:02crwdnd2935265:03crwdne2935265:0 Nintendo Switch Right Joy-Con Shell Replacement: crwdns2935265:00crwdnd2935265:03crwdnd2935265:03crwdne2935265:0
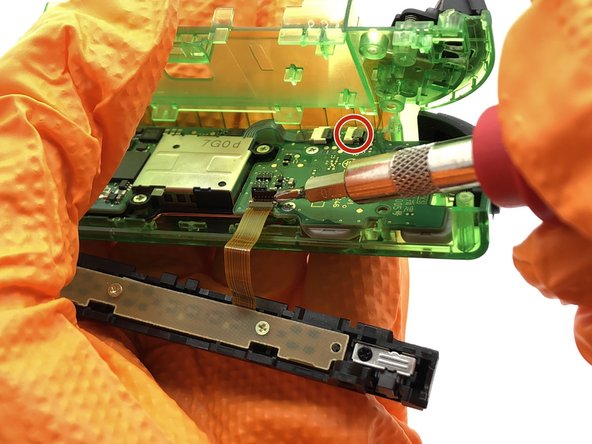
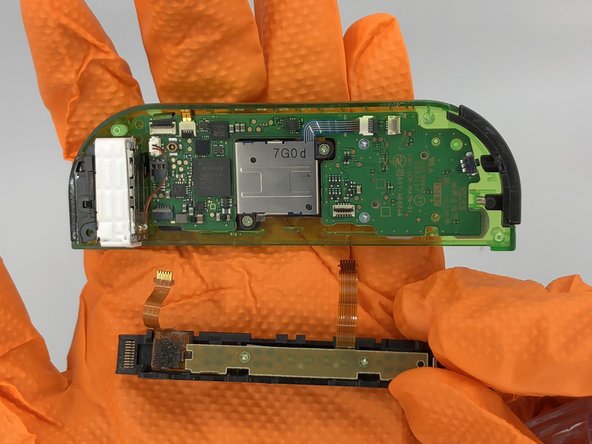
  • Remove the ribbon cables connecting the rail and battery casing to the motherboard. Unlock the cables by flipping the connector upwards with a spudger, then pull the cable out of the connector.

  • You may even choose to leave the rail connected, though it will be unwieldy.

  • Be careful not to lift the connectors in the wrong direction. The connection nearest to the shoulder buttons lifts up away from the rail (the black part), and the connection nearest to the rumble motor lifts in the opposite direction, up toward the rail (the thin grey part.)

Entferne die Flachbandkabel, die die Schiene und das Akkugehäuse mit der Hauptplatine verbinden. Entriegle die Kabel, indem du den Steckverbinder mit einem Spudger nach oben klappst, und dann das Kabel aus dem Steckverbinder herausziehst.

Du kannst die Schiene auch angeschlossen lassen, es ist dann aber etwas unbequemer.

Achte darauf, dass du die Stecker nicht in die falsche Richtung öffnest. Der Stecker nahe bei den Schultertasten muss von der Schiene (dem schwarzen Teil) weg gelöst werden, der Stecker nahe beim Vibrationsmotor in die entgegengesetzte Richtung zur Schiene (dem dünnen grauen Teil) hin.

crwdns2944171:0crwdnd2944171:0crwdnd2944171:0crwdnd2944171:0crwdne2944171:0