crwdns2935425:04crwdne2935425:0
crwdns2931653:04crwdne2931653:0


Main PCB removal
-
The center piece, along with the left and right bumpers have been removed simply by sliding them up and away from the controller
-
A similar style of cable/connector as the micro USB is used for the vibration motors
-
Use the angled tweezers in the same manner as before to separate these cables from the PCB connectors
-
Vibration motors can now be lifted out
-
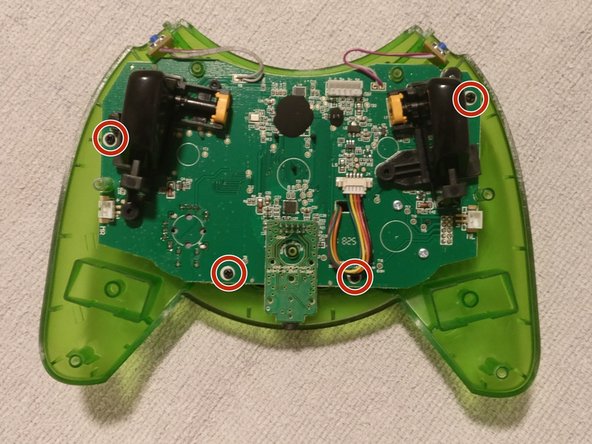
Remove the four screws holding the PCB to the front half of the controller
crwdns2944171:0crwdnd2944171:0crwdnd2944171:0crwdnd2944171:0crwdne2944171:0