crwdns2933423:0crwdne2933423:0

Remplacement du panneau LCD des MacBook Pro 15" Core 2 Duo modèles A1226 et A1260

crwdns2935425:010crwdne2935425:0

crwdns2936315:0crwdne2936315:0
crwdns2936317:0crwdne2936317:0
crwdns2931653:010crwdne2931653:0
MacBook Pro 15" Core 2 Duo Models A1226 and A1260 LCD Panel Replacement: crwdns2935265:00crwdnd2935265:01crwdnd2935265:02crwdne2935265:0 MacBook Pro 15" Core 2 Duo Models A1226 and A1260 LCD Panel Replacement: crwdns2935265:00crwdnd2935265:02crwdnd2935265:02crwdne2935265:0
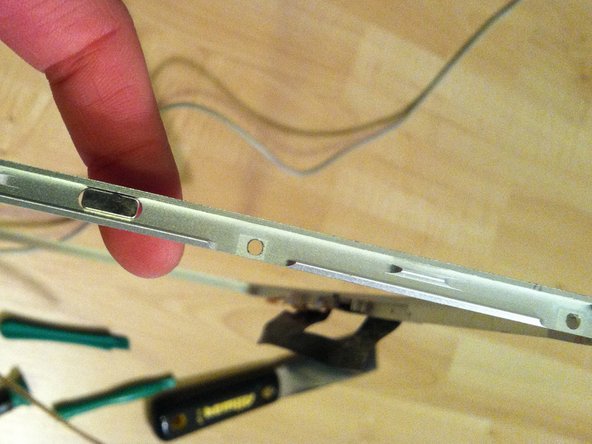
  • Lift the LCD out of the front bezel, minding any cables that may get caught.

  • Replacement Note: there are clear plastic shims attached via adhesive to the sides and bottom of the lcd panel. Be sure to transfer these shims to the replacement panel for optimum fit.

  • Don't forget to transfer the small magnet attached to the right side of the LCD to your new LCD. The absence of this magnet will prevent your MacBook Pro from entering sleep mode.

  • Depending on the model of your laptop, the magnet may be located inside a hole in the front bezel, not the LCD itself. See second picture.

Ôtez l'écran LCD du cache avant en évitant que les nappes restent accrochées.

Remarque pour le remplacement : des cales en plastique transparent sont collées sur les côtés et le bas du panneau LCD. Veillez à transférer ces cales sur le panneau de rechange pour une pose optimale.

N'oubliez pas de transférer le petit aimant fixé du côté droit de l'écran LCD sur votre nouveau LCD. Si l'aimant manque, votre MacBook Pro ne pourra plus se mettre ne mode veille.

Selon le modèle de votre ordinateur, l'aimant peut se trouver à l'intérieur d'un trou dans le cache avant et non dans l'écran LCD. Voir la deuxième photo.

crwdns2944171:0crwdnd2944171:0crwdnd2944171:0crwdnd2944171:0crwdne2944171:0