crwdns2933423:0crwdne2933423:0

CR-10S Pro BL Touch Einbau

crwdns2936315:0crwdne2936315:0
crwdns2936319:0crwdne2936319:0
crwdns2931653:07crwdne2931653:0
CR-10S Pro BL Touch Install, Bottom Section 1a.: crwdns2935265:00crwdnd2935265:01crwdnd2935265:03crwdne2935265:0 CR-10S Pro BL Touch Install, Bottom Section 1a.: crwdns2935265:00crwdnd2935265:02crwdnd2935265:03crwdne2935265:0 CR-10S Pro BL Touch Install, Bottom Section 1a.: crwdns2935265:00crwdnd2935265:03crwdnd2935265:03crwdne2935265:0
Bottom Section 1a.
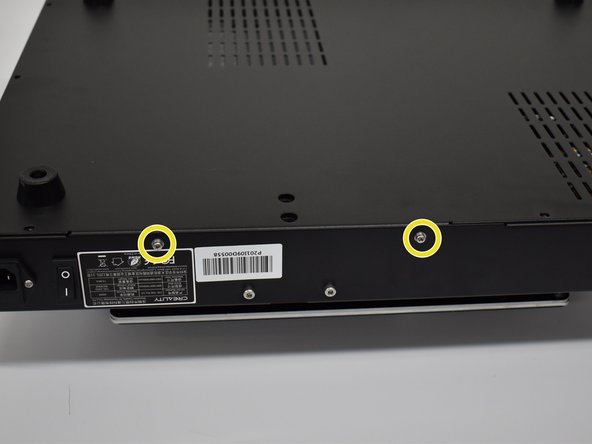
  • Using a #1 Phillips screwdriver, remove the 11 screws on the bottom and 2 screws on each side for a total of 15. Next, remove the bottom cover.

  • Unplug the original ribbon cable (not shown)

  • Plug in new connections. For clarity, we only have the new connections shown here.

  • Ribbon Cable (keyed)

  • 3 pin black plug into D11 (end row towards SD card slot) Orange wire will face the ribbon cable like in the picture.

  • 2 pin white plug into Z+ (connection closest to the ribbon cable) From the same view as the picture, use the right 2 pins.

  • Hot glue is optional.

Entferne mit einem Kreuzschlitzschraubendreher Nr. #1 die 11 Schrauben an der Unterseite und 2 Schrauben an jeder Seite, insgesamt also 15. Entferne dann die untere Abdeckung.

Ziehe das Original-Flachbandkabel ab (nicht abgebildet)

Stecke neue Anschlüsse ein. Der Übersichtlichkeit halber werden hier nur die neuen Anschlüsse gezeigt.

Flachbandkabel (kodiert)

3-poliger schwarzer Stecker in D11 (Endreihe in Richtung SD-Kartensteckplatz) Orangefarbene Ader zeigt zum Flachbandkabel wie auf dem Bild.

2-poliger weißer Stecker in Z+ (Anschluss, der dem Flachbandkabel am nächsten ist) Aus der gleichen Sicht wie auf dem Bild, verwende die rechten 2 Stifte.

Heißkleber ist optional.

crwdns2944171:0crwdnd2944171:0crwdnd2944171:0crwdnd2944171:0crwdne2944171:0