crwdns2933423:0crwdne2933423:0

CR-10S Pro BL Touch Einbau

crwdns2936315:0crwdne2936315:0
crwdns2936319:0crwdne2936319:0
crwdns2931653:05crwdne2931653:0
CR-10S Pro BL Touch Install, Top Section 2b.: crwdns2935265:00crwdnd2935265:01crwdnd2935265:03crwdne2935265:0 CR-10S Pro BL Touch Install, Top Section 2b.: crwdns2935265:00crwdnd2935265:02crwdnd2935265:03crwdne2935265:0 CR-10S Pro BL Touch Install, Top Section 2b.: crwdns2935265:00crwdnd2935265:03crwdnd2935265:03crwdne2935265:0
Top Section 2b.
  • Tighten button head screws with M2 hex. Start with the top 2 then position the bottom tab, aligning the holes to install the 3rd screw.

  • Add new zip ties to hold the cable loom in place.

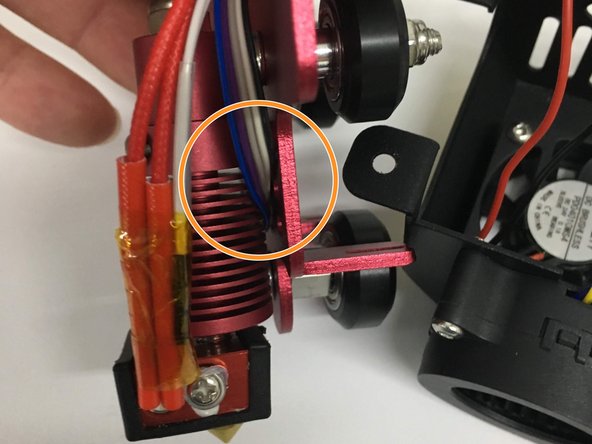
  • On the hot end/probe side, route the wires behind the hot end and plug into the probe.

  • Be sure that the probe wires are not pinched between the X carriage and probe mounting bracket.

  • Install and tighten the button head screws.

Ziehe die Flachkopfschrauben mit M2-Inbus an. Beginne mit den oberen 2, positioniere dann die untere Lasche und richte die Löcher aus, um die dritte Schraube zu einzusetzen.

Füge neue Kabelbinder hinzu, um den Kabelbaum in Position zu halten.

Führe auf der Seite des heißen Endes/der Sonde die Drähte hinter das heiße Ende und stecke sie in die Sonde.

Achte darauf, dass die Sondenkabel nicht zwischen dem X-Schlitten und der Sondenhalterung eingeklemmt werden.

Setze die Knopfkopfschrauben ein und ziehe sie fest.

crwdns2944171:0crwdnd2944171:0crwdnd2944171:0crwdnd2944171:0crwdne2944171:0