crwdns2933423:0crwdne2933423:0

Raptor 2 / T REX 3 Cable Chain Update

crwdns2936315:0crwdne2936315:0
crwdns2936323:0crwdne2936323:0
crwdns2931653:09crwdne2931653:0
Raptor 2 / T REX 3 Cable Chain Update, Reassembly 1a.: crwdns2935265:00crwdnd2935265:01crwdnd2935265:03crwdne2935265:0 Raptor 2 / T REX 3 Cable Chain Update, Reassembly 1a.: crwdns2935265:00crwdnd2935265:02crwdnd2935265:03crwdne2935265:0 Raptor 2 / T REX 3 Cable Chain Update, Reassembly 1a.: crwdns2935265:00crwdnd2935265:03crwdnd2935265:03crwdne2935265:0
Reassembly 1a.
  • The chain has to go on a specific way! You can call it the shorter end or male end but install the side circled in green over the wires going towards the bed heater.

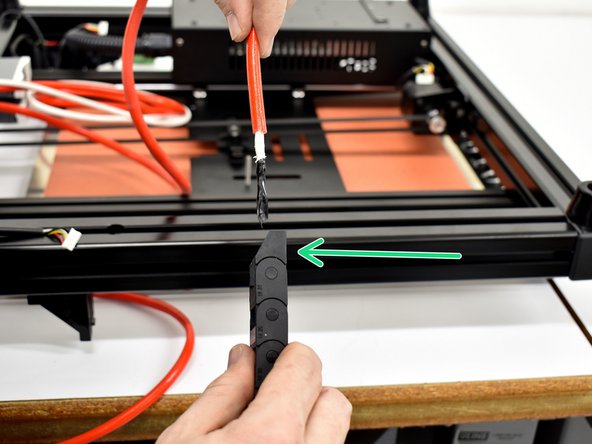
  • Make sure your tape job on all wires that go through the chain is still intact and get your replacement chain in hand.

  • Feed the wires through the new cable chain.

  • Insert the cables into the new chain with the correct chain end facing up.

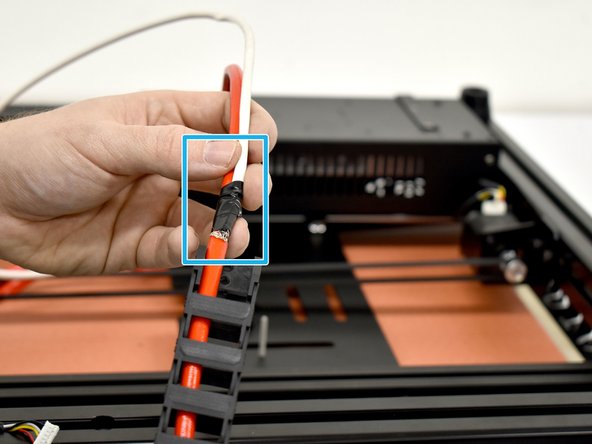
  • Make sure you have tape here, securing the thermistor wires to the orange sleeve.

crwdns2935429:0crwdne2935429:0

crwdns2935429:0crwdne2935429:0

crwdns2935429:0crwdne2935429:0

crwdns2935429:0crwdne2935429:0

crwdns2935429:0crwdne2935429:0

crwdns2944171:0crwdnd2944171:0crwdnd2944171:0crwdnd2944171:0crwdne2944171:0