crwdns2933423:0crwdne2933423:0

Raptor 2 / T REX 3 Cable Chain Update

crwdns2936315:0crwdne2936315:0
crwdns2936325:0crwdne2936325:0
crwdns2931653:08crwdne2931653:0
Raptor 2 / T REX 3 Cable Chain Update, Disassembly 1g.: crwdns2935265:00crwdnd2935265:01crwdnd2935265:03crwdne2935265:0 Raptor 2 / T REX 3 Cable Chain Update, Disassembly 1g.: crwdns2935265:00crwdnd2935265:02crwdnd2935265:03crwdne2935265:0 Raptor 2 / T REX 3 Cable Chain Update, Disassembly 1g.: crwdns2935265:00crwdnd2935265:03crwdnd2935265:03crwdne2935265:0
Disassembly 1g.
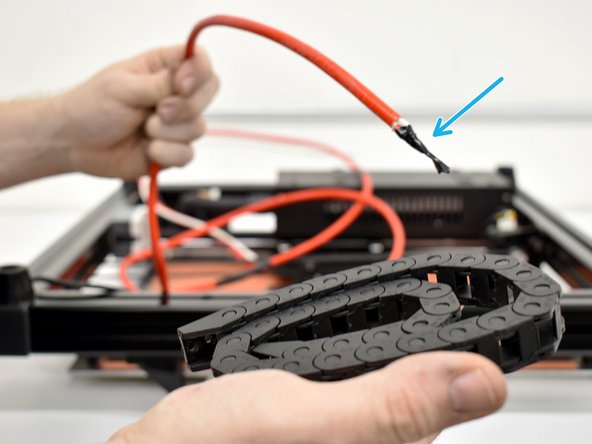
  • Tape the end of the thermistor wires to the orange sleeve. This will make install easier later

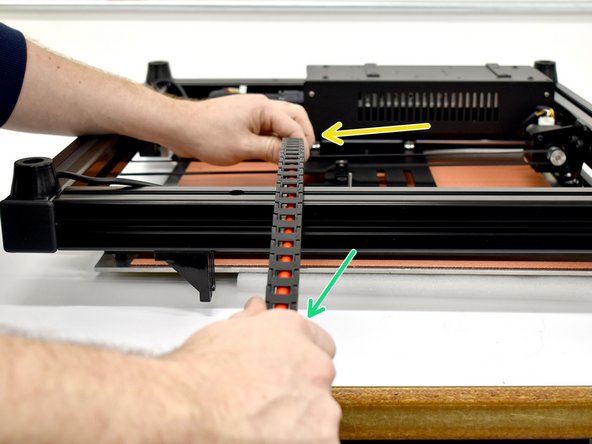
  • Pull the old chain off the machine.

  • Hold the wires on the bed side.

  • Start pulling the cable chain away from the bed.

  • With the old chain fully removed, notice the taped end. This will make installing into the new chain much easier.

  • Be gentle! If the cables get stuck, pull the wire back through and inspect your taped areas. They must be smooth and small to fit through the old chain then retry

crwdns2935429:0crwdne2935429:0

crwdns2935429:0crwdne2935429:0

crwdns2935429:0crwdne2935429:0

crwdns2935429:0crwdne2935429:0

crwdns2935429:0crwdne2935429:0

crwdns2935429:0crwdne2935429:0

crwdns2944171:0crwdnd2944171:0crwdnd2944171:0crwdnd2944171:0crwdne2944171:0