crwdns2933423:0crwdne2933423:0

Raptor 2 / T REX 3 Cable Chain Update

crwdns2936315:0crwdne2936315:0
crwdns2936323:0crwdne2936323:0
crwdns2931653:07crwdne2931653:0
Raptor 2 / T REX 3 Cable Chain Update, Disassembly 1f.: crwdns2935265:00crwdnd2935265:01crwdnd2935265:03crwdne2935265:0 Raptor 2 / T REX 3 Cable Chain Update, Disassembly 1f.: crwdns2935265:00crwdnd2935265:02crwdnd2935265:03crwdne2935265:0 Raptor 2 / T REX 3 Cable Chain Update, Disassembly 1f.: crwdns2935265:00crwdnd2935265:03crwdnd2935265:03crwdne2935265:0
Disassembly 1f.
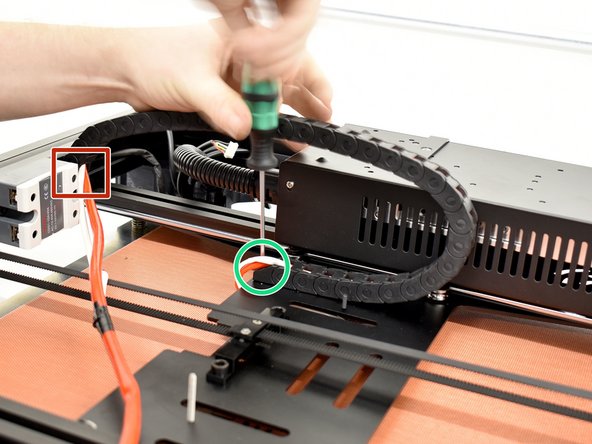
  • To remove the cable chain, you must cut a few more cable ties and remove some screws.

  • Be careful not to cut into any wires or sleeving!

  • Cut any cable ties securing wires to the cable chain.

  • Remove the M3 socket head screw with a M2.5 hex wrench.

  • Loosen the M3 socket head screw to align the T Nut with a M2.5 hex wrench.

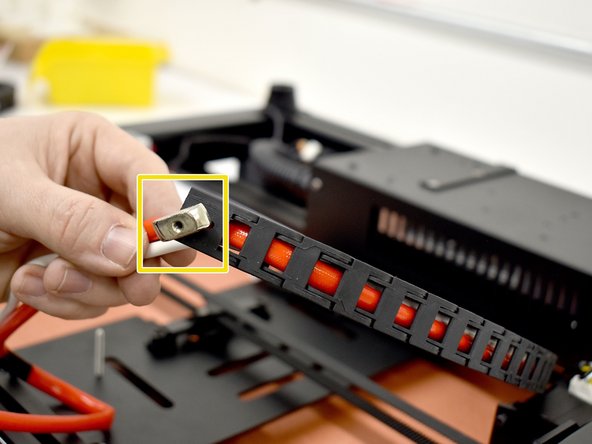
  • Remove the M3 socket head screw and T Nut and set aside. They will be installed on the new chain soon.

crwdns2935429:0crwdne2935429:0

crwdns2935429:0crwdne2935429:0

crwdns2935429:0crwdne2935429:0

crwdns2935429:0crwdne2935429:0

crwdns2935429:0crwdne2935429:0

crwdns2935429:0crwdne2935429:0

crwdns2944171:0crwdnd2944171:0crwdnd2944171:0crwdnd2944171:0crwdne2944171:0