crwdns2933423:0crwdne2933423:0

Asus Zenfone 3 Max Screen Replacement

crwdns2935425:03crwdne2935425:0

crwdns2936315:0crwdne2936315:0
crwdns2936319:0crwdne2936319:0
crwdns2931653:03crwdne2931653:0
Asus Zenfone 3 Max Screen Replacement: crwdns2935265:00crwdnd2935265:01crwdnd2935265:03crwdne2935265:0 Asus Zenfone 3 Max Screen Replacement: crwdns2935265:00crwdnd2935265:02crwdnd2935265:03crwdne2935265:0 Asus Zenfone 3 Max Screen Replacement: crwdns2935265:00crwdnd2935265:03crwdnd2935265:03crwdne2935265:0
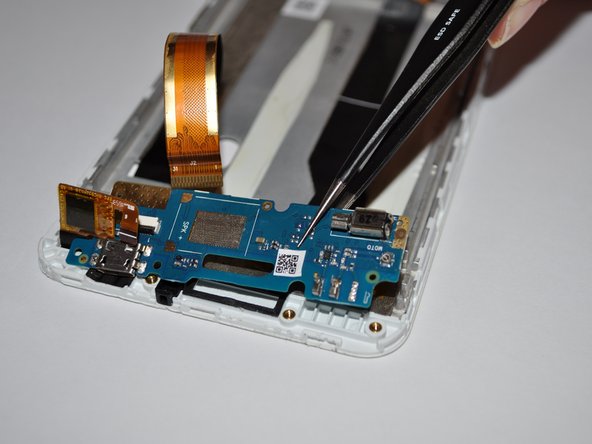
  • Remove the four 2.5mm Phillips #0 screws that hold the motherboard and remove the motherboard. Follow our motherboard replacement guide.

  • Remove the (blue) daughterboard. The charging port flex cable will come with it.

  • Be careful when removing the daughterboard. It is thin and adhered very solidly to the screen.

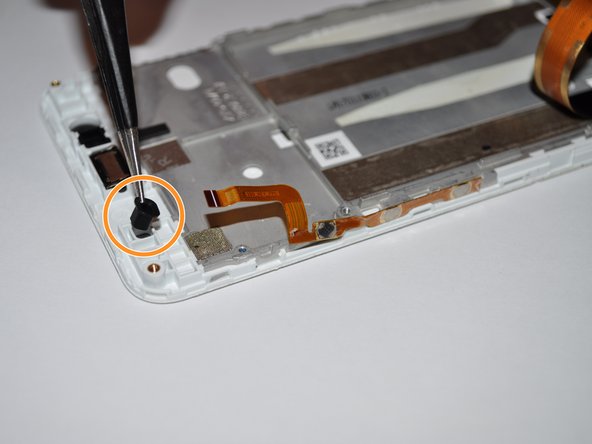
  • Move the rubber piece (denoted with orange circle) from the old port to your new LCD assembly.

crwdns2935429:0crwdne2935429:0

crwdns2935429:0crwdne2935429:0

crwdns2935429:0crwdne2935429:0

crwdns2935429:0crwdne2935429:0

crwdns2944171:0crwdnd2944171:0crwdnd2944171:0crwdnd2944171:0crwdne2944171:0