crwdns2933423:0crwdne2933423:0

Motorola Moto Z3 スクリーンの交換

crwdns2931527:0crwdnd2931527:0crwdnd2931527:0crwdnd2931527:0crwdne2931527:0

crwdns2936315:0crwdne2936315:0
crwdns2936323:0crwdne2936323:0
crwdns2931653:03crwdne2931653:0
Motorola Moto Z3 Screen Replacement, Cut the display adhesive: crwdns2935265:00crwdnd2935265:01crwdnd2935265:03crwdne2935265:0 Motorola Moto Z3 Screen Replacement, Cut the display adhesive: crwdns2935265:00crwdnd2935265:02crwdnd2935265:03crwdne2935265:0 Motorola Moto Z3 Screen Replacement, Cut the display adhesive: crwdns2935265:00crwdnd2935265:03crwdnd2935265:03crwdne2935265:0
Cut the display adhesive
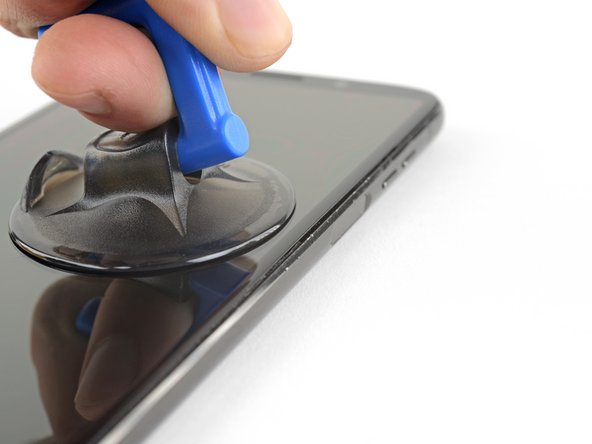
  • Apply a suction cup to the display, near the middle of the right edge.

  • Pull up on the suction cup with firm, constant pressure to create a slight gap between the display and rear case.

  • If the screen is cracked, the suction cup may not stick. Try lifting it with strong tape, or superglue the suction cup in place and allow it to cure so you can proceed.

  • This may require a significant amount of force, but you only need to open a very slight gap with the suction cup to insert your tool.

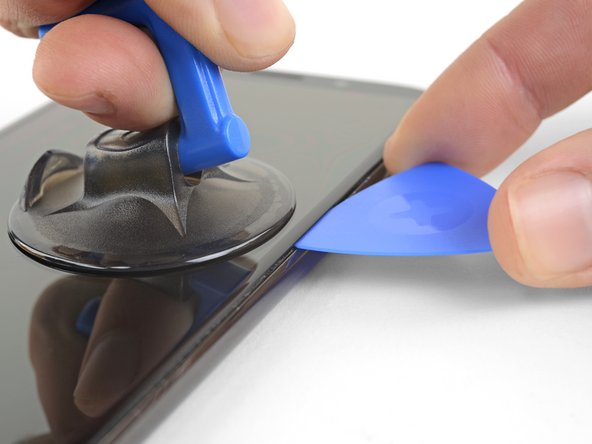
  • If you have trouble, apply more heat to further soften the adhesive, and try again. The adhesive cools quickly, so you may need to heat it repeatedly.

  • Insert an opening pick (or playing card) into the gap you opened behind the display.

  • Do not insert the tool more than 1.5 mm past the edge of the display.

吸盤カップをディスプレイの右端中央付近に取り付けます。

ディスプレイとリアケースの間にわずかな隙間を作るために、しっかりとした一定の力で吸盤カップを引き上げます。

スクリーンにひびが入っていると、吸盤が固着しないことがあります。 強力なガムテープで持ち上げるか、吸盤カップに接着ボンドを付けて引き上げて、先の手順に進むことができます。

この作業では、相当な力が必要かもしれません。ただし、ツールを差し込むだけのわずかな隙間を作るだけです。

作業がうまくいかない場合は、さらに熱を加えて接着剤を柔らかくしてから、作業を再開してください。 接着剤はすぐに冷却されるので、繰り返し加熱する必要があります。

ディスプレイ下に生じた隙間に開口ピック(もしくはトランプカード)を差し込みます。

1.5mm以上ツールを差し込まないでください。

crwdns2944171:0crwdnd2944171:0crwdnd2944171:0crwdnd2944171:0crwdne2944171:0