crwdns2933423:0crwdne2933423:0

Remplacement de la Carte I/O du Sony VAIO SVE14AJ16L

crwdns2936315:0crwdne2936315:0
crwdns2936317:0crwdne2936317:0
crwdns2931653:03crwdne2931653:0
Sony VAIO SVE14AJ16L I/O Card Replacement: crwdns2935265:00crwdnd2935265:01crwdnd2935265:03crwdne2935265:0 Sony VAIO SVE14AJ16L I/O Card Replacement: crwdns2935265:00crwdnd2935265:02crwdnd2935265:03crwdne2935265:0 Sony VAIO SVE14AJ16L I/O Card Replacement: crwdns2935265:00crwdnd2935265:03crwdnd2935265:03crwdne2935265:0
  • Remove the 13 Phillips #0 screws.

  • Make sure you have an organization system to remember which screws go where, as the majority are different sizes! The iFixit Magnetic Project Mat is an awesome tool for this exact reason!

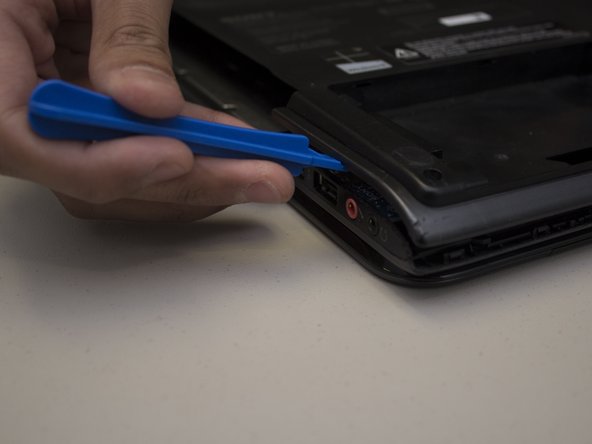
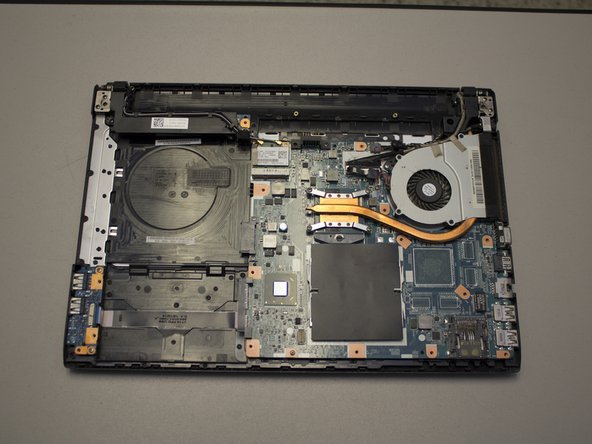
  • Carefully pry apart the clipped-on bottom panel of the laptop to expose the internals using the iFixit opening tool.

Retirez les 13 vis cruciformes n° 0.

Assurez-vous de vous organiser afin de vous rappeler qu’elle vise, car la majorité sont de taille différente ! Le iFixit Magnetic Project Mat et un outil génial pour cette raison !

Soulevez et séparez délicatement la partie inférieure du boîtier de l’ordinateur portable à l’aide d’un outil d’ouverture iFixit pour en exposer les composants internes.

crwdns2944171:0crwdnd2944171:0crwdnd2944171:0crwdnd2944171:0crwdne2944171:0