crwdns2933423:0crwdne2933423:0

Remplacement de l'écran LCD du Toshiba Chromebook 2

crwdns2935425:04crwdne2935425:0

crwdns2936315:0crwdne2936315:0
crwdns2936317:0crwdne2936317:0
crwdns2931653:04crwdne2931653:0
Toshiba Chromebook 2 LCD Screen Replacement: crwdns2935265:00crwdnd2935265:01crwdnd2935265:03crwdne2935265:0 Toshiba Chromebook 2 LCD Screen Replacement: crwdns2935265:00crwdnd2935265:02crwdnd2935265:03crwdne2935265:0 Toshiba Chromebook 2 LCD Screen Replacement: crwdns2935265:00crwdnd2935265:03crwdnd2935265:03crwdne2935265:0
  • Fold the loose screen down onto the laptop's keyboard, as if you were closing the laptop, with the rear of the display assembly still open.

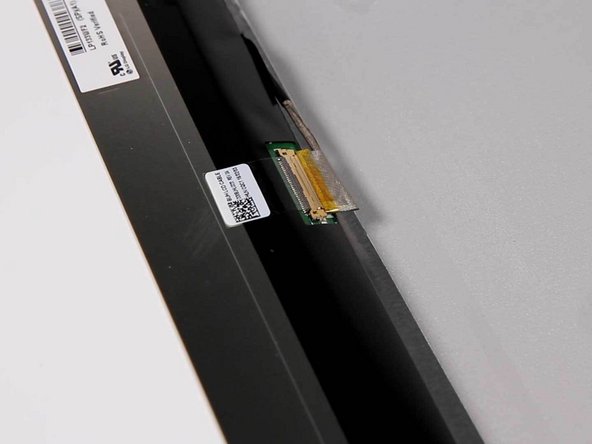
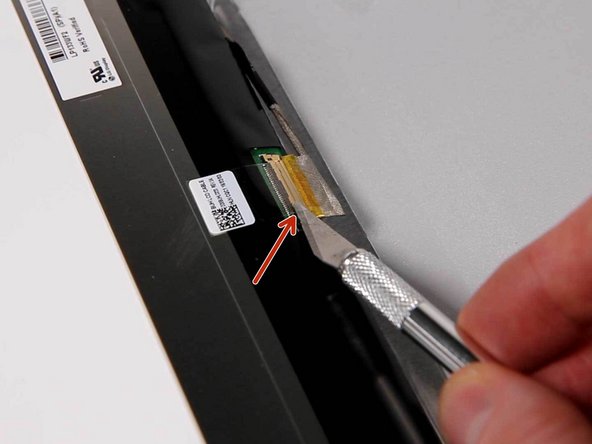
  • Carefully remove the connecting ribbon cable as shown in the picture.

  • You may need to remove the sticky adhesive tape which holds the connector in place before you can remove it.

  • When reassembling, replace this with some fresh sticky table to help prevent it coming loose over time.

Repliez l'écran desserré sur le clavier de l'ordinateur portable, comme si vous fermiez l'ordinateur portable, avec l'arrière de l'ensemble écran toujours ouvert.

Retirez délicatement le câble ruban de connexion comme indiqué sur la photo.

Vous devrez peut-être retirer le ruban adhésif qui maintient le connecteur en place avant de pouvoir le retirer.

Lors du remontage, remplacez-le par une table collante fraîche pour éviter qu’elle ne se détache avec le temps.

crwdns2944171:0crwdnd2944171:0crwdnd2944171:0crwdnd2944171:0crwdne2944171:0