crwdns2933423:0crwdne2933423:0

Google Pixel 3 XLの分解

crwdns2936315:0crwdne2936315:0
crwdns2936323:0crwdne2936323:0
crwdns2931653:04crwdne2931653:0
Google Pixel 3 XL Teardown: crwdns2935265:00crwdnd2935265:01crwdnd2935265:03crwdne2935265:0 Google Pixel 3 XL Teardown: crwdns2935265:00crwdnd2935265:02crwdnd2935265:03crwdne2935265:0 Google Pixel 3 XL Teardown: crwdns2935265:00crwdnd2935265:03crwdnd2935265:03crwdne2935265:0
  • Now that we've worked our way around the exterior, it's time to head inside.

  • Experience tells us that a little suction and cutting is all that's required to coax the display open, but when that doesn't work we bring out the big (heat) guns.

  • It looks like the Pixel 3 XL still uses foam adhesive, but it's far more tenacious than the repair-friendly stuff we saw last year.

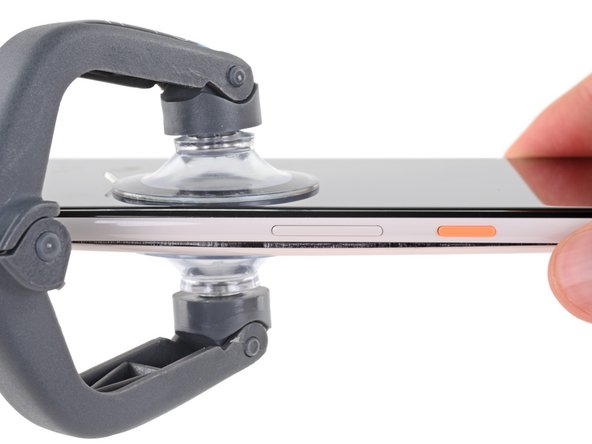
  • We pull out the trusty iSclack, expecting to separate the display assembly, but the rear cover yields first!

  • This whole thing is starting to remind us less of the Pixel 3's predecessor, and more of its notoriously sticky contemporary.

外観の確認作業を終えて、内部に侵入しましょう。

これまでの経験によると、小サイズの吸盤カップに開口ピックがあればディスプレイを開くことができます。もし上手くいかない場合はヒートガンを取り出しましょう。

どうやらPixel 3 XLには前モデルと同じフォーム製接着剤が使用されているようです。しかし昨年モデルで見つけた剥がしやすい接着剤に比べると、粘着力が強く厄介なようです。

頼りになるiSclackを取り出して、ディスプレイアセンブリを開口しようと試みますが、最初に外れるのはリアカバーでした!

この作業を進めるうちに、Pixel 3の前モデルよりも、つい最近出くわした無駄に粘着力があるデバイスを思い出します。

crwdns2944171:0crwdnd2944171:0crwdnd2944171:0crwdnd2944171:0crwdne2944171:0