crwdns2933423:0crwdne2933423:0

Apple Watch Serie 3 LTE Display und Force Touch Dichtung austauschen

crwdns2936315:0crwdne2936315:0
crwdns2936319:0crwdne2936319:0
crwdns2931653:08crwdne2931653:0
Apple Watch Series 3 LTE Screen and Force Touch Gasket Replacement, Install the New Screen / Digitizer: crwdns2935265:00crwdnd2935265:01crwdnd2935265:03crwdne2935265:0 Apple Watch Series 3 LTE Screen and Force Touch Gasket Replacement, Install the New Screen / Digitizer: crwdns2935265:00crwdnd2935265:02crwdnd2935265:03crwdne2935265:0 Apple Watch Series 3 LTE Screen and Force Touch Gasket Replacement, Install the New Screen / Digitizer: crwdns2935265:00crwdnd2935265:03crwdnd2935265:03crwdne2935265:0
Install the New Screen / Digitizer
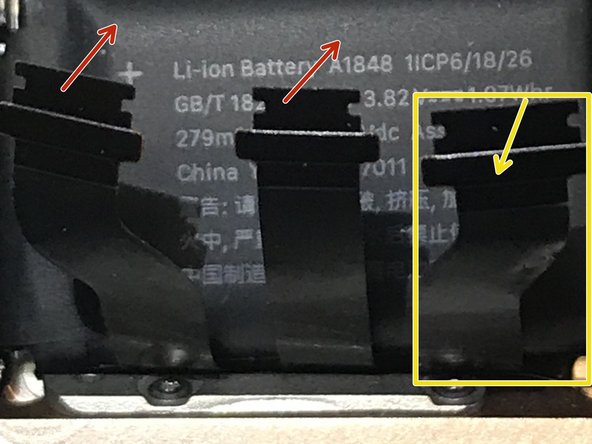
  • Review the new screen assembly to make sure it is the same size and contains the same modules as the original assembly.

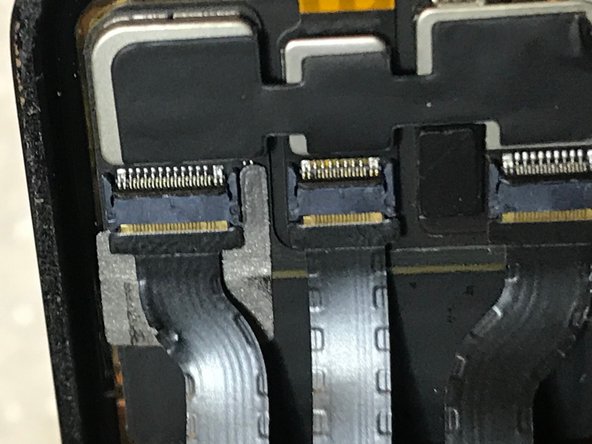
  • With spudger or tweezers, pop open the three ZIF connector clips so the ribbon cables can be inserted and secured.

  • A trick that I found helpful was to cut two strips of Scotch tape and set two of the three ribbon cables on the tape pieces and barely tape them temporarily up to the taptic engine so that only one cable is connected at a time.

  • Line up the ribbon cable and place it just into its connector. Use a spudger or closed tweezers to apply careful pressure on each forward edge to nudge the end of the connector forward to seat the cable end in the connector. Close the ZIF latch by pulling it back toward the top of the connector.

  • For some reason, the first cable seated easily but the middle cable and third cable did not seat easily at all. In fact, I originally closed the watch up and later learned that touch was not working so I had to re-open the watch and reseat the cables.

  • After the first cable is seated, then peel the Scotch tape off of the middle cable and repeat the insertion and seating process and close the ZIF latch. Finally, remove the Scotch tape and insert and seat the final cable and close the ZIF latch.

Überprüfe das Ersatzdisplay, achte darauf, dass es die richtige Größe hat und die Module mit dem Originalteil übereinstimmen.

Klappe die Sicherungsbügel an den drei ZIF-Verbindern mit einem Spudger oder einer Pinzette hoch, damit du die Flachbandkabel einschieben und sichern kannst.

Es kann helfen, wenn du zwei der drei Flachbandkabel mit einem Klebeband zeitweise an der Taptic Engine befestigst, so dass du das letzte Kabel ungestört einsetzen kannst.

Richte das Flachbandkabel aus und setze es in seinen Anschluss ein. Schiebe das Kabel an den beiden Ecken mit einem Spudger oder einer geschlossenen Pinzette soweit wie möglich ein. Schließe den Sicherungsbügel am ZIF-Verbinder.

Das erste Kabel ließ sich leicht befestigen, die anderen beiden aber nicht. Ich habe dann die Uhr geschlossen, musste dann aber sehen, dass der Touchscreen nicht funktioniert. Ich musste die Uhr wieder öffnen und diese Kabel neu befestigen.

Nach Einbau des ersten Kabels kannst du das mittlere Kabel vom Klebeband ablösen und es in gleicher Weise einsetzen und den Sicherungsbügel am ZIF-Verbinder schließen. Verfahre genau so mit dem dritten Kabel.

crwdns2944171:0crwdnd2944171:0crwdnd2944171:0crwdnd2944171:0crwdne2944171:0