crwdns2915892:0crwdne2915892:0
I wanted to repair a small device. I got my chance when someone asked me if I would repair their Apple Watch. After watching two videos and reviewing the ifixit Series 3 teardown, I tried it for myself and this is my experience.
crwdns2942213:0crwdne2942213:0
-
-
Set up a workspace. I don't know why but I like setting things up on a paper towel.
-
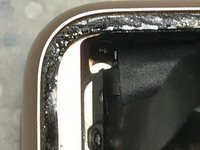
I wanted to see the crack so I shifted the watch to catch the reflection so that the hairline crack was obvious.
-
Remove the two watch band straps by pressing the respective release button and sliding the strap across its holding track. Pay attention to which strap goes on top and which strap goes on the bottom
-
-
-
Using a heat gun or the ifixit iOpener tool, heat the top of the watch. I used a heat gun on low heat from 8-12 inches away moving it slightly back and forth over the watch for about 60 seconds so that the watch face is hot to the touch.
-
There is no need to heat the watch more than 60 seconds on low heat! Also, just as a precaution, do not heat the watch around combustible materials.
-
Based on the excellent series 3 screen repair video by Joe's Gaming and Electronics, I used a feeler gauge to slide slightly down and then slightly horizontal to get under the edge of the oled screen assembly.
-
Starting from the side opposite the digital crown, slowly and with careful control, slide or roll the feeler gauge around the edge of the screen to release the adhesive. After getting one side done you can use a pick to keep that edge open.
-
Keep moving around the screen until you have moved all the way around the screen, DO NOT GO TOO FAR IN with the feeler gage - just along the edges.
-
-
-
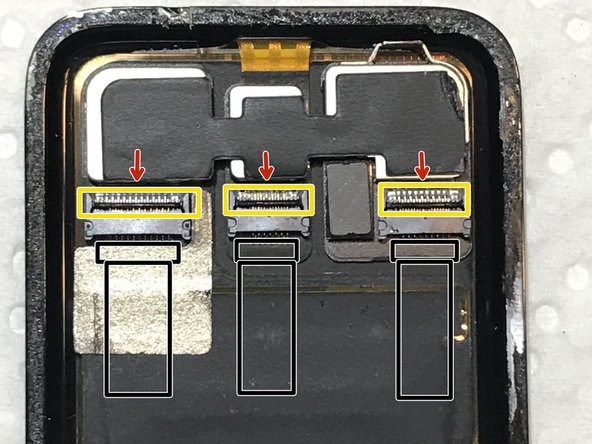
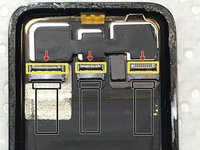
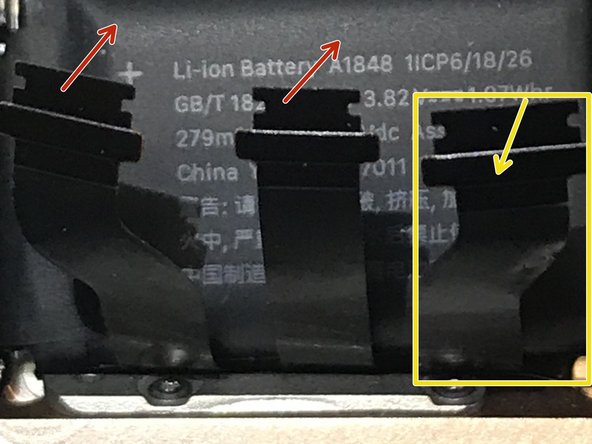
Carefully lift the display screen and you'll find the screen held by three delicate ribbon cables. You can fold the screen up to work on these three cables.
-
The ribbon cable is held down to the connectors with a custom-shaped piece of tape. Carefully peel the tape up and off of the connectors and ribbon cable. Set it aside on some waxed paper.
-
I sandwiched the ribbon cable tape in waxed paper and kept a weight down on it until I was ready to re-use it. If I had thought of it I would have paid the $3 for the ifixit replacement tape.
-
Each cable is held in a ZIF connector. A small clip lifts up and forward. Use a spudger between the clip and the module behind it and carefully pop the clip up.
-
With the ZIF clips opened up, carefully pull each ribbon cable from its connector and set the display screen aside.
-
-
-
-
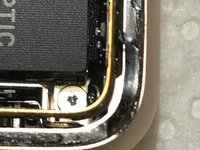
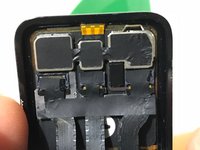
Now we can inspect if we did some damage to the gasket when we sliced open the screen.
-
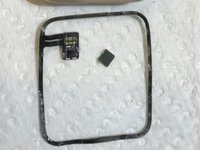
The gasket looked a little ragged in some spots and since I expected that I might need to replace it, I decided to go ahead and remove it.
-
-
crwdns2935267:0crwdne2935267:0Tweezers$4.99
-
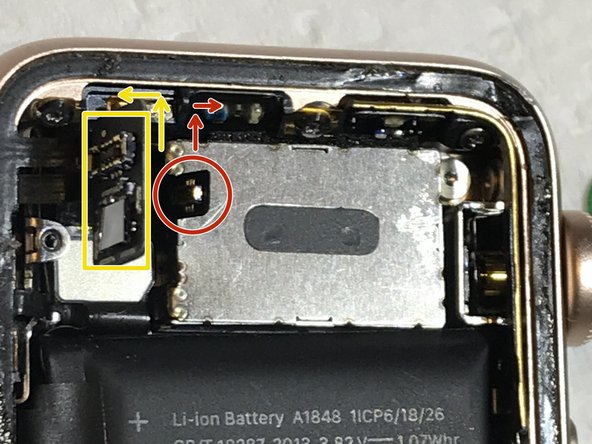
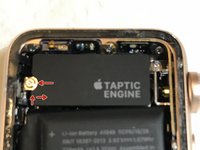
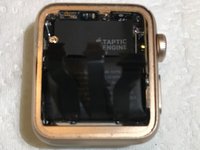
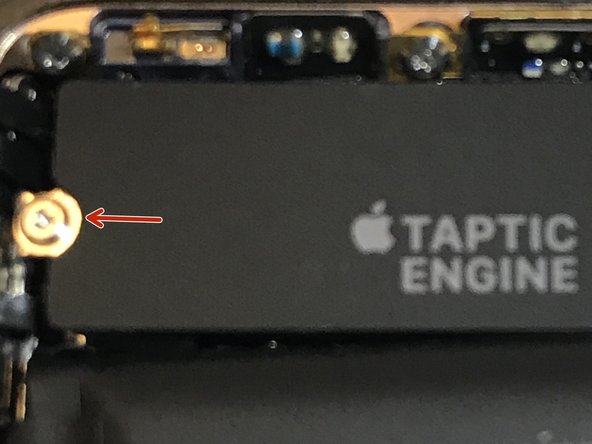
A Tri-Wing Y000 screw (.6 mm) holds an adhesive label on top of the Taptic Engine. The label also hides the connector for the Force Touch Gasket. Remove the screw and peel up the label. It takes a little effort to peel the cover/label due to some adhesive.
-
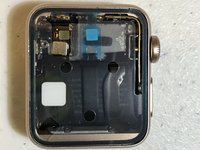
A gold colored connector sits on top of the force touch sensor module. Pop up the connector and lift up the force touch sensor module.
-
Using tweezers, pull up the force touch sensor gasket starting at one side and going around the watch until the gasket lifts out.
-
-
-
Using a little alcohol and q-tips or paper towel and tweezers, clean any residue of adhesive where the gasket was sitting.
-
After cleaning the gasket surface, without peeling off the adhesive protective sheets yet, set the gasket down over top of the perimeter of the watch just to observe the fitment.
-
The ifixit force touch gasket comes contained within a handy removable plastic holder.
-
Once confident with the fitment, peel off the adhesive protective sheet on the under side, line up the gasket to the watch and set it down onto the watch.
-
Press down around the gasket along the edges of the watch where the gasket sits in its groove so that the adhesive can take hold.
-
Remove the plastic holder from the gasket. Note that the gasket upper adhesive protective sheet is still in place.
-
-
-
Set the force touch gasket module down into its position which will be covered by the Taptic Engine label /cover.
-
Reconnect the gold colored connector onto the force touch gasket module.
-
Reinstall the taptic engine label/cover onto the tapic engine module and over top of the force touch sensor module.
-
-
-
Review the new screen assembly to make sure it is the same size and contains the same modules as the original assembly.
-
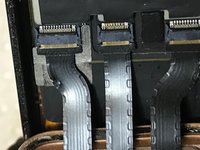
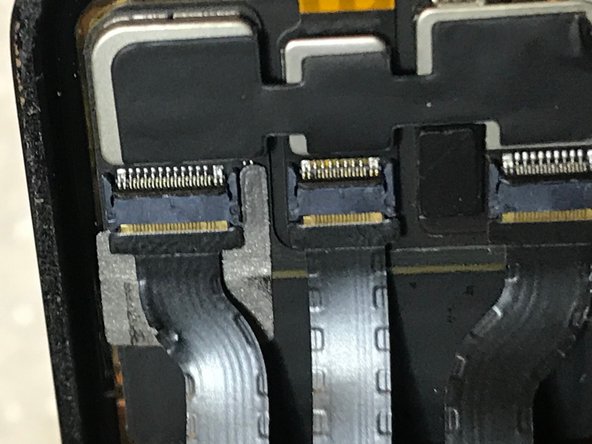
With spudger or tweezers, pop open the three ZIF connector clips so the ribbon cables can be inserted and secured.
-
A trick that I found helpful was to cut two strips of Scotch tape and set two of the three ribbon cables on the tape pieces and barely tape them temporarily up to the taptic engine so that only one cable is connected at a time.
-
Line up the ribbon cable and place it just into its connector. Use a spudger or closed tweezers to apply careful pressure on each forward edge to nudge the end of the connector forward to seat the cable end in the connector. Close the ZIF latch by pulling it back toward the top of the connector.
-
For some reason, the first cable seated easily but the middle cable and third cable did not seat easily at all. In fact, I originally closed the watch up and later learned that touch was not working so I had to re-open the watch and reseat the cables.
-
After the first cable is seated, then peel the Scotch tape off of the middle cable and repeat the insertion and seating process and close the ZIF latch. Finally, remove the Scotch tape and insert and seat the final cable and close the ZIF latch.
-
-
-
Line up and apply the ribbon cable tape over the cable and ZIF connectors. The tape looked a bit tattered which is why I would prefer to use new tape.
-
Line up the display over the watch body and press the display onto the body and press along the edges so that everything is aligned and sealed.
-
In the event that you have to reopen the watch after the new force touch gasket has been sealed to the display and to watch body, use a bead of B-7000 on the gasket and apply some light holding pressure for several hours. Remove any excess adhesive immediately from the watch.
-
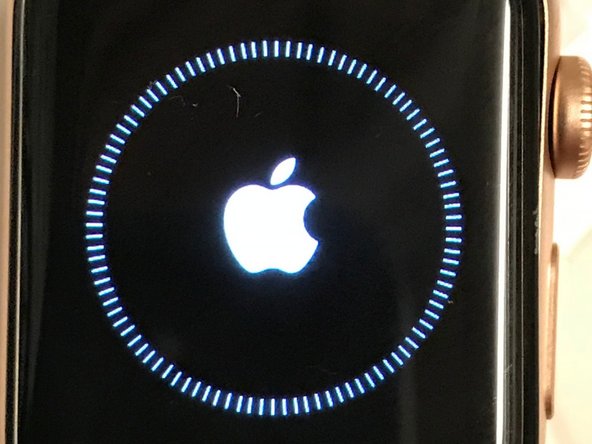
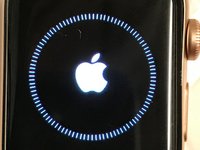
Charge the watch and test everything. I did a complete factory reset and then paired the watch and loaded WatchOS 5.
-


To reassemble your device, follow these instructions in reverse order.
crwdns2935221:0crwdne2935221:0
crwdns2935229:030crwdne2935229:0
crwdns2947412:011crwdne2947412:0
force touch good?
Hi Guys, so I’ve opened a couple of Series 3 screens and I found out that the heat is very ineffective and almost always costs you the force touch gasket. I use a blade dipped in methylated spirit which melts the gum and allows me pry open the screen. Works every time.
Thank you so much!
kenisohn -
Anagazo,
Glad that you found an alternate technique that works for you. I wouldn’t call the heat ineffective and I recommend installing a new force touch gasket regardless after opening up the glued surface like this display.
Did the watch retain its swimproof capability?