crwdns2933423:0crwdne2933423:0

更换右侧Joy-Con摇杆

crwdns2936315:0crwdne2936315:0
crwdns2936311:0crwdne2936311:0
crwdns2931653:05crwdne2931653:0
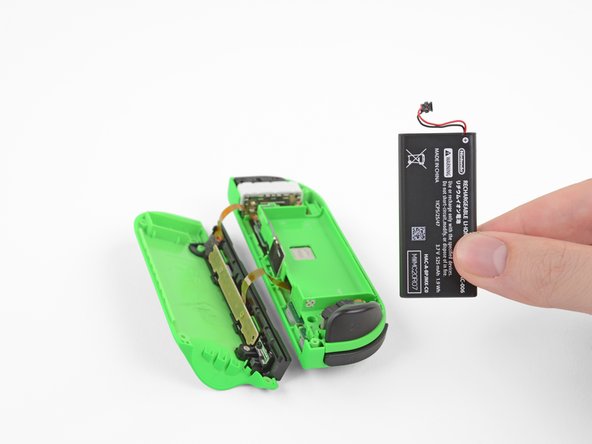
Right Joy-Con Joystick Replacement, Remove the battery: crwdns2935265:00crwdnd2935265:01crwdnd2935265:03crwdne2935265:0 Right Joy-Con Joystick Replacement, Remove the battery: crwdns2935265:00crwdnd2935265:02crwdnd2935265:03crwdne2935265:0 Right Joy-Con Joystick Replacement, Remove the battery: crwdns2935265:00crwdnd2935265:03crwdnd2935265:03crwdne2935265:0
Remove the battery
  • The following two steps show the removal of the battery and the coaxial antenna cable from the midframe. These two steps make for a less cluttered repair, but are not essential. If you want, you can leave the battery and the grey coax cable in place here and proceed to step 7.

  • Insert an opening pick between the battery and the Joy-Con housing. Gently pry out the battery, which is lightly taped in place.

  • Be careful not to deform or puncture the battery—it can catch fire or explode if damaged.

接下来的两步将会展示如何从中框移除电池和同轴天线线缆。这两步可以使拆解更加简洁,但并不是必要的。如果你并不需要,你可以保持电池和天线不动并跳至步骤7

在电池和电池仓的缝隙中插入吉他拨片。缓缓抬起电池,保证固定电池的双面胶仍在原处。

请注意不要弄破或弯曲电池,否则会有着火甚至爆炸的危险。

crwdns2944171:0crwdnd2944171:0crwdnd2944171:0crwdnd2944171:0crwdne2944171:0