crwdns2933423:0crwdne2933423:0

右側ジョイコンのジョイスティックの交換

crwdns2936315:0crwdne2936315:0
crwdns2936323:0crwdne2936323:0
crwdns2931653:05crwdne2931653:0
Right Joy-Con Joystick Replacement, Remove the battery: crwdns2935265:00crwdnd2935265:01crwdnd2935265:03crwdne2935265:0 Right Joy-Con Joystick Replacement, Remove the battery: crwdns2935265:00crwdnd2935265:02crwdnd2935265:03crwdne2935265:0 Right Joy-Con Joystick Replacement, Remove the battery: crwdns2935265:00crwdnd2935265:03crwdnd2935265:03crwdne2935265:0
Remove the battery
  • The following two steps show the removal of the battery and the coaxial antenna cable from the midframe. These two steps make for a less cluttered repair, but are not essential. If you want, you can leave the battery and the grey coax cable in place here and proceed to step 7.

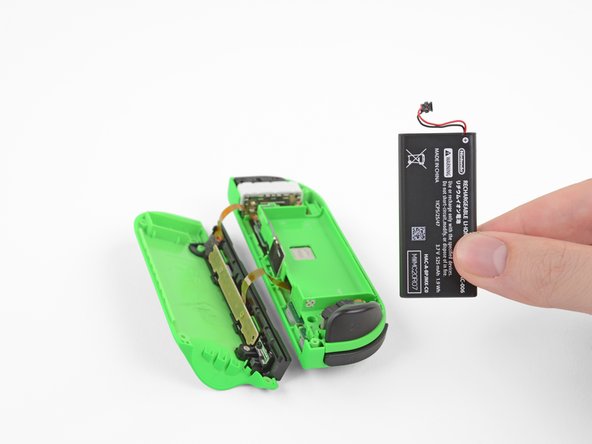
  • Insert an opening pick between the battery and the Joy-Con housing. Gently pry out the battery, which is lightly taped in place.

  • Be careful not to deform or puncture the battery—it can catch fire or explode if damaged.

次の2手順では、バッテリーと同軸アンテナケーブルをミッドフレームから取り外す方法です。これらの2つの手順をすることで、修理作業の簡素化になりますが、この作業は必須ではありません。必要であれば、バッテリーを残して、グレーの同軸ケーブルをここに固定したまま、手順7に進んでください。

開口ピックをバッテリーとJoy-Conハウジングの間に差し込みます。テープで軽く固定されているバッテリーを慎重に持ち上げます。

バッテリーを変形させたり、穴を開けないようご注意ください。ダメージを与えてしまうと、引火や爆発の原因となります。

crwdns2944171:0crwdnd2944171:0crwdnd2944171:0crwdnd2944171:0crwdne2944171:0