crwdns2933423:0crwdne2933423:0

Reemplazo del joystick derecho del Nintendo Switch

crwdns2936315:0crwdne2936315:0
crwdns2936331:0crwdne2936331:0
crwdns2931653:05crwdne2931653:0
Right Joy-Con Joystick Replacement, Remove the battery: crwdns2935265:00crwdnd2935265:01crwdnd2935265:03crwdne2935265:0 Right Joy-Con Joystick Replacement, Remove the battery: crwdns2935265:00crwdnd2935265:02crwdnd2935265:03crwdne2935265:0 Right Joy-Con Joystick Replacement, Remove the battery: crwdns2935265:00crwdnd2935265:03crwdnd2935265:03crwdne2935265:0
Remove the battery
  • The following two steps show the removal of the battery and the coaxial antenna cable from the midframe. These two steps make for a less cluttered repair, but are not essential. If you want, you can leave the battery and the grey coax cable in place here and proceed to step 7.

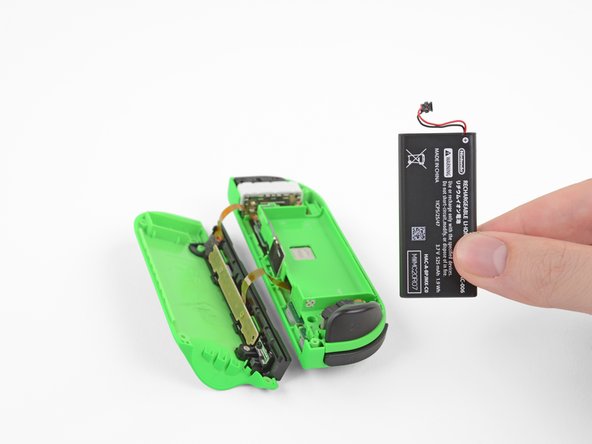
  • Insert an opening pick between the battery and the Joy-Con housing. Gently pry out the battery, which is lightly taped in place.

  • Be careful not to deform or puncture the battery—it can catch fire or explode if damaged.

Los siguientes dos pasos muestran la extracción de la batería y el cable coaxial de la antena del marco medio. Estos dos pasos permiten una reparación menos desordenada, pero no son esenciales. Si quieres, puedes dejar la batería y el cable coaxial gris en su lugar aquí y proceder al paso 7.

Inserta una púa de apertura entre la batería y la carcasa del Joy-Con. Suavemente saca la batería, que está ligeramente pegada con cinta adhesiva en su lugar.

Ten cuidado de no deformar o perforar la batería, ya que puede incendiarse o explotar si se daña.

crwdns2944171:0crwdnd2944171:0crwdnd2944171:0crwdnd2944171:0crwdne2944171:0