crwdns2935425:022crwdne2935425:0
crwdns2931653:022crwdne2931653:0


-
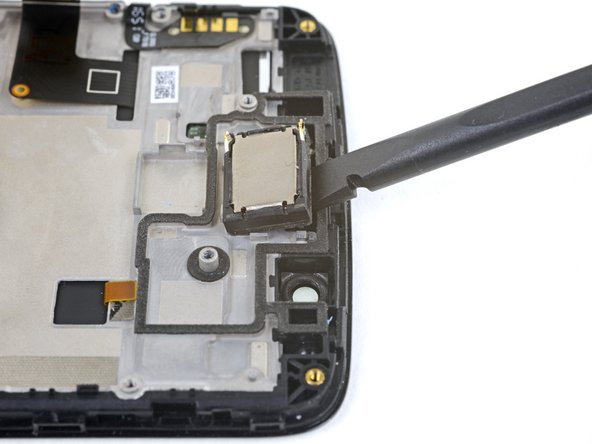
Use the flat end of a spudger to pry up and loosen the earpiece module from its recess.
-
Remove the earpiece module.
| [* black] Use the flat end of a spudger to pry up and loosen the earpiece module from its recess. | |
| [* black] Remove the earpiece module. | |
| - | [* icon_reminder] During |
| + | [* icon_reminder] During re-installation, be sure to check the [https://d3nevzfk7ii3be.cloudfront.net/igi/cUJBSMEykaYLBUoK|orientation of the earpiece module|new_window=true] and reinstall it the same way. |
crwdns2944171:0crwdnd2944171:0crwdnd2944171:0crwdnd2944171:0crwdne2944171:0