crwdns2933423:0crwdne2933423:0

Motorola Moto Z Play ディスプレイアセンブリの交換

crwdns2931529:0crwdnd2931529:0crwdnd2931529:0crwdnd2931529:06crwdnd2931529:0crwdne2931529:0

crwdns2936315:0crwdne2936315:0
crwdns2936323:0crwdne2936323:0
crwdns2931653:03crwdne2931653:0
Motorola Moto Z Play Display Assembly Replacement: crwdns2935265:00crwdnd2935265:01crwdnd2935265:03crwdne2935265:0 Motorola Moto Z Play Display Assembly Replacement: crwdns2935265:00crwdnd2935265:02crwdnd2935265:03crwdne2935265:0 Motorola Moto Z Play Display Assembly Replacement: crwdns2935265:00crwdnd2935265:03crwdnd2935265:03crwdne2935265:0
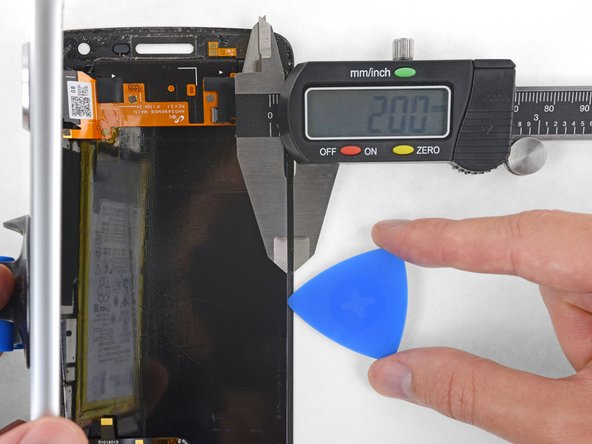
  • In the following steps, you will separate the display assembly from the Moto Z Play's chassis.

  • For reference, refer to the first image, showing the back of the display assembly (right) after it has been removed from the phone (left).

  • If you plan to re-use the display assembly, pay particular attention to the side edges. When slicing through the glue in this area, you must be careful to insert your tool less than 2 mm, or your tool will come in contact with the display panel and damage it.

  • Playing cards are a safer, but much slower, prying tool. The soft paper cards are less likely to damage the display panel, which is good news if you plan to reuse it.

次の手順では、ディスプレイアセンブリをMoto Z Playのシャーシから分離します。

参考として、デバイスから取り外した後のディスプレイアセンブリの背面画像(右)と取り外し前の画像を参照してください(左)。

ディスプレイアセンブリを再利用する場合は、デバイス横のエッジ部分に注意してください。 この部分を接着剤でスライスするときは、ツールを2 mm以上挿入しないでください。ツールがディスプレイパネルに接触して損傷する可能性があります。

トランプの使用は、ディスプレイパネルを損傷する可能性が低いためより安全ですが、はるかに時間がかかります。 トランプのような柔らかい紙のカードは、ディスプレイを再利用したい場合には最適なツールです。

crwdns2944171:0crwdnd2944171:0crwdnd2944171:0crwdnd2944171:0crwdne2944171:0