crwdns2933423:0crwdne2933423:0

Moto G4 Vervanging van het LCD-scherm en de digitizermodule

crwdns2931527:0crwdnd2931527:0crwdnd2931527:0crwdnd2931527:0crwdne2931527:0

crwdns2936315:0crwdne2936315:0
crwdns2936313:0crwdne2936313:0
crwdns2931653:011crwdne2931653:0
Moto G4 LCD Screen and Digitizer Assembly Replacement: crwdns2935265:00crwdnd2935265:01crwdnd2935265:02crwdne2935265:0 Moto G4 LCD Screen and Digitizer Assembly Replacement: crwdns2935265:00crwdnd2935265:02crwdnd2935265:02crwdne2935265:0
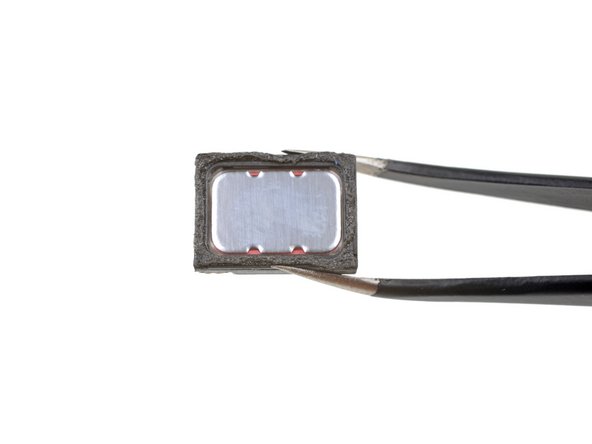
  • Remove the earpiece speaker.

  • Check the condition of the adhesive around the bottom of the earpiece speaker when you reinstall it. A little heat from a hair dryer or iOpener can help soften the adhesive and make it sticky again. Be careful not to touch or damage the surface of the speaker.

  • In some of the previous photos in this guide, the speaker is shown installed incorrectly. During installation, make sure the speaker's two spring contacts are located at the bottom corners, as shown in the first image in this step. Images showing the speaker rotated 180° (with the spring contacts near the top edge of the phone) are incorrect.

Verwijder de oorstukspeaker.

Check, bij het weer installeren, de staat van de lijm rondom de onderkant van de oorstukspeaker. Een beetje warmte met behulp van een föhn of een iOpener kan de lijm weer verzachten en plakkerig maken. Wees voorzichtig en zorg dat je de oppervlakte van de speaker niet beschadigt.

In sommige van de foto's in deze handleiding zie je de oorstukspeaker fout geïnstalleerd. Zorg dat de twee veercontacten van de speaker bij de onderste hoeken zitten, zoals op de eerste afbeelding te zien is. Afbeeldingen die de speaker 180 graden gedraaid laten zien (met de veercontacten bij de bovenkant van de telefoon) zijn incorrect.

crwdns2944171:0crwdnd2944171:0crwdnd2944171:0crwdnd2944171:0crwdne2944171:0