crwdns2933423:0crwdne2933423:0

Remplacement du boitier en plastique du Netgear Arlo

crwdns2931529:0crwdnd2931529:0crwdnd2931529:0crwdnd2931529:03crwdnd2931529:0crwdne2931529:0

crwdns2935425:05crwdne2935425:0

crwdns2936315:0crwdne2936315:0
crwdns2936317:0crwdne2936317:0
crwdns2931653:05crwdne2931653:0
Netgear Arlo Plastic Housing Replacement: crwdns2935265:00crwdnd2935265:01crwdnd2935265:03crwdne2935265:0 Netgear Arlo Plastic Housing Replacement: crwdns2935265:00crwdnd2935265:02crwdnd2935265:03crwdne2935265:0 Netgear Arlo Plastic Housing Replacement: crwdns2935265:00crwdnd2935265:03crwdnd2935265:03crwdne2935265:0
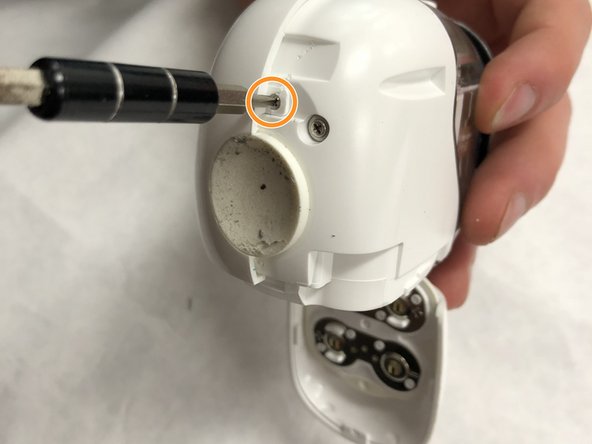
  • Remove the screw (3.5mm) near the sync button holding the opposite side of the camera on.

  • Remove the second screw (3.5mm) on the back of the camera to remove the second housing.

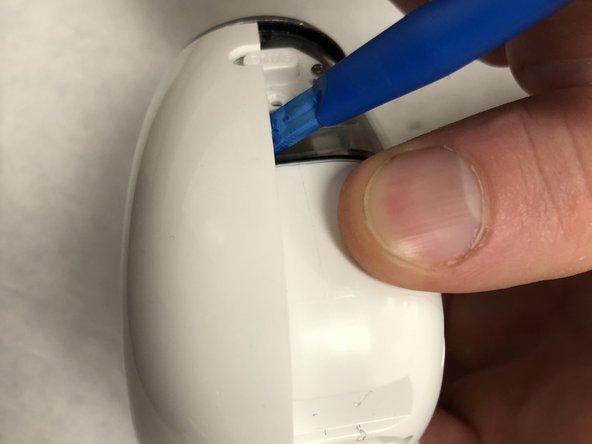
  • Once the screws are removed use an opening tool to pry back the second plastic mount.

Retirez la vis (3,5 mm) près du bouton de synchronisation qui maintient le côté opposé de la caméra allumé.

Retirez la deuxième vis (3,5 mm) à l'arrière de la caméra pour retirer le deuxième boîtier.

Une fois les vis retirées, utilisez un outil d'ouverture pour faire levier sur le deuxième support en plastique.

crwdns2944171:0crwdnd2944171:0crwdnd2944171:0crwdnd2944171:0crwdne2944171:0