crwdns2935425:04crwdne2935425:0
crwdns2931653:04crwdne2931653:0


-
Remove the disconnected camera by simply pulling it out of its socket.
-
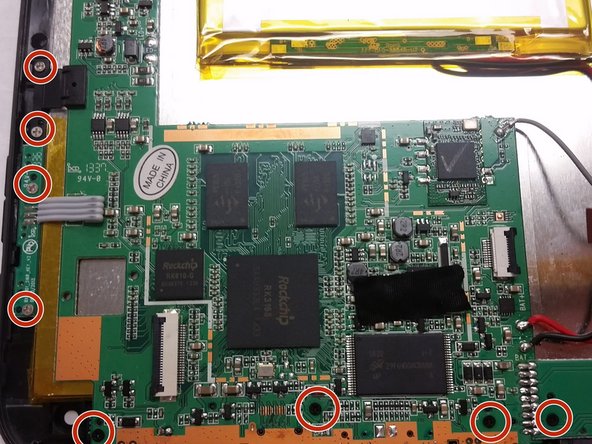
Remove eight 25mm JIS #00 screws securing the motherboard.
-
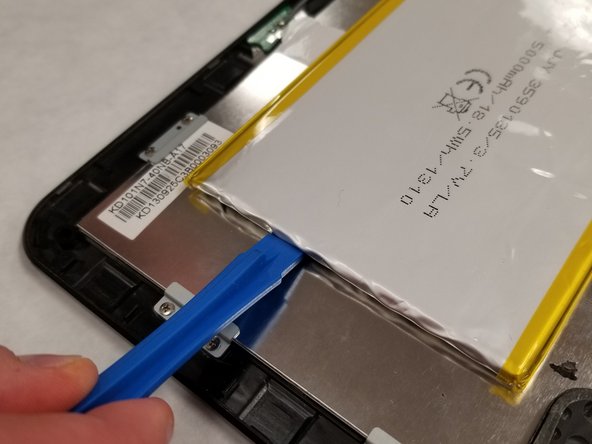
The battery is glued to the back of the screen. Gently pry the battery off the screen, being careful not the bend the battery.
| - | [* black] Remove the |
|---|---|
| - | [* red] Remove |
| - | [* black] The battery is glued to the back of the screen. |
| + | [* black] Remove the disconnected camera by simply pulling it out of its socket. |
| + | [* red] Remove eight 25mm JIS #00 screws securing the motherboard. |
| + | [* black] The battery is glued to the back of the screen. Gently pry the battery off the screen, being careful not the bend the battery. |
crwdns2944171:0crwdnd2944171:0crwdnd2944171:0crwdnd2944171:0crwdne2944171:0