crwdns2933423:0crwdne2933423:0

Acer Aspire E1-510-2500 Screen Replacement

crwdns2931527:0crwdnd2931527:0crwdnd2931527:0crwdnd2931527:0crwdne2931527:0

crwdns2936315:0crwdne2936315:0
crwdns2936325:0crwdne2936325:0
crwdns2931653:03crwdne2931653:0
Acer Aspire E1-510-2500 Screen Replacement: crwdns2935265:00crwdnd2935265:01crwdnd2935265:03crwdne2935265:0 Acer Aspire E1-510-2500 Screen Replacement: crwdns2935265:00crwdnd2935265:02crwdnd2935265:03crwdne2935265:0 Acer Aspire E1-510-2500 Screen Replacement: crwdns2935265:00crwdnd2935265:03crwdnd2935265:03crwdne2935265:0
  • Open the laptop, leaving the screen flat on the table.

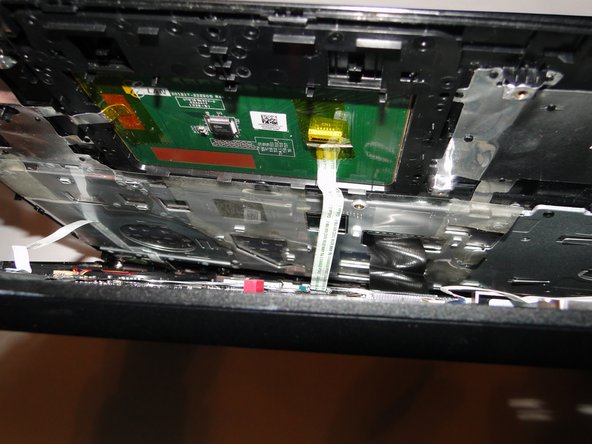
  • Carefully pull the keyboard assembly out away from the base of the laptop. There should be three connections visible in the gap between the keyboard assembly and the base.

  • Using tweezers, carefully detach the connections from the base.

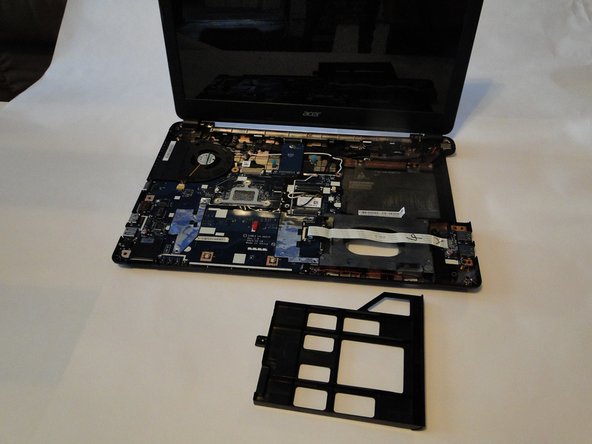
  • Place the keyboard assembly and disk tray place holder aside.

  • For reassembly, leave the disk tray place holder out until after the blue tape connector has been reconnected, to have enough space to reattach the tape.

crwdns2935429:0crwdne2935429:0

crwdns2935429:0crwdne2935429:0

crwdns2935429:0crwdne2935429:0

crwdns2935429:0crwdne2935429:0

crwdns2935429:0crwdne2935429:0

crwdns2944171:0crwdnd2944171:0crwdnd2944171:0crwdnd2944171:0crwdne2944171:0