crwdns2933423:0crwdne2933423:0

iRobot Roomba 870 Bumper Sensor Replacement

crwdns2942213:0crwdne2942213:0

  1. iRobot Roomba 870  Bumper Sensor Replacement, Bumper Sensor: crwdns2935265:01crwdnd2935265:01crwdnd2935265:02crwdne2935265:0 iRobot Roomba 870  Bumper Sensor Replacement, Bumper Sensor: crwdns2935265:01crwdnd2935265:02crwdnd2935265:02crwdne2935265:0
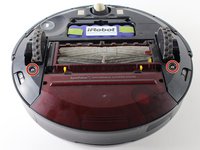
    • Flip the iRoomba over so that the underside is facing up.

    • Using the Phillips #0 screwdriver, remove the 4.0 mm screw in the center of the yellow side brush.

    • Remove the yellow side brush.

  2. iRobot Roomba 870  Bumper Sensor Replacement: crwdns2935265:02crwdnd2935265:01crwdnd2935265:03crwdne2935265:0 iRobot Roomba 870  Bumper Sensor Replacement: crwdns2935265:02crwdnd2935265:02crwdnd2935265:03crwdne2935265:0 iRobot Roomba 870  Bumper Sensor Replacement: crwdns2935265:02crwdnd2935265:03crwdnd2935265:03crwdne2935265:0
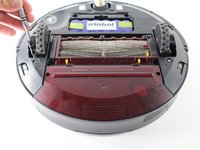
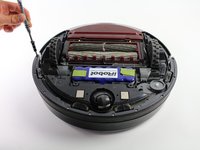
    • Remove the two 3.5 mm Phillips screws that hold the battery cover onto the Roomba with a Phillips #0 screwdriver.

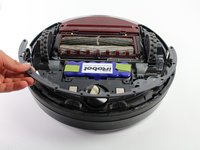
    • Remove the battery cover.

  3. iRobot Roomba 870  Bumper Sensor Replacement: crwdns2935265:03crwdnd2935265:01crwdnd2935265:03crwdne2935265:0 iRobot Roomba 870  Bumper Sensor Replacement: crwdns2935265:03crwdnd2935265:02crwdnd2935265:03crwdne2935265:0 iRobot Roomba 870  Bumper Sensor Replacement: crwdns2935265:03crwdnd2935265:03crwdnd2935265:03crwdne2935265:0
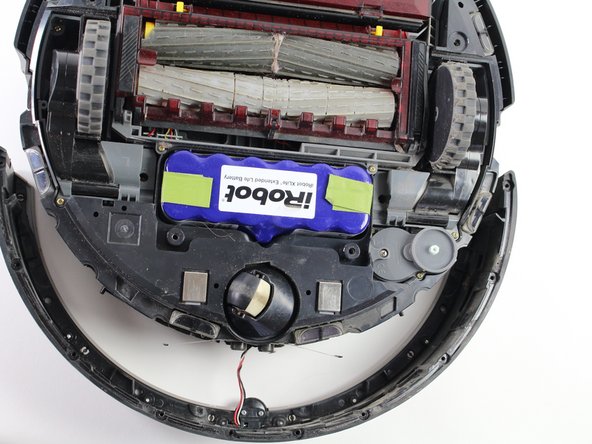
    • Remove the two remaining 3.5 mm Phillips #0 screws that attach the base-plate to the bottom of the Roomba.

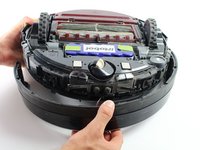
    • Remove the entire base-plate from the bottom of the Roomba.

  4. iRobot Roomba 870  Bumper Sensor Replacement: crwdns2935265:04crwdnd2935265:01crwdnd2935265:03crwdne2935265:0 iRobot Roomba 870  Bumper Sensor Replacement: crwdns2935265:04crwdnd2935265:02crwdnd2935265:03crwdne2935265:0 iRobot Roomba 870  Bumper Sensor Replacement: crwdns2935265:04crwdnd2935265:03crwdnd2935265:03crwdne2935265:0
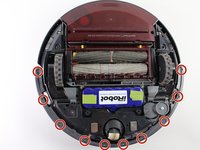
    • Remove the ten 3 mm screws that attach the bumper guard to the bumper with a Phillips #1 screwdriver.

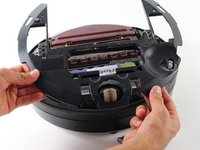
    • Remove the bumper guard.

  5. iRobot Roomba 870  Bumper Sensor Replacement: crwdns2935265:05crwdnd2935265:01crwdnd2935265:02crwdne2935265:0 iRobot Roomba 870  Bumper Sensor Replacement: crwdns2935265:05crwdnd2935265:02crwdnd2935265:02crwdne2935265:0
    • Be careful when removing the bumper from the Roomba to prevent damage to the sensor wires. Remove slowly!

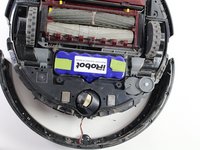
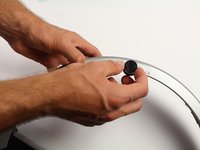
    • Lift up the Roomba so that its bumper is not resting on anything, and slowly separate the bumper from the device.

  6. iRobot Roomba 870  Bumper Sensor Replacement: crwdns2935265:06crwdnd2935265:01crwdnd2935265:03crwdne2935265:0 iRobot Roomba 870  Bumper Sensor Replacement: crwdns2935265:06crwdnd2935265:02crwdnd2935265:03crwdne2935265:0 iRobot Roomba 870  Bumper Sensor Replacement: crwdns2935265:06crwdnd2935265:03crwdnd2935265:03crwdne2935265:0
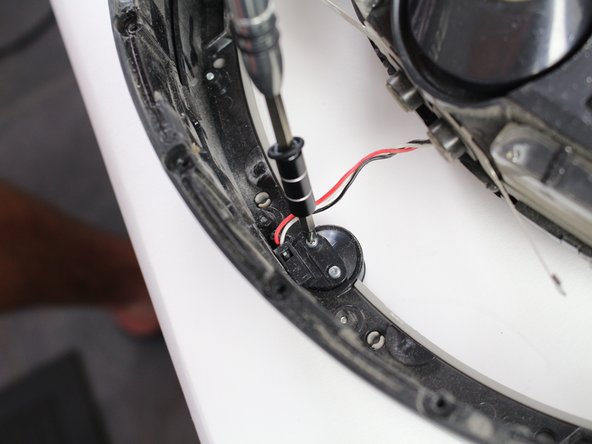
    • Remove the two 3 mm screws that attach the sensor connector to the bumper/sensor with a #1 Phillips Screwdriver.

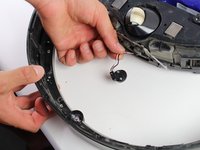
    • Carefully detach the sensor connector from the bumper and the sensor.

  7. iRobot Roomba 870  Bumper Sensor Replacement: crwdns2935265:07crwdnd2935265:01crwdnd2935265:02crwdne2935265:0 iRobot Roomba 870  Bumper Sensor Replacement: crwdns2935265:07crwdnd2935265:02crwdnd2935265:02crwdne2935265:0
    • The sensor is now loose on the bumper. Be careful not to rapidly move the bumper for fear of dislodging the sensor and breaking it.

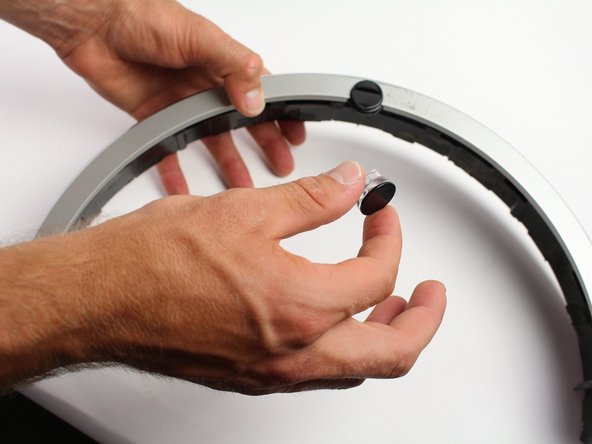
    • Flip the bumper over, ensuring the sensor remains inside the sensor compartment.

    • Gently remove the bumper from the black infrared sensor.

crwdns2915888:0crwdne2915888:0

To reassemble your device, follow these instructions in reverse order.

crwdns2935229:013crwdne2935229:0

Jacob Lindberg

crwdns2935283:004/19/17crwdne2935283:0

449 crwdns2915208:0crwdne2915208:0

crwdns2935295:0crwdne2935295:0

crwdns2915084:0crwdne2915084:0

Cal Poly, Team S14-G3, Banghart Spring 2017 crwdns2935289:0Cal Poly, Team S14-G3, Banghart Spring 2017crwdne2935289:0

CPSU-BANGHART-S17S14G3

crwdns2931471:04crwdne2931471:0

crwdns2935297:010crwdne2935297:0

crwdns2947412:03crwdne2947412:0

Can not get to the plug-in area on the board to replace sensor this way. DOES NOT work this way.

jkeysgate - crwdns2934203:0crwdne2934203:0

man kommt nicht an den Stecker. Die Anleitung bringt überhaupt nichts.

Reinhard Totzauer - crwdns2934203:0crwdne2934203:0

Incomplete. This NEEDs to explain how to access the plug on the board.

Ed T. - crwdns2934203:0crwdne2934203:0

crwdns2917038:0crwdne2917038:0

crwdns2936625:0crwdne2936625:0:

crwdns2936751:024crwdne2936751:0 2

crwdns2936753:07crwdne2936753:0 12

crwdns2936753:030crwdne2936753:0 129

crwdns2942667:0crwdne2942667:0 8,415