crwdns2933423:0crwdne2933423:0

iPhone 7 Plus Rear Camera Lens Glass Replacement

crwdns2942213:0crwdne2942213:0

  1. iPhone 7 Plus Rear Camera Lens Glass Replacement, Pentalobe Screws: crwdns2935265:01crwdnd2935265:01crwdnd2935265:01crwdne2935265:0
    • Before you begin, discharge your iPhone battery below 25%. A charged lithium-ion battery can catch fire and/or explode if accidentally punctured.

    • Power off your iPhone before beginning disassembly.

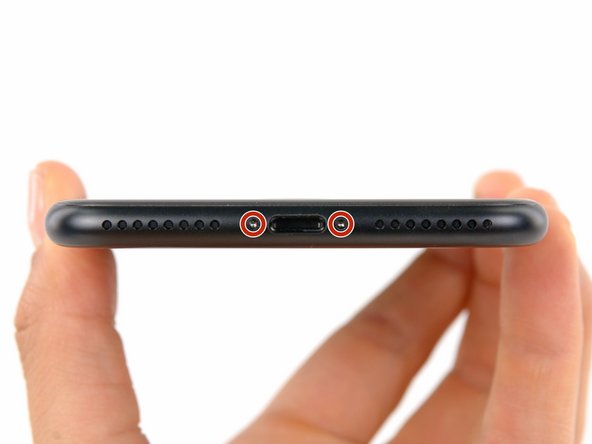
    • Remove the two 3.4 mm pentalobe screws at the bottom edge of the iPhone.

    • Opening the iPhone's display will compromise its waterproof seals. Have replacement seals ready before you proceed past this step, or take care to avoid liquid exposure if you reassemble your iPhone without replacing the seals.

  2. iPhone 7 Plus Rear Camera Lens Glass Replacement, Opening Procedure: crwdns2935265:02crwdnd2935265:01crwdnd2935265:01crwdne2935265:0
    • Heating the lower edge of the iPhone will help soften the adhesive securing the display, making it easier to open.

    • Use a hairdryer or prepare an iOpener and apply it to the lower edge of the iPhone for about a minute in order to soften up the adhesive underneath.

  3. iPhone 7 Plus Rear Camera Lens Glass Replacement: crwdns2935265:03crwdnd2935265:01crwdnd2935265:02crwdne2935265:0 iPhone 7 Plus Rear Camera Lens Glass Replacement: crwdns2935265:03crwdnd2935265:02crwdnd2935265:02crwdne2935265:0
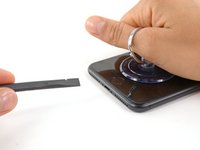
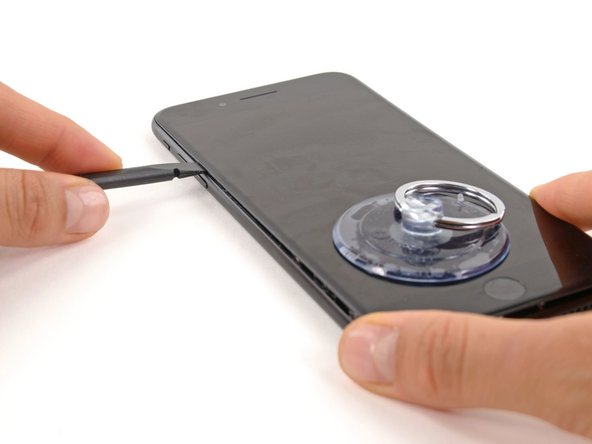
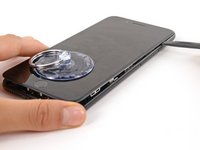
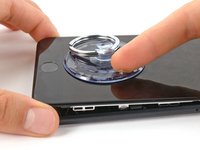
    • Apply a suction cup to the lower half of the front panel, just above the home button.

    • Be sure the suction cup does not overlap with the home button, as this will prevent a seal from forming between the suction cup and front glass.

    • If your display is badly cracked, covering it with a layer of clear packing tape may allow the suction cup to adhere. Alternatively, very strong tape may be used instead of the suction cup. If all else fails, you can superglue the suction cup to the broken screen.

  4. iPhone 7 Plus Rear Camera Lens Glass Replacement: crwdns2935265:04crwdnd2935265:01crwdnd2935265:03crwdne2935265:0 iPhone 7 Plus Rear Camera Lens Glass Replacement: crwdns2935265:04crwdnd2935265:02crwdnd2935265:03crwdne2935265:0 iPhone 7 Plus Rear Camera Lens Glass Replacement: crwdns2935265:04crwdnd2935265:03crwdnd2935265:03crwdne2935265:0
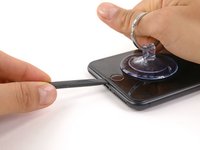
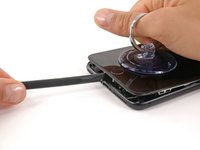
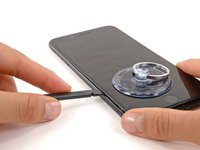
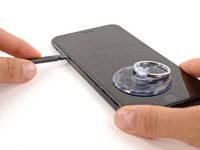
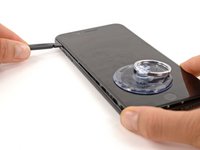
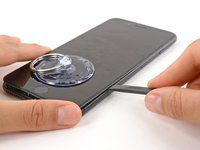
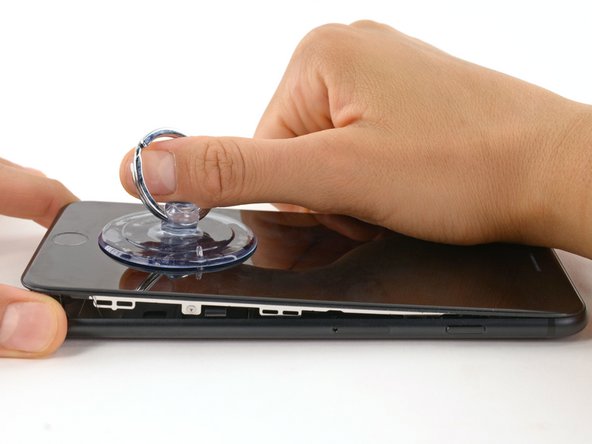
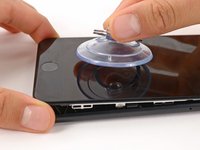
    • Pull up on the suction cup with firm, constant pressure to create a slight gap between the front panel and rear case.

    • Insert the flat end of a spudger into the gap.

    • The watertight adhesive holding the display in place is very strong; creating this initial gap takes a significant amount of force. If you're having a hard time opening a gap, rock the screen up and down to weaken the adhesive until you can fit a spudger inside.

    • While pulling up on the suction cup, twist the spudger to widen the opening between the screen and rear case.

  5. iPhone 7 Plus Rear Camera Lens Glass Replacement: crwdns2935265:05crwdnd2935265:01crwdnd2935265:03crwdne2935265:0 iPhone 7 Plus Rear Camera Lens Glass Replacement: crwdns2935265:05crwdnd2935265:02crwdnd2935265:03crwdne2935265:0 iPhone 7 Plus Rear Camera Lens Glass Replacement: crwdns2935265:05crwdnd2935265:03crwdnd2935265:03crwdne2935265:0
    • Insert the flat end of the spudger between the front panel and the rear case at the lower left edge of the iPhone.

    • Slide the spudger up the left edge of the phone starting at the lower edge and moving towards the volume control buttons and silent switch, breaking up the adhesive holding the display in place.

    • Do not try to pry the top edge of the display away from the rear case, as it is held in place by plastic clips that may break.

  6. iPhone 7 Plus Rear Camera Lens Glass Replacement: crwdns2935265:06crwdnd2935265:01crwdnd2935265:02crwdne2935265:0 iPhone 7 Plus Rear Camera Lens Glass Replacement: crwdns2935265:06crwdnd2935265:02crwdnd2935265:02crwdne2935265:0
    • Remove the spudger from the left side of the phone and insert the flat end into the bottom right corner.

    • Slide the spudger up the right edge of the phone to the top corner, breaking up the adhesive holding the display in place.

  7. iPhone 7 Plus Rear Camera Lens Glass Replacement: crwdns2935265:07crwdnd2935265:01crwdnd2935265:02crwdne2935265:0 iPhone 7 Plus Rear Camera Lens Glass Replacement: crwdns2935265:07crwdnd2935265:02crwdnd2935265:02crwdne2935265:0
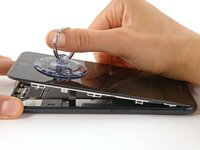
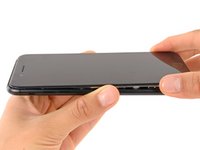
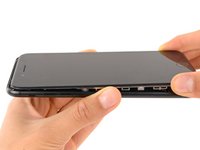
    • Pull up on the suction cup to lift up the display and open the iPhone.

    • Do not raise the display more than 10º as there are delicate ribbon cables along the right edge of the device connecting the display to the logic board.

  8. iPhone 7 Plus Rear Camera Lens Glass Replacement: crwdns2935265:08crwdnd2935265:01crwdnd2935265:02crwdne2935265:0 iPhone 7 Plus Rear Camera Lens Glass Replacement: crwdns2935265:08crwdnd2935265:02crwdnd2935265:02crwdne2935265:0
    • Pull up on the small nub on the suction cup to remove it from the front panel.

  9. iPhone 7 Plus Rear Camera Lens Glass Replacement: crwdns2935265:09crwdnd2935265:01crwdnd2935265:02crwdne2935265:0 iPhone 7 Plus Rear Camera Lens Glass Replacement: crwdns2935265:09crwdnd2935265:02crwdnd2935265:02crwdne2935265:0
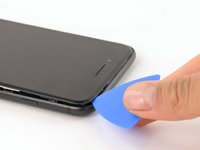
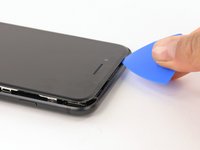
    • Slide an opening pick underneath the display along the top edge of the phone to loosen the last of the adhesive.

  10. iPhone 7 Plus Rear Camera Lens Glass Replacement: crwdns2935265:010crwdnd2935265:01crwdnd2935265:03crwdne2935265:0 iPhone 7 Plus Rear Camera Lens Glass Replacement: crwdns2935265:010crwdnd2935265:02crwdnd2935265:03crwdne2935265:0 iPhone 7 Plus Rear Camera Lens Glass Replacement: crwdns2935265:010crwdnd2935265:03crwdnd2935265:03crwdne2935265:0
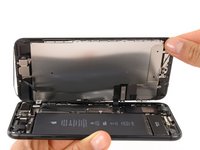
    • Pull the display assembly slightly away from the top edge of the phone to disengage the clips holding it to the rear case.

    • Open the iPhone by swinging the display up from the left side, like the back cover of a book.

    • Don't try to fully separate the display yet, as several fragile ribbon cables still connect it to the iPhone's logic board.

  11. iPhone 7 Plus Rear Camera Lens Glass Replacement, Battery Disconnection: crwdns2935265:011crwdnd2935265:01crwdnd2935265:01crwdne2935265:0
    • Remove the following four tri-point Y000 screws securing the lower display cable bracket to the logic board:

    • Three 1.2 mm screws

    • One 2.6 mm screw

  12. iPhone 7 Plus Rear Camera Lens Glass Replacement: crwdns2935265:012crwdnd2935265:01crwdnd2935265:02crwdne2935265:0 iPhone 7 Plus Rear Camera Lens Glass Replacement: crwdns2935265:012crwdnd2935265:02crwdnd2935265:02crwdne2935265:0
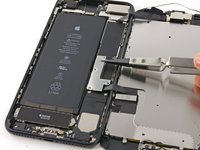
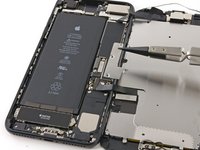
    • Remove the lower display cable bracket.

  13. iPhone 7 Plus Rear Camera Lens Glass Replacement: crwdns2935265:013crwdnd2935265:01crwdnd2935265:03crwdne2935265:0 iPhone 7 Plus Rear Camera Lens Glass Replacement: crwdns2935265:013crwdnd2935265:02crwdnd2935265:03crwdne2935265:0 iPhone 7 Plus Rear Camera Lens Glass Replacement: crwdns2935265:013crwdnd2935265:03crwdnd2935265:03crwdne2935265:0
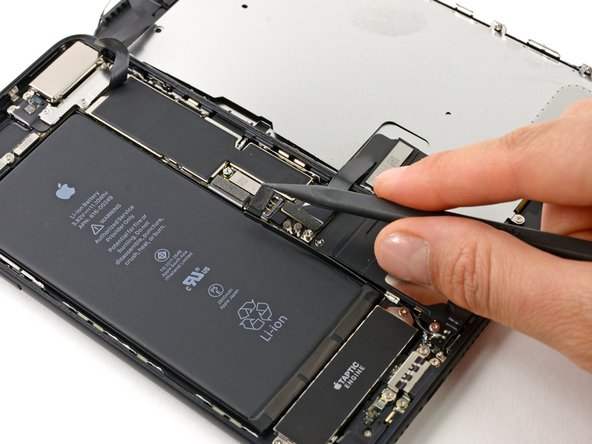
    • Use the point of a spudger to lift the battery connector out of its socket on the logic board.

    • Bend the connector cable up slightly to prevent it from making contact with the socket and providing power to the phone.

  14. iPhone 7 Plus Rear Camera Lens Glass Replacement, Display Assembly: crwdns2935265:014crwdnd2935265:01crwdnd2935265:03crwdne2935265:0 iPhone 7 Plus Rear Camera Lens Glass Replacement, Display Assembly: crwdns2935265:014crwdnd2935265:02crwdnd2935265:03crwdne2935265:0 iPhone 7 Plus Rear Camera Lens Glass Replacement, Display Assembly: crwdns2935265:014crwdnd2935265:03crwdnd2935265:03crwdne2935265:0
    • Make sure the battery is disconnected before you disconnect or reconnect the cables in this step.

    • Use the flat end of a spudger or a fingernail to disconnect the two lower display connectors by prying them straight up from their sockets on the logic board.

    • To re-attach press connectors, press down on one end until it clicks into place, then repeat on the other end. Do not press down on the middle. If the connector is even slightly misaligned, the connector can bend, causing permanent damage.

    • If you have a blank screen, white lines on the display, or partial or complete lack of touch response after reassembling your phone, try disconnecting and carefully reconnecting both of these cables and make sure they are fully seated.

  15. iPhone 7 Plus Rear Camera Lens Glass Replacement: crwdns2935265:015crwdnd2935265:01crwdnd2935265:03crwdne2935265:0 iPhone 7 Plus Rear Camera Lens Glass Replacement: crwdns2935265:015crwdnd2935265:02crwdnd2935265:03crwdne2935265:0 iPhone 7 Plus Rear Camera Lens Glass Replacement: crwdns2935265:015crwdnd2935265:03crwdnd2935265:03crwdne2935265:0
    • Remove the three tri-point Y000 screws securing the bracket over the front panel sensor assembly connector:

    • One 1.3 mm screw

    • Two 1.0 mm screws

    • Remove the bracket.

  16. iPhone 7 Plus Rear Camera Lens Glass Replacement: crwdns2935265:016crwdnd2935265:01crwdnd2935265:02crwdne2935265:0 iPhone 7 Plus Rear Camera Lens Glass Replacement: crwdns2935265:016crwdnd2935265:02crwdnd2935265:02crwdne2935265:0
    • Disconnect the front panel sensor assembly connector from its socket on the logic board.

    • This press connector should also be reconnected one end at a time to minimize the risk of bending.

  17. iPhone 7 Plus Rear Camera Lens Glass Replacement: crwdns2935265:017crwdnd2935265:01crwdnd2935265:01crwdne2935265:0
  18. iPhone 7 Plus Rear Camera Lens Glass Replacement, Rear-Facing Cameras: crwdns2935265:018crwdnd2935265:01crwdnd2935265:01crwdne2935265:0
    crwdns2935267:0crwdne2935267:0
    Standoff Screwdriver for iPhones
    $5.49
    crwdns2942207:0crwdne2942207:0
    • Remove the two screws securing the rear-facing camera bracket:

    • One 1.6 mm Phillips screw

    • One 2.2 mm standoff screw

    • Standoff screws are best removed using a standoff screwdriver or bit.

    • In a pinch, a small flathead screwdriver will do the job—but use extra caution to ensure it doesn't slip and damage surrounding components.

  19. iPhone 7 Plus Rear Camera Lens Glass Replacement: crwdns2935265:019crwdnd2935265:01crwdnd2935265:01crwdne2935265:0
    • Remove the bracket covering the rear-facing camera assembly.

  20. iPhone 7 Plus Rear Camera Lens Glass Replacement: crwdns2935265:020crwdnd2935265:01crwdnd2935265:03crwdne2935265:0 iPhone 7 Plus Rear Camera Lens Glass Replacement: crwdns2935265:020crwdnd2935265:02crwdnd2935265:03crwdne2935265:0 iPhone 7 Plus Rear Camera Lens Glass Replacement: crwdns2935265:020crwdnd2935265:03crwdnd2935265:03crwdne2935265:0
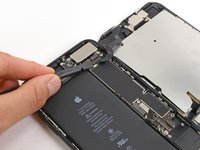
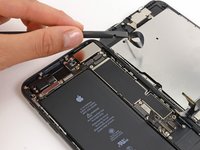
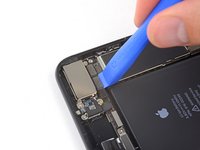
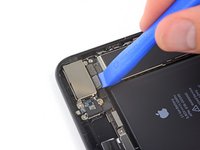
    • Use an iFixit opening tool or a fingernail to disconnect the two camera cable connectors by prying them straight up from their sockets.

  21. iPhone 7 Plus Rear Camera Lens Glass Replacement: crwdns2935265:021crwdnd2935265:01crwdnd2935265:02crwdne2935265:0 iPhone 7 Plus Rear Camera Lens Glass Replacement: crwdns2935265:021crwdnd2935265:02crwdnd2935265:02crwdne2935265:0
    • Use the flat end of a spudger to pry up the rear-facing camera assembly from the top edge of the iPhone.

  22. iPhone 7 Plus Rear Camera Lens Glass Replacement: crwdns2935265:022crwdnd2935265:01crwdnd2935265:01crwdne2935265:0
    • Remove the rear-facing camera assembly.

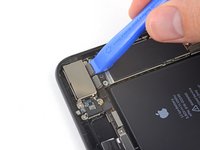
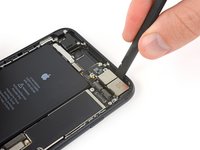
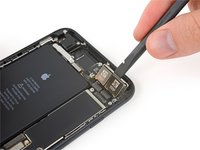
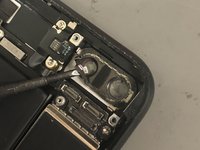
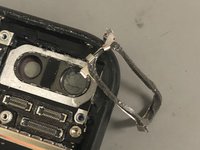
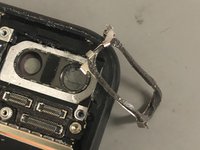
  23. iPhone 7 Plus Rear Camera Lens Glass Replacement, Camera bottom bracket: crwdns2935265:023crwdnd2935265:01crwdnd2935265:03crwdne2935265:0 iPhone 7 Plus Rear Camera Lens Glass Replacement, Camera bottom bracket: crwdns2935265:023crwdnd2935265:02crwdnd2935265:03crwdne2935265:0 iPhone 7 Plus Rear Camera Lens Glass Replacement, Camera bottom bracket: crwdns2935265:023crwdnd2935265:03crwdnd2935265:03crwdne2935265:0
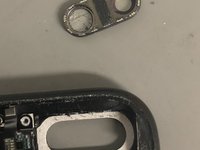
    • It's difficult to remove this bottom bracket. The inside round edge of this bracket seems to be soldered with camera lens ring; so you need much more effort and it's not surprising to break the bracket altogether.

    • I like to take a flat screw driver and push it in where it wont damage any components and just pull until I hear small tears.

    • Thats where the soldering have happened, you can also see it in picture three.

    I pulled the tabs with a small pair of pliers. Did the job neatly with less risk of damaging surrounding components.

    Martin Cooper - crwdns2934203:0crwdne2934203:0

    If you order just the glass replacement for this repair it is much easier. Instead of pulling out and destroying the housing from the inside as shown in this guide, you can complete this repair by carefully breaking out the glass bits from the front. Make sure you have removed your camera housings as shown in the previous steps to avoid damage to the cameras. Use a small hammer and a flat-head screwdriver to shatter the glass. Pick out remaining bits with jewelers pliers or metal tweezers. Once all of the glass bits are removed, clean the adhesive residue with acetone (nail polish remover). Apply the new replacement glass by removing the backer that covers the adhesive. Press firmly for 30 seconds.

    This method preserves the metal bracket and plate which are not typically sold as replacement parts with this type of repair. This guide should be updated with this technique in my opinion.

    Chris Meerdo - crwdns2934203:0crwdne2934203:0

  24. iPhone 7 Plus Rear Camera Lens Glass Replacement, Final step: crwdns2935265:024crwdnd2935265:01crwdnd2935265:03crwdne2935265:0 iPhone 7 Plus Rear Camera Lens Glass Replacement, Final step: crwdns2935265:024crwdnd2935265:02crwdnd2935265:03crwdne2935265:0 iPhone 7 Plus Rear Camera Lens Glass Replacement, Final step: crwdns2935265:024crwdnd2935265:03crwdnd2935265:03crwdne2935265:0
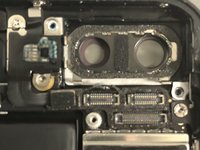
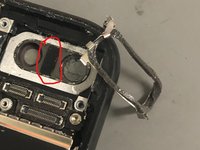
    • The last step is to push the cracked camera lens out from inside.

    • First, find a tool you prefer and easy to use with effort. Then, put your hands where your power will land to protect the rear case from bending. Next, push the camera lens with effort. Please be careful with the phone and your hand very much.

    • When you place the new camera lens, you will need glue or adhesive to fasten the camera lens as well as the new bottom bracket.

    • You don't have to have a new bracket, its not necessary.

    • If you worry about the iPhone 7 Plus being damaged, please send it to an Apple center.

    • What I do here is that I put the phone firmly at the table with the camera sticking out, I place my flat screwdriver where the red marker is and I slightly tap the screwdriver with a hammer.

    What kind of adhesive would you use?

    Kienan - crwdns2934203:0crwdne2934203:0

    • To insert a new one you place it on the table and gently lay your phone above it pushing it back inside.

    • Make sure that the new camera lens is flush with the back and you are good to reverse the steps.

crwdns2915888:0crwdne2915888:0

To reassemble your device, follow these instructions in reverse order.

crwdns2935229:041crwdne2935229:0

nicolay.94

crwdns2935283:003/09/17crwdne2935283:0

3.957 crwdns2915208:0crwdne2915208:0

crwdns2935297:02crwdne2935297:0

crwdns2944067:012crwdne2944067:0

When will you pretend finish this guide with picture? I have the same problem but I don’t want to loss the waterproof. Do you know another form to fix or soleve this problem?

Jose Juan Castro Ojeda - crwdns2934203:0crwdne2934203:0

You will lose waterproof unfortunally. Seals may be replaced but will not be 100%

nicolay.94 -

Adding pictures today.

nicolay.94 -

I read that the bottom bracket you mention at the end is fallen alignment bracket and it aligns the camera lens. Do you know how to add it back? Or we’ll install a new one

pxolo10 - crwdns2934203:0crwdne2934203:0

You will have to get this part: iPhone 7 Plus Rear Camera Alignment Bracket

as the other one is soldered and will break and bend. You will have to align the bracket yourself to replace it.
nicolay.94 -

What kind of glue or adhesive did you use to secure the Camarena lens?

pxolo10 - crwdns2934203:0crwdne2934203:0

B-7000 Clear is what I use.
nicolay.94 -

I write in Russian. Вчера я сделал это самостоятельно для iPhone 7 plus. Предварительно купил для камеры Metal Holder (bottom bracket) и Shockproof Sponge. Рамку стекла я вытолкнул карандашом после некоторых усилий, это выполнимо. Сначала я пытался нагреть, но это не облегчает задачу. В конце концов я применил механическое давление. Я разбил стекло камеры, приложил карандаш к твердой поверхности, просунул второй конец карандаша в отверстие камеры, обхватил корпус iPhone удобно пальцами и сильно, но аккуратно стал давить. Спустя 2 минуты давления рамка камеры поддалась и вытолкнулась. Я использовал черный автомобильный герметик чтобы вклеить новую рамку (мой iPhone черного цвета), проблем не возникло. Metal Holder тоже намазал герметиком. Я думаю, что так же можно использовать пяти минутный эпоксидный клей. При сборке корпуса я так же промазал герметик по периметру, я подумал, что это будет лучше, чем черный скотч 3М. Бросать в воду я не стану, но думаю водонепроницаемость моего iPhone в порядке.

Albert - crwdns2934203:0crwdne2934203:0

Il ricambio è compatibile anche perno iPhone 8 plus?

Riccardo Mazzoni - crwdns2934203:0crwdne2934203:0

Nice guide, very helpful! Some suggestions:

•It would be nice to include instructions and photos on replacing the alignment bracket and foam pad.

•My new camera lens cover from iFixit arrived with dust on the inside and was difficult to clean until I figured out to use a lint-free cloth wrapped around the spudger pick, and applied light pressure to clean the inside of the camera lens cover. This is important, because had I not done this, the camera could have had a haze from the dust on the inside of the lens cover upon reassembly.

•Storing the camera module facing down, while working on the alignment bracket and lens cover, will keep dust from settling on the camera module lens.

Robert O'Brien - crwdns2934203:0crwdne2934203:0

Although I successfully completed the repair, I could have used more detailed instructions (with photos) of the replacement process. Once the cracked dual rear camera lens cover was removed, I was left to sort out the rest myself. Could have used some instruction on how to PROPERLY install the new items. Following suggestions on the site, I had purchased the new Dual Rear Camera Lens Cover along with a new Rear Camera Alignment Bracket and Rear Camera Foam Pads. It would have been helpful to know how to reassemble the new items. Kind of a large gap in guidance here!

ELLO WEE - crwdns2934203:0crwdne2934203:0

crwdns2917038:0crwdne2917038:0

crwdns2936625:0crwdne2936625:0:

crwdns2936751:024crwdne2936751:0 7

crwdns2936753:07crwdne2936753:0 51

crwdns2936753:030crwdne2936753:0 149

crwdns2942667:0crwdne2942667:0 103,095