crwdns2915892:0crwdne2915892:0
Use this guide to replace the dock connector assembly, which includes the dock connector and lower microphone.
crwdns2942213:0crwdne2942213:0
-
-
Power off your iPhone before beginning disassembly.
-
Your phone's rear cover may have two #000 Phillips screws or Apple's 5-Point "Pentalobe" screws. Check which screws you have, and ensure you also have the correct screwdriver in order to remove them.
-
Remove the two 3.6 mm Pentalobe or Phillips #000 screws next to the dock connector.
-
-
-
Push the rear panel toward the top edge of the iPhone.
-
-
-
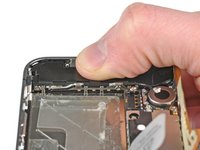
Pinch the rear panel with your fingers, and lift it away from the iPhone. Alternatively, use a Small Suction Cup .
-
-
-
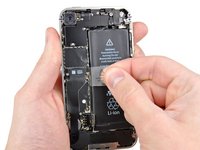
Remove the single 1.5 mm Phillips screw securing the battery connector to the logic board (if present).
you do not need to take the battery out as chuck said so you dont run the risk of braking the battery connector socket from the logic board
Won't you need the battery removed to access the large-headed screws on the side which hold the front display?
In my situation, the #00 screwdriver had a hard time trying to get the screws off. Using a glasses screwdriver kit may be a better alternative if the screws are resistant to the #00 screwdriver.
Unfortunately the battery screw was already stripped probably from original assembly. We used a pair of nail clippers as pliers to grab a hold of the screw by the edges to turn it. If it hadn't have been for the stripped screw it would have taken us about 10 minutes, as it was it took us 30-40 minutes if you count searching for solutions for removing the stripped screw.
what do I do if the screw head snapped off
-
-
-
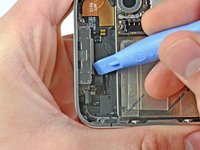
Use the edge of a plastic opening tool to gently pry the battery connector up from its socket on the logic board.
-
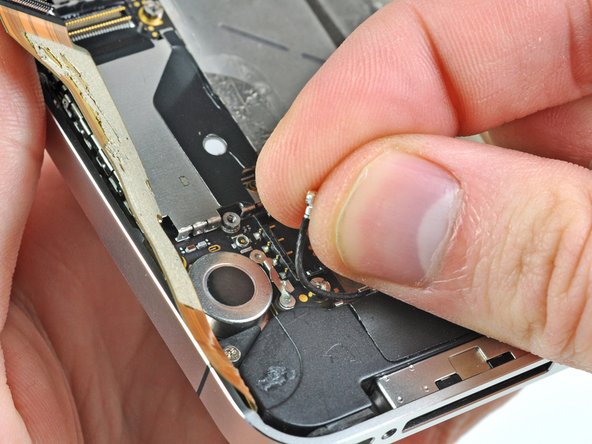
Remove the metal clip covering the antenna connector.
I don't see the metal clip covering the antenna connector, in the photo or in my phone. Hope this isn't a deal breaker.
I don't see it either. I think the metal clip is on the model A1332. The GSM model.
-
-
-
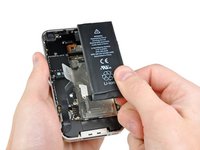
Pull up on the exposed clear plastic tab to peel the battery off the adhesive securing it to the iPhone.
-
If there's any alcohol solution remaining in the phone, carefully wipe it off or allow it to air dry before installing your new battery.
-
Remove the battery.
-
Before reassembly, clean metal-to-metal contact points with a de-greaser such as windex. The oils from your fingers have the potential to cause wireless interference issues.
-
Perform a hard reset after reassembly. This can prevent several issues and simplify troubleshooting.
Note that the pull tab is not actually attached to the battery. It is attached to the iPhone chassis, and is only used to separate the battery from the adhesive. (Don't expect it to come out with the battery!)
Also, the adhesive is VERY strong. I had to use my plastic opening tool to assist in prying the battery loose. This is probably the most nerve-wracking part of the job.
It is much easier to slightly WARM the battery with a HAIRDRYER not a HEAT GUN to soften the adhesive. DO NOT GET BATTERY HOT AND DO NOT USE HEAT GUN
Joe -
I just did this today. Everything was as scripted. Mine had lots of adhesive and had to use plastic spudger to go around battery to loosen up. Do not use plastic tab until you can see under battery a little bit. Great instructions. Took less than 10 minutes.
The adhesive is very strong and I was initially worried about damaging the phone by prying so much. There are a couple of places below the volume switch where you can pry between the metal of the case and the battery. If you lift the battery just a little, wiggle the pry bar further in and then start moving down the case. Don't worry about bending the battery, its dead anyway.
Do not pry on the left side (circuit board side) and do not use the pull tab until the adhesive is broken loose.
I tried this at first with a plastic pry tool, and the adhesive was so strong that I broke the tool. I then used a large screwdriver and applied pressure very slowly along various places on the outer side of the battery. That eventually did the trick.
-
-
-
Remove the two 1.8 mm Phillips screws securing the dock connector cable cover to the logic board.
-
Remove the metal dock connector cable cover.
-
-
-
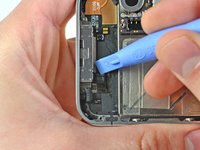
Use the edge of a plastic opening tool to pry the dock cable up from its socket on the logic board.
This repair went well overall, but I thought I would add a couple comments on this step. Once I got my iPhone back together, it would not charge and the home button didn't work. I took it back apart and realized that the dock cable was not seated. After many attempts, I finally got it seated correctly and you can feel it "click" into place. The metal rectangle that holds it on should sit FLAT and not have any bulge. If you have a bulge, that means the dock cable is not seated correctly.
-
-
-
-
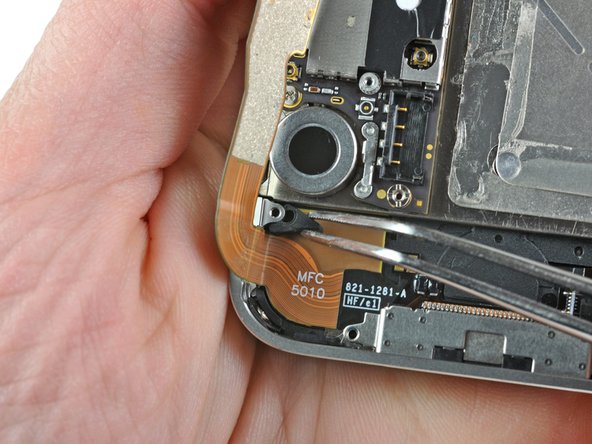
Peel the dock connector cable off the adhesive securing it to the logic board and the side of the speaker enclosure.
-
-
-
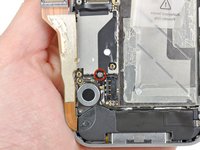
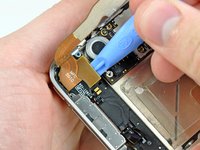
Remove the 1.6 mm Phillips screw securing the pressure contact to the logic board near the vibrator.
-
Remove the pressure contact.
-
-
-
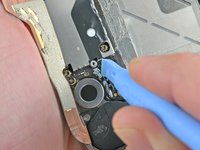
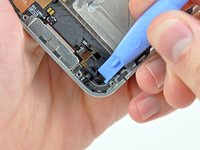
Use the edge of a plastic opening tool to pry the Wi-Fi antenna cable up from its socket on the logic board.
-
De-route the Wi-Fi antenna cable out from under the metal fingers attached to the logic board.
-
-
-
Remove the two 2.4 mm Phillips screws securing the speaker enclosure assembly to the outer case.
-
-
-
Remove the small black spacer that was under the Phillips screw near the vibrator.
-
-
-
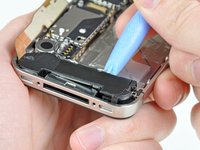
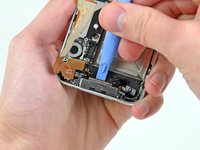
Use a plastic opening tool to lift the speaker enclosure assembly out of the case, being sure not to damage the EMI fingers on the attached Wi-Fi antenna.
-
Remove the speaker enclosure assembly.
-
-
-
If present, remove the small strip of tape covering one of the dock connector screws.
-
-
-
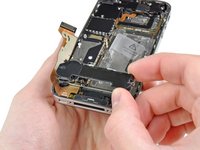
Use a plastic opening tool to flip up the retaining flap on the home button ribbon cable ZIF socket.
-
-
crwdns2935267:0crwdne2935267:0Tweezers$4.99
-
Use a pair of tweezers to pull the home button ribbon cable out of its socket.
-
-
-
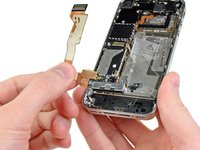
Carefully pull, but do not remove, the rubber microphone holder out of its tube in the bottom edge of the iPhone.
-
-
-
Remove the two 1.3 mm Phillips screws securing the dock connector to the case of the iPhone.
-
-
-
Use a pair of tweezers to remove the small rubber spacer beneath the speaker enclosure mounting ear near the vibrator.
-
-
-
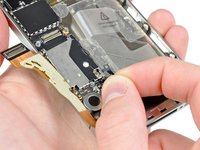
Remove the tiny rubber spacer near the dock connector.
-
-
-
Use the edge of a plastic opening tool to peel the dock connector and its cable off the black plastic case of the iPhone.
A new Dock connector may come with several pieces of plastic covering various adhesive surfaces so be sure to remove them before replacing.
Made the repair new dock connector and battery. Phone powers up and is charging. Wi-Fi is fine. However the cell is not working the carrier status in the upper left corner say searching and I can't make calls. Any thoughts?
-
-
-
Pry the dock connector away from its opening at the bottom of the iPhone.
-
Remove the dock connector.
-


To reassemble your device, follow these instructions in reverse order.
To reassemble your device, follow these instructions in reverse order.
crwdns2935221:0crwdne2935221:0
crwdns2935229:0117crwdne2935229:0

crwdns2947412:05crwdne2947412:0
So I attempted once to fix the dock connector and failed. A month later I took the phone apart again. The first thing I noticed when taking off the dock connector from the logic board is that it wasn't seated properly. I attached it properly and now the iPhone charges and home button works perfectly!
What about it was not seated properly? any specific contact point? was it not screwed in well if it wasn't seated properly? I just replaced on a friends 4, but it has not turned on yet, and I can't figure it out. It just stopped charging one day so I figured it was a bad port from corrosion or something and replaced it. The swap was easy enough so I'm confused as to why it isn't turning on yet.
Matthew -
Great instructions. Easy to follow. I found that a JIS000 bit worked better than a phillips #00 bit on my Verizon iPhone 4, model A1349.
New part from IFixit works great. Some tips from my installation:
- PH000 screwdriver works well, but takes some finesse. A little pressure to get the screw going, and don't try to over tighten on the way back in. If you happen to round one out, a 00 or 0 PH screwdriver might get enough bite to get it going.
- Plastic pieces are covering the adhesive on numerous parts of the new dock connector. These are to be removed prior to installation.
- Battery does not have to be removed, so I avoided the risk of breaking something else.
I completed this guide, but unfortunately my phone is in no better shape than it was before the dock replacement. Apparently, this was not the problem. The device won't restore in iTunes. It just sits with the Apple logo and an empty status bar on the screen. Now when I unplug it from the computer, I get a black screen, with just a touch of backlight, but no display otherwise. Before the dock replacement, it always said "Connect to iTunes" but would not restore either. Any thoughts on what else I could try now?
Pra descarregar a bateria, antes de fazer o serviço, isso serve pra qualquer celular?
Gilmar Dutra - crwdns2934203:0crwdne2934203:0