crwdns2933423:0crwdne2933423:0

iPhone 16 Pro Charging Port Removal

crwdns2862623:0crwdne2862623:0
crwdns2942641:0crwdne2942641:0

crwdns2942213:0crwdne2942213:0

  1. iPhone 16 Pro Charging Port Removal, Prepare your phone for disassembly: crwdns2935265:01crwdnd2935265:01crwdnd2935265:02crwdne2935265:0 iPhone 16 Pro Charging Port Removal, Prepare your phone for disassembly: crwdns2935265:01crwdnd2935265:02crwdnd2935265:02crwdne2935265:0
    • Allow your phone's battery to drain below 25%, as a charged lithium-ion battery is a potential safety hazard.

    • Unplug any cables from your phone.

    • Hold the power and either volume buttons and slide to power off your phone.

  2. iPhone 16 Pro Charging Port Removal, Tape over any cracks: crwdns2935265:02crwdnd2935265:01crwdnd2935265:02crwdne2935265:0 iPhone 16 Pro Charging Port Removal, Tape over any cracks: crwdns2935265:02crwdnd2935265:02crwdnd2935265:02crwdne2935265:0
    • If your screen or back glass is badly cracked, lay overlapping strips of packing tape over the glass to protect yourself and make disassembly easier.

    • Make sure there's a smooth area near the bottom edge that's big enough for a suction cup to stick to.

  3. iPhone 16 Pro Charging Port Removal, Mark your opening picks: crwdns2935265:03crwdnd2935265:01crwdnd2935265:03crwdne2935265:0 iPhone 16 Pro Charging Port Removal, Mark your opening picks: crwdns2935265:03crwdnd2935265:02crwdnd2935265:03crwdne2935265:0 iPhone 16 Pro Charging Port Removal, Mark your opening picks: crwdns2935265:03crwdnd2935265:03crwdnd2935265:03crwdne2935265:0
    • If inserted too far, an opening pick can damage your device. Follow this step to mark your pick and prevent damage.

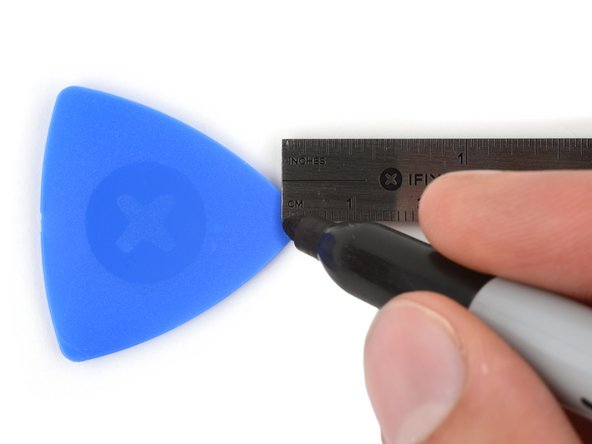
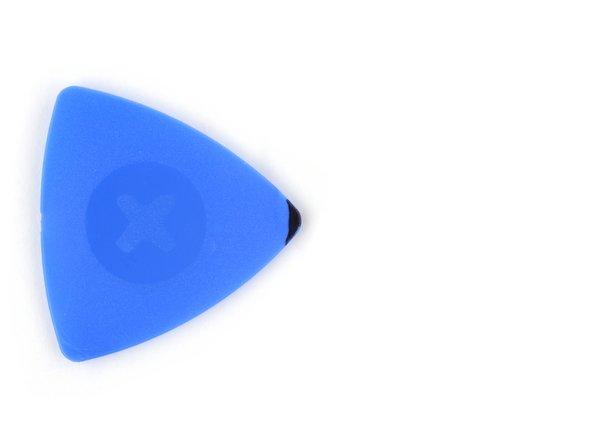
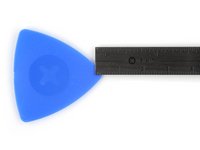
    • Measure 3 mm from the tip and mark the opening pick with a permanent marker.

    • You can also mark the other corners of the pick with different measurements.

    • Alternatively, tape a coin to a pick 3 mm from the tip.

  4. iPhone 16 Pro Charging Port Removal, Remove the pentalobe screws: crwdns2935265:04crwdnd2935265:01crwdnd2935265:02crwdne2935265:0 iPhone 16 Pro Charging Port Removal, Remove the pentalobe screws: crwdns2935265:04crwdnd2935265:02crwdnd2935265:02crwdne2935265:0
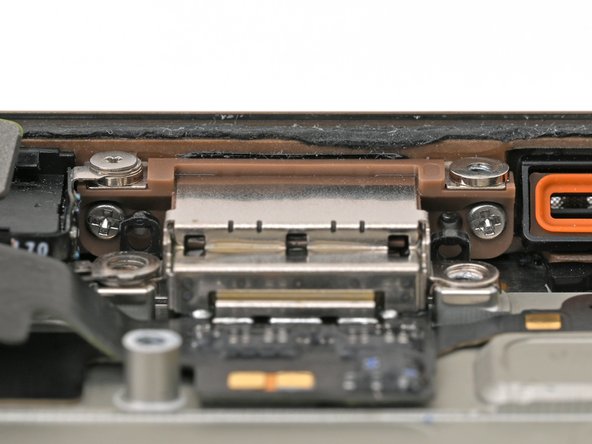
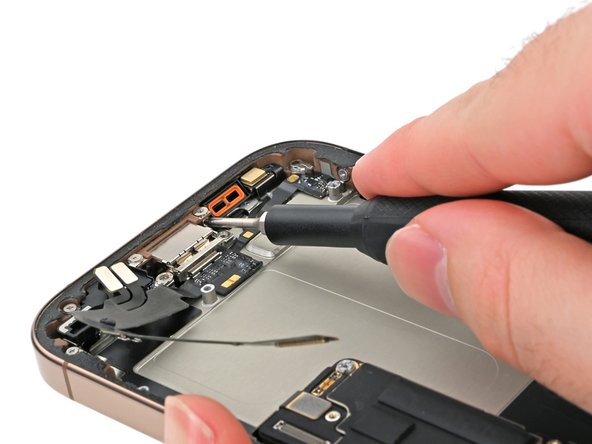
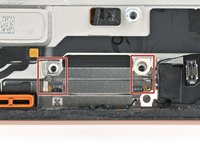
    • Use a P2 pentalobe screwdriver to remove the two 7.4 mm‑long screws on either side of the USB-C port.

  5. iPhone 16 Pro Charging Port Removal, Remove the charging port: crwdns2935265:05crwdnd2935265:01crwdnd2935265:01crwdne2935265:0
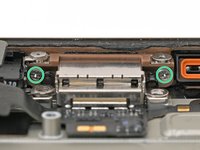
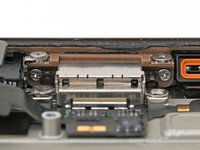
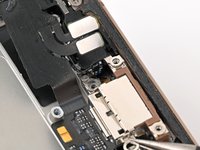
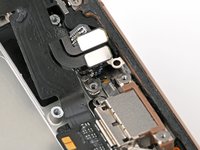
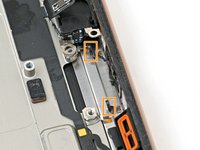
    • Use a standoff screwdriver to remove the 3.6 mm‑long screw securing the charging port to the frame.

  6. iPhone 16 Pro Charging Port Removal: crwdns2935265:06crwdnd2935265:01crwdnd2935265:03crwdne2935265:0 iPhone 16 Pro Charging Port Removal: crwdns2935265:06crwdnd2935265:02crwdnd2935265:03crwdne2935265:0 iPhone 16 Pro Charging Port Removal: crwdns2935265:06crwdnd2935265:03crwdnd2935265:03crwdne2935265:0
    • Use a Phillips screwdriver to remove the two 3.4 mm‑long screws securing the charging port to the frame.

    • These screws are tight and can be difficult to reach. Angle your screwdriver at as shallow of an angle as you can.

    • When you're installing the charging port, temporarily install the two external P2 pentalobe screws to help with port alignment. Once it's aligned, secure the port with its Phillips screws.

    • Remove the pentalobe screws after this, or they'll block you from installing the back glass.

  7. iPhone 16 Pro Charging Port Removal: crwdns2935265:07crwdnd2935265:01crwdnd2935265:01crwdne2935265:0
    • Use a tri-point Y000 screwdriver to remove the 1.3 mm‑long screw securing the charging port to the frame.

  8. iPhone 16 Pro Charging Port Removal: crwdns2935265:08crwdnd2935265:01crwdnd2935265:02crwdne2935265:0 iPhone 16 Pro Charging Port Removal: crwdns2935265:08crwdnd2935265:02crwdnd2935265:02crwdne2935265:0
    • The charging port has an adhesive gasket that seals it against the bottom and edge of the frame. It's also tucked behind two prongs, which prevents you from pulling the port away from the frame.

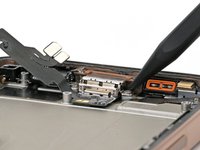
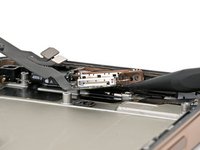
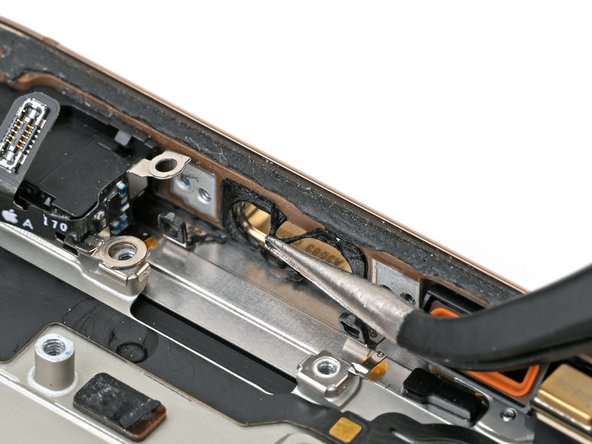
    • Insert the point of a spudger under one side of the charging port.

    • Pry up gently to separate the gasket and lift the port up.

  9. iPhone 16 Pro Charging Port Removal: crwdns2935265:09crwdnd2935265:01crwdnd2935265:03crwdne2935265:0 iPhone 16 Pro Charging Port Removal: crwdns2935265:09crwdnd2935265:02crwdnd2935265:03crwdne2935265:0 iPhone 16 Pro Charging Port Removal: crwdns2935265:09crwdnd2935265:03crwdnd2935265:03crwdne2935265:0
    • Don't pull the port directly away from its cut-out in the frame. There are two prongs holding it in place.

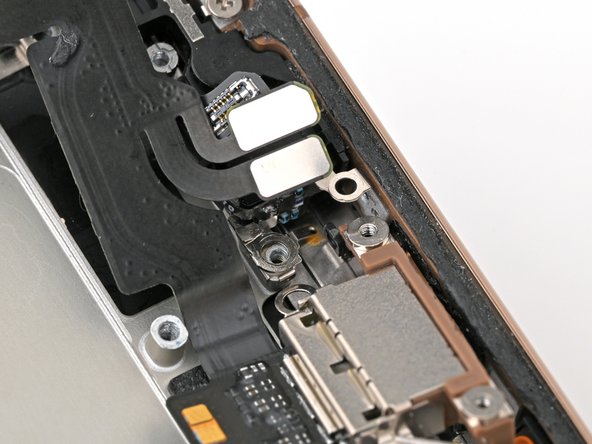
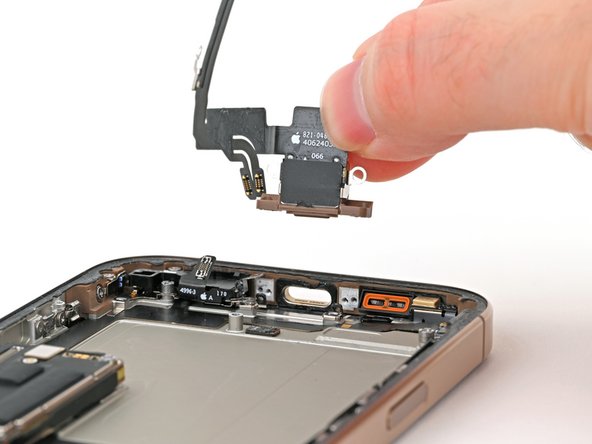
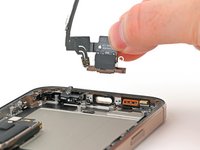
    • Pull the charging port away from the microphone.

    • Remove the charging port.

  10. iPhone 16 Pro Charging Port Removal, Reassembly tips: crwdns2935265:010crwdnd2935265:01crwdnd2935265:03crwdne2935265:0 iPhone 16 Pro Charging Port Removal, Reassembly tips: crwdns2935265:010crwdnd2935265:02crwdnd2935265:03crwdne2935265:0 iPhone 16 Pro Charging Port Removal, Reassembly tips: crwdns2935265:010crwdnd2935265:03crwdnd2935265:03crwdne2935265:0
    • During reassembly, note the following:

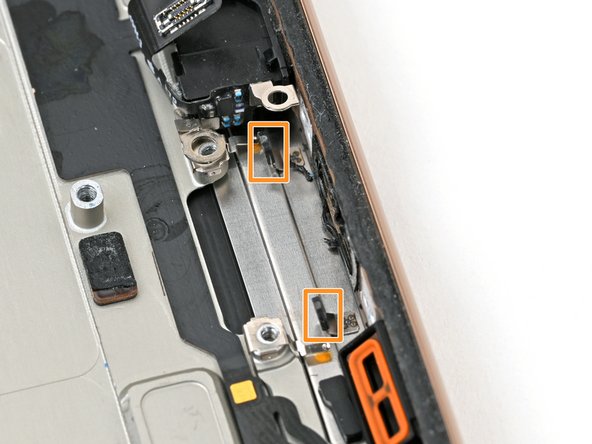
    • The two screw posts underneath the charging port contain grounding clips. During reassembly, make sure they're still clipped in place. The clips should face towards the bottom edge of the iPhone.

    • Make sure the two black prongs are standing straight up. If they were bent when you removed the port, use the point of a spudger to carefully straighten them.

    • Remove all of the original adhesive securing the port to the frame before replacing it.

crwdns2915888:0crwdne2915888:0

To reassemble your iPhone, follow these instructions in reverse order.

Take your e-waste to an R2 or e-Stewards certified recycler.

Repair didn’t go as planned? Try some basic troubleshooting, or ask our iPhone 16 Pro Answers community for help.

Nick Schultz

crwdns2935283:003/24/24crwdne2935283:0

19 546 crwdns2915208:0crwdne2915208:0

crwdns2935297:0114crwdne2935297:0

crwdns2915084:0crwdne2915084:0

iFixit crwdns2935289:0iFixitcrwdne2935289:0

Staff

crwdns2931471:0121crwdne2931471:0

crwdns2935297:019 715crwdne2935297:0

crwdns2947412:00crwdne2947412:0

crwdns2917038:0crwdne2917038:0

crwdns2936625:0crwdne2936625:0:

crwdns2936751:024crwdne2936751:0 0

crwdns2936753:07crwdne2936753:0 0

crwdns2936753:030crwdne2936753:0 17

crwdns2942667:0crwdne2942667:0 20