crwdns2915892:0crwdne2915892:0
Replace the adhesive securing the front panel to the rear case of your iPad 2 GSM.
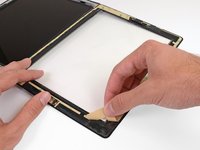
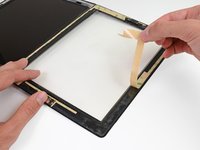
Before you begin peeling and sticking tape, it's important to have clean adhesion surfaces on both the front panel and the rear case. Use a spudger to scrape off any large excess bits of original adhesive, then clean all of the gluing surfaces with a paper towel and rubbing alcohol or Goof Off.
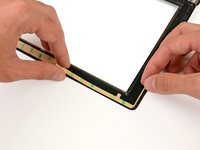
Throughout this procedure, it is recommended to peel up each adhesive strip as needed.
crwdns2942213:0crwdne2942213:0
-
crwdns2935267:0crwdne2935267:0Tweezers$4.99
-
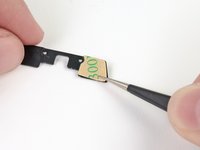
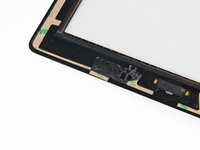
Carefully grasp the home button with a pair of tweezers.
-
Gently lower and place the home button into the round opening located at the bottom of the front panel.
-
-
-
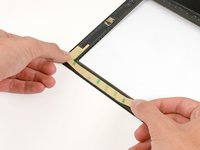
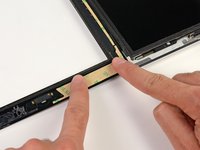
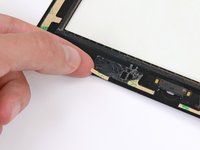
Carefully peel off the first trapezoidal adhesive strip.
I ordered the IPAD 2 BATTERY KIT (IF110-014-3 ). does this come with this adhesive strips?
Yes the iPad 2 battery kit includes everything you need, including the adhesive. The strips may look slightly different than the ones shown in this guide, but they will work the same. If you are only replacing the battery, you won’t need to remove or replace the home button, so ignore the home button bracket steps of this guide.
-
-
crwdns2935267:0crwdne2935267:0Tweezers$4.99
-
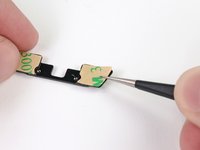
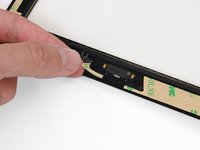
Using a pair of tweezers, place the first trapezoidal adhesive strip (minding its correct orientation) on the matching side of the home button mounting bracket.
-
-
-
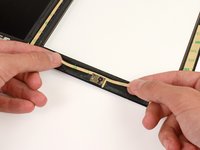
Use a pair of tweezers to grasp the corner of one of the adhesive strips placed on the mounting bracket.
-
Lift and peel the brown backing up off the adhesive strip, revealing the clear adhesive strip.
-
-
-
Gently place the home button mounting bracket on top of the home button.
Make sure the home button mounting bracket has a parallel gap of 1-2 mm from the bottom of the digitizer. This will ensure that the mounting bracket makes contact with the home contact pins.
-
-
-
-
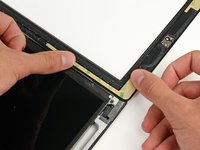
Place the largest L-shaped adhesive strip on the top left corner of the front panel.
-
Smooth the strip down from the center out, taking care to not trap any air bubbles between the strip and the front panel.
-
-
-
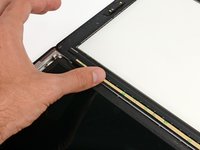
Place the thinnest L-shaped adhesive strip on the bottom left corner of the front panel.
-
-
-
Place the remaining thin L-shaped adhesive strip on the top right corner of the front panel, near the camera mounting bracket.
This is the third to last "L" shaped strip - it's the fatter one, without any diagonal cuts to it (used in the following steps)
-
-
-
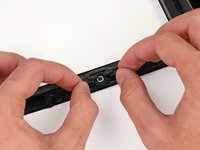
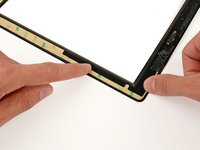
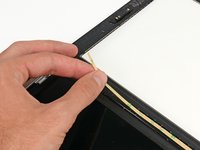
Place the straight adhesive strip on the right side of the front panel.
-
If you've already attached the digitizer cable, you'll have to work around/under it to attach this strip.
I had already reattached the digitizer cable so I used an Exacto knife to trim the adhesive around the cable…worked like a charm.
-
-
-
Place the last L-shaped adhesive strip on the bottom right corner of the front panel.
hi, i had my front panel connecting strip torn during repair… what can i do??
i had my ipad 2 front panel connecting strip torn down during repair…
plz tell me the solution
-
-
-
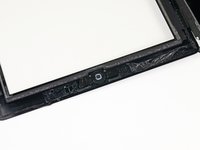
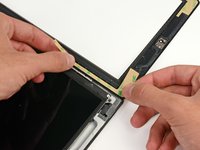
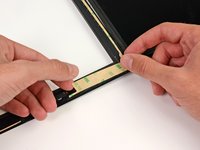
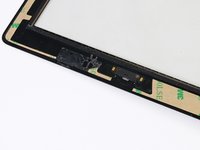
Lay the thin T-shaped adhesive strip between the bottom edge of the inner frame of the front panel and the camera mounting bracket. The longest edge should be flush with the inner frame.
I believe this should go above the bracket. There is no metal to adhere to between the LCD and the camera.
Yes, this is definitely the wrong way up. The adhesive strip should run along the outside edge on the screen.
This image needs to be removed. Messed up a couple following this.
It is definitely upside down.
This strip is upside down. I followed these instructions and the top of my digitizer is loose now and doesn't stay down in the bezel. I have to buy more strips and do everything over.
No. Everything is showed correctly. This strip doesn't have to glue to metal, there are plastic spacers for it at the top of the LCD.
If you afraid the glass will be loose of the bezel then you can cut two thin stripes of another two sided tape and attach them to the bezel's plastic as an extra option.
-
-
-
Place the small hook-shaped adhesive strip below the left side of the home button mounting bracket.
-
-
-
Lay the final small rectangular adhesive strip to the left of the hook-shaped adhesive strip, immediately to the right of the thin L-shaped strip, and flush with the bottom of the front panel.
-
-
-
Peel the brown backing up off each adhesive strip.
-


To reassemble your device, follow these instructions in reverse order.
To reassemble your device, follow these instructions in reverse order.
crwdns2935221:0crwdne2935221:0
crwdns2935229:062crwdne2935229:0

crwdns2947412:02crwdne2947412:0
I think, it would be easer if adhesive strips were cut in such a way that repairer can attach them not to the glass but directly to device.
success , reconnecting the logic board to the wi-fi and blue tooth as well as the cell data attens. was a little difficult however a little planning and lay out helps for a perfect fit and fix I would recommend gloves for sure. goof off and alcohol and a lot of elbow grease was needed to remove the old adhesive . I used paper towel spread out to catch the extra glass, worked well. be extra careful if using a heat gun as lcd can be damaged. eye protection a must. good work fixit crew...