crwdns2915892:0crwdne2915892:0
Use this guide to replace a broken or noisy fan in your iMac Intel 27" Retina 5K Display, or simply remove it for cleaning.
Before beginning any work on your iMac: Unplug the computer and press and hold the power button for ten seconds to discharge the power supply's capacitors.
Be very careful not to touch the capacitor leads or any exposed solder joints on the back of the power supply.
crwdns2942213:0crwdne2942213:0
-
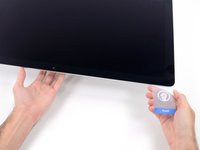
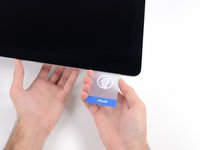
crwdns2935267:0crwdne2935267:0iMac Intel 27" Cardboard Service Wedge$4.99
-
With the hinge free to move, the iMac will be unbalanced and hard to work on. Repairs can be completed with the iMac laying down, but are faster and easier with an iMac service wedge.
-
If you are using the iFixit cardboard service wedge, follow these assembly directions to put it together.
-
-
-
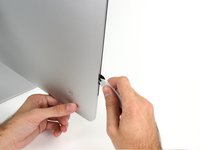
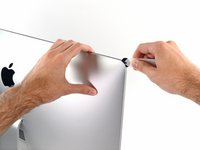
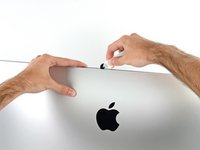
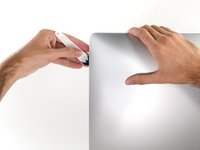
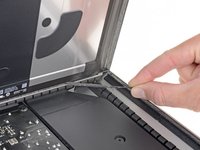
Starting on the left of the display, near the power button, insert the iMac Opening Tool into the gap between the glass panel and the rear case.
-
-
-
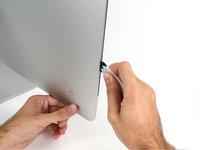
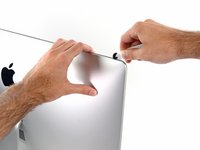
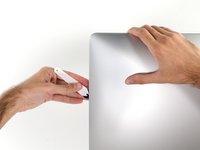
Use the tool like a pizza cutter—roll it along through the gap, and it will cut the foam adhesive through the center.
-
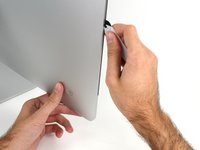
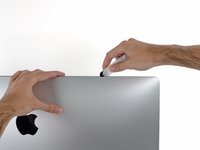
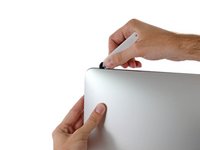
Run the tool up along the left side of the display.
-
-
-
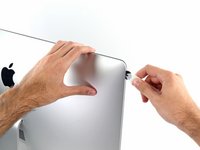
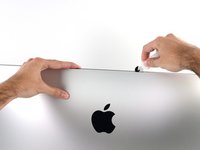
Continue wheeling the tool up around the top left corner.
-
-
-
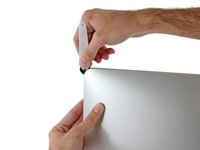
Cut the adhesive along the top left of the display.
-
-
-
Continue along the top of the display.
-
-
-
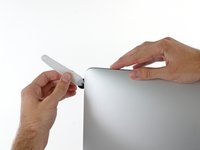
Push the tool around the top right corner of the display.
-
-
-
Wheel the tool down along the right side of the display.
-
-
-
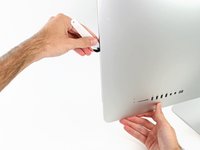
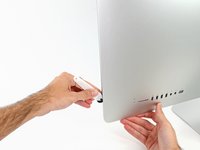
Finish pushing the opening tool to the bottom of the right side of the display.
-
-
-
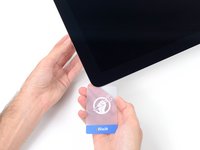
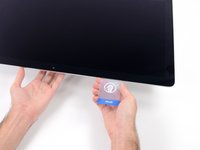
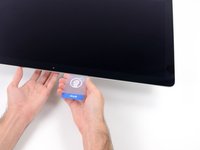
crwdns2935267:0crwdne2935267:0Plastic Cards$2.99
-
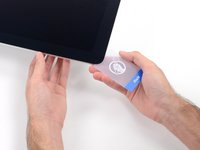
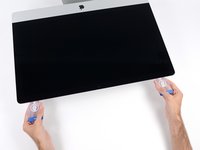
Set the iMac face-up on a table.
-
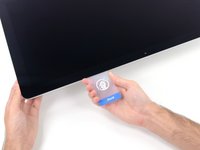
Starting from the top right corner of the iMac, insert a plastic card between the display and frame.
-
-
-
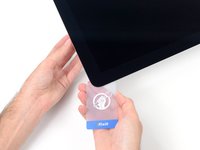
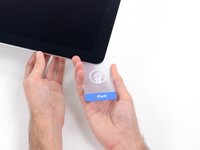
Gently twist the plastic card to open the space between the display and frame, and cut any remaining adhesive near the corner.
-
-
-
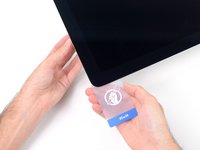
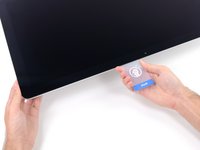
Slide the card toward the center of the display, to cut any remaining adhesive.
-
-
-
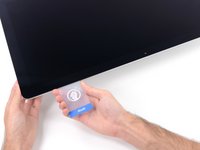
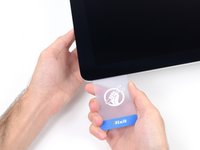
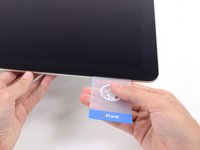
Put the card into the corner again and let it stay there to keep the adhesive from resettling.
-
-
-
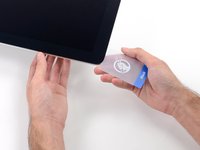
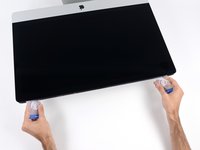
Insert a second card into the gap between the display and frame in the top left corner.
-
-
-
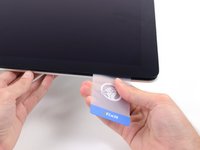
Gently twist the card, slightly increasing the space between the display and frame.
-
-
-
Slide the plastic card toward the center, again stopping just before the iSight camera.
-
-
-
Insert the card back into the top left corner.
-
-
-
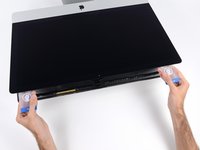
With the cards inserted as shown near the corners, gently twist the cards to increase the gap between display and case.
-
If there are any sections that seem to stick and won't separate, stop twisting and use one of the cards to cut the adhesive in the problem area.
-
Begin to lift the top of the display up from the frame.
-
-
-
While holding the display up with one hand, use the other to unplug the display power cable.
Der Stecker muss seitlich wie die meisten anderen Stecker in diesem Modell komprimiert werden, um ihn aus der Buchse auf dem Logicboard zu ziehen. Die Zugrichtung ist parallel zum Logicboard in Richtung Oberkante des iMac. Ziehen ohne seitliches Zusammendrücken der Backen am Stecker könnte den Stecker oder die Buchse beschädigen.
These instructions are unclear. They imply the cable can just be pulled out but this step had me stuck for a bit. Searching the webs, I discovered that there are little tabs on either side of the connector. I used my prod tool and poked one side and the connector came out a little. I poked the other side the connector came out without a fight.
The instruction for this step state this but I was still not expecting two cables. Finally figured out there is a Display Power and a separate Display Data cable.
As others have mentioned later on, it is not necessary to fully remove the screen or disconnect these cables. I managed with just the screen held wedged open with a small cardboard box.
-
-
-
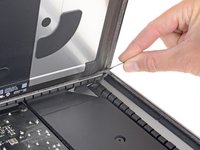
Flip up the metal retaining bracket on the display data cable.
-
Disconnect the display data cable.
-
-
-
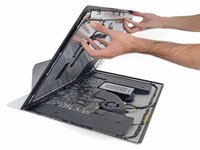
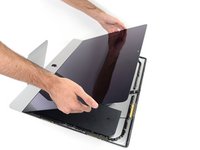
Lift the display up to a near-vertical position.
After rocking the display back and forth a bit, I found it helpful to use my iMac opening tool to gently slide ever so slightly underneath the bottom of the glass to cut the adhesive. This was with the display lowered back into it its normal position. I just worked about 1 millimetre deep at a time and eventually cut through the ~8” adhesive strip at the bottom centre.
It's possible to skip this step and go to step 24, leaving the display attached. You'll want to open the display just enough to replace the drive, with the machine upright and supported so the display doesn't swivel (I fold up a small pillow and wedge it in there). This way you don't have to worry about damaging the display when removing it, or aligning it when replacing it (which can be difficult to do solo as it's big and heavy).
Using a T8 with a short handle is helpful here, and make sure it's well magnetized so you don't drop the screws for the hard drive (just leave the other ones in the speakers).
-
-
-
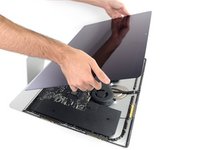
Grasp the small tab at the end of one of the bottom edge display adhesive strips and pull the adhesive toward the top of the iMac to remove it.
-
Repeat this step with the other adhesive strip and remove it.
-
-
-
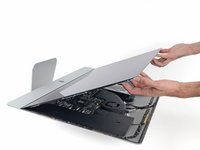
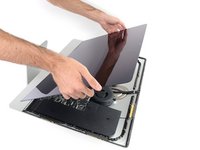
Lift the display up from the frame and remove it from the iMac. Lay the display face down on a flat, soft surface.
-
It may be necessary to slowly lift from one side, to peel against the remaining adhesive.
-
-
-
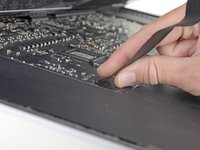
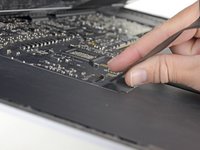
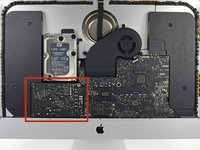
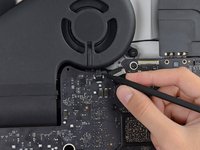
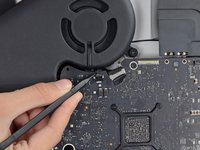
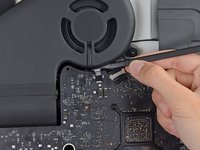
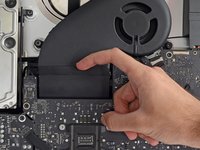
Use the tip of a spudger to disconnect the fan cable's connector from its socket on the logic board.
-
-
-
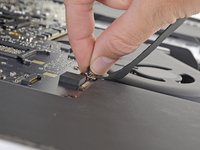
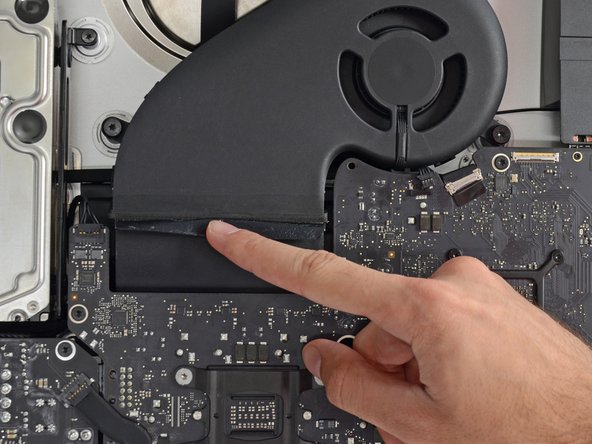
Use your fingers to peel the black tape connecting the fan to the exhaust duct back slightly.
-
Leave the tape in place on the exhaust duct, you only need to expose the join to free the fan.
-
-
-
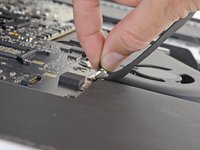
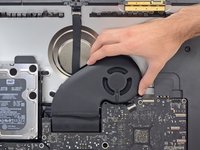
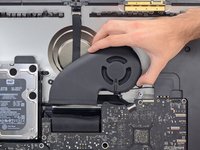
Use a T10 Torx screwdriver to remove the three 12.4 mm screws securing the fan.
-
-
-
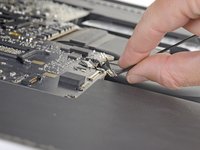
Remove the fan from the iMac.
-


Compare your new replacement part to the original part—you may need to transfer remaining components or remove adhesive backings from the new part before installing.
To reassemble your device, follow the above steps in reverse order.
Take your e-waste to an R2 or e-Stewards certified recycler.
Repair didn’t go as planned? Check out our Answers community for troubleshooting help.
crwdns2935221:0crwdne2935221:0
crwdns2935229:05crwdne2935229:0

crwdns2947412:03crwdne2947412:0
Danke für die Beschreibung, aber sollte man das Glas nicht wieder ankleben? Die alten Mac´s hatten ja noch Magnete. Hat dieser auch welche, somit wäre der Kleber unnötig ?
Darn good instructions.
Is the 2013 iMac fan the same? Is it compatible ?
What’s the point of this? You run the wheel around the outside, and then you lay it down anyway to pull the glass and do the rest. The wedge is not needed.
ebay - crwdns2934203:0crwdne2934203:0
I have a story to tell about this teardown. It all went wonderfully well until after I completed the process and attempted to format my new SSD drive only to discovery that the capacity of the drive was 256GB… not the 2TB I was sure I had ordered. iFixit was very supportive and helpful in sending me a new set of sticky tape strips and and RMA to return the SSD and some of the other parts.
I finally had received my new set of strips and the 2TB SSD…. I figured, piece of cake… I already know how to do this… but I watched the video again and started following the teardown…
…apparently the new sticky tape strips was way more powerful that the original tape and while using the pizza cutter tool and not advancing much, I proceeded to use one of the iFixit credit card style wedges…. I now have 2 pretty severe cracks on the glass of my display, which as clearly explained by @mayer can only be replaced by an entire display… which runs at about $500. Cosmetically it looks horrible, but it works… for now.
Erich Hentschel - crwdns2934203:0crwdne2934203:0