crwdns2915892:0crwdne2915892:0
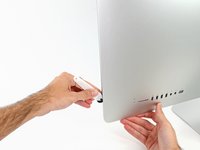
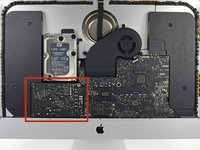
If your iMac was configured with a solid state drive or Fusion Drive, it includes a blade SSD on the back of the logic board. Use this guide to access and remove the blade SSD.
Before beginning any work on your iMac: Unplug the computer and press and hold the power button for ten seconds to discharge the power supply's capacitors.
Be very careful not to touch the capacitor leads or any exposed solder joints on the back of the power supply.
crwdns2942213:0crwdne2942213:0
-
crwdns2935267:0crwdne2935267:0iMac Intel 27" Cardboard Service Wedge$4.99
-
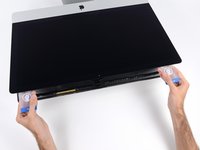
With the hinge free to move, the iMac will be unbalanced and hard to work on. Repairs can be completed with the iMac laying down, but are faster and easier with an iMac service wedge.
-
If you are using the iFixit cardboard service wedge, follow these assembly directions to put it together.
 crwdns2952109:0crwdne2952109:0
-
-
-
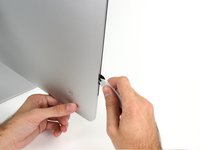
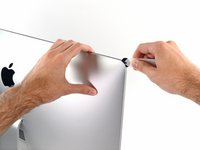
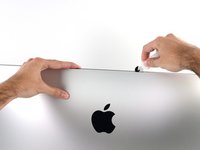
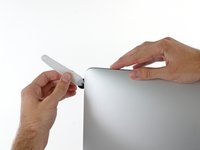
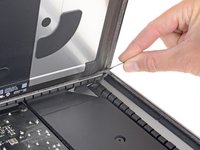
Starting on the left of the display, near the power button, insert the iMac Opening Tool into the gap between the glass panel and the rear case.
-
-
-
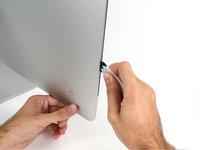
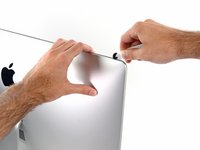
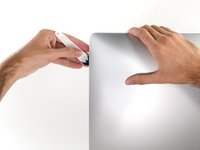
Use the tool like a pizza cutter—roll it along through the gap, and it will cut the foam adhesive through the center.
-
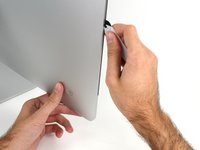
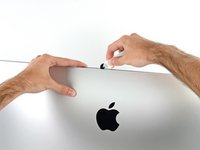
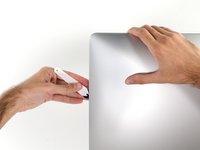
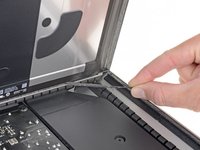
Run the tool up along the left side of the display.
-
-
-
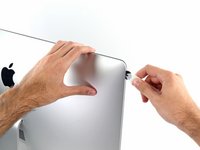
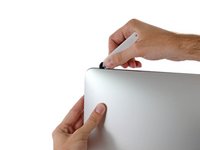
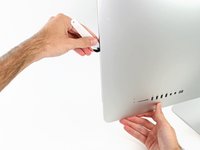
Continue wheeling the tool up around the top left corner.
-
-
-
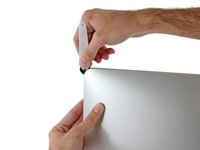
Cut the adhesive along the top left of the display.
-
-
-
Continue along the top of the display.
-
-
-
Push the tool around the top right corner of the display.
-
-
-
Wheel the tool down along the right side of the display.
-
-
-
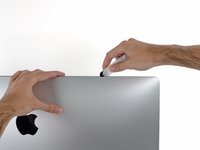
Finish pushing the opening tool to the bottom of the right side of the display.
-
-
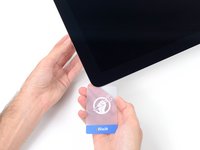
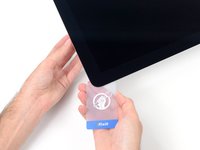
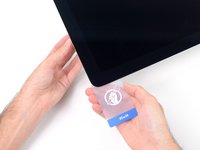
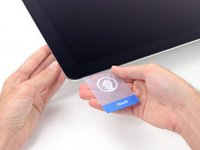
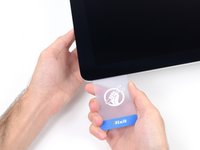
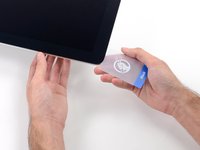
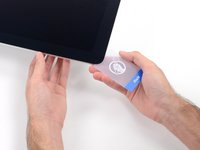
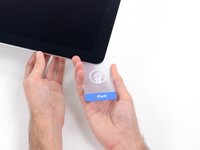
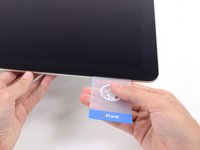
crwdns2935267:0crwdne2935267:0Plastic Cards$2.99
-
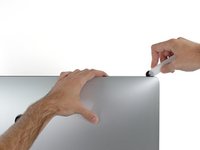
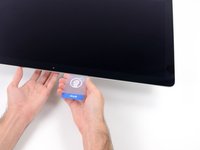
Set the iMac face-up on a table.
-
Starting from the top right corner of the iMac, insert a plastic card between the display and frame.
-
-
-
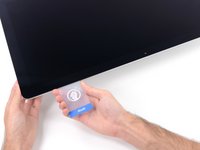
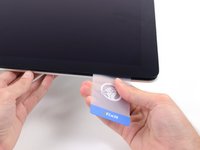
Gently twist the plastic card to open the space between the display and frame, and cut any remaining adhesive near the corner.
-
-
-
Slide the card toward the center of the display, to cut any remaining adhesive.
-
-
-
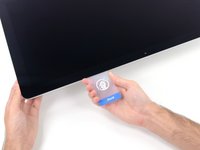
Put the card into the corner again and let it stay there to keep the adhesive from resettling.
-
-
-
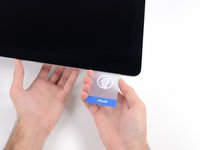
Insert a second card into the gap between the display and frame in the top left corner.
-
-
-
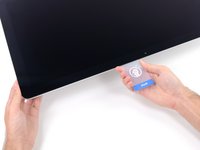
Gently twist the card, slightly increasing the space between the display and frame.
-
-
-
Slide the plastic card toward the center, again stopping just before the iSight camera.
-
-
-
Insert the card back into the top left corner.
-
-
-
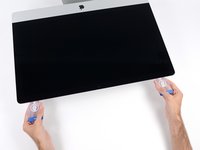
With the cards inserted as shown near the corners, gently twist the cards to increase the gap between display and case.
-
If there are any sections that seem to stick and won't separate, stop twisting and use one of the cards to cut the adhesive in the problem area.
-
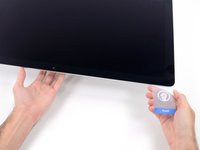
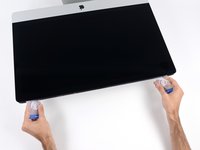
Begin to lift the top of the display up from the frame.
-
-
-
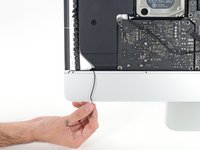
While holding the display up with one hand, use the other to unplug the display power cable.
-
-
-
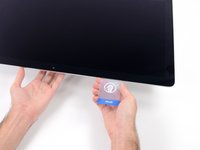
Flip up the metal retaining bracket on the display data cable.
-
Disconnect the display data cable.
-
-
-
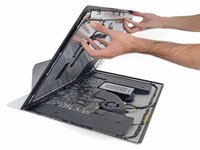
Lift the display up to a near-vertical position.
-
-
-
-
Grasp the small tab at the end of one of the bottom edge display adhesive strips and pull the adhesive toward the top of the iMac to remove it.
-
Repeat this step with the other adhesive strip and remove it.
-
-
-
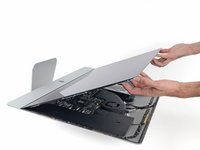
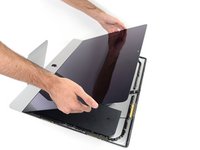
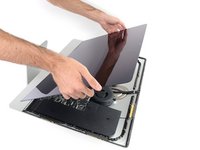
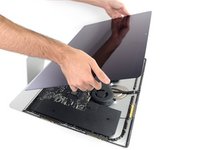
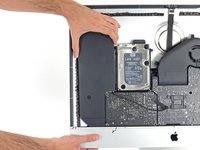
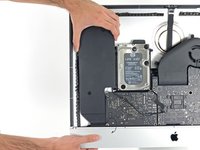
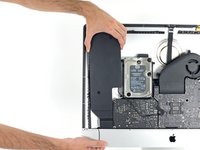
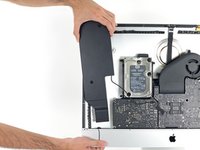
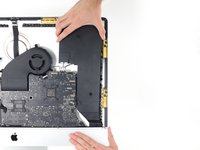
Lift the display up from the frame and remove it from the iMac. Lay the display face down on a flat, soft surface.
-
It may be necessary to slowly lift from one side, to peel against the remaining adhesive.
-
-
-
Use a Phillips screwdriver to remove the nine 3.2 mm screws securing the support bracket.
-
You may need to peel up the display adhesive lining the bottom edge of the iMac enclosure to access the screws.
-
-
-
Remove the lower support bracket (a.k.a. "chin strap") from the iMac enclosure.
-
Position the bracket diagonally.
-
Secure the rightmost screw enough to hold the bracket in place; keep it loose for now so the bracket can pivot.
-
Swing the left side of the bracket down until it sits horizontally in its original position.
-
Starting with the leftmost screw, install and tighten the remaining screws.
-
-
-
Remove two 10 mm T10 screws.
-
-
-
Unplug the left speaker cable by pulling it straight up out of its socket on the logic board.
-
De-route the cable from the gap between the hard drive and logic board.
-
-
-
Use a spudger to disconnect the power button connector from its socket on the logic board.
-
-
-
Lift the left speaker straight up, until the power button cable is exposed (about 0.5 inches).
-
-
-
Gently de-route the power button cable from its groove in the left speaker.
-
-
-
Lift the left speaker straight up and remove it from the iMac.
-
Push from the connector end as you pull from the speaker end to thread the cable under the hard drive's right bracket.
-
-
-
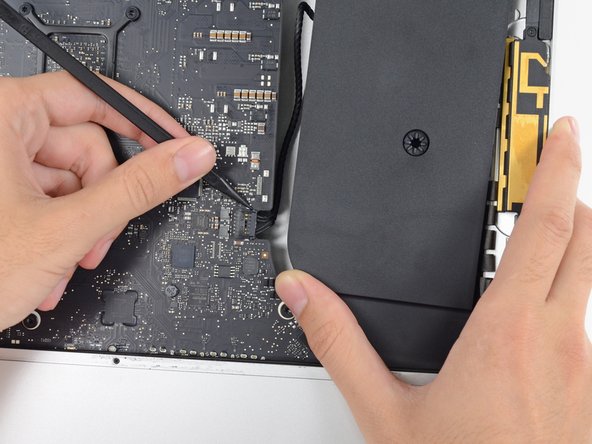
Pull straight up on the SATA data/power cable to disconnect it from the drive.
-
-
-
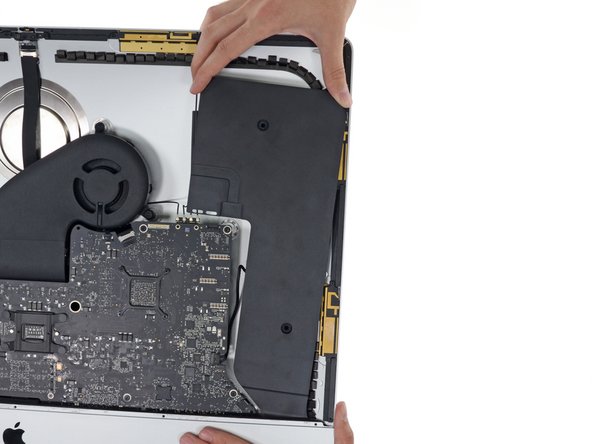
Remove two 7.3 mm T8 screws securing the left hard drive bracket to the rear case.
-
-
-
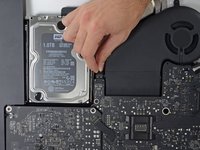
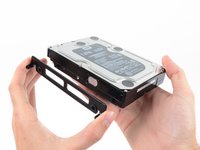
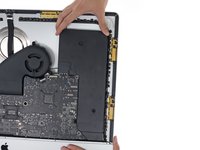
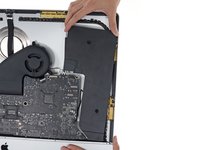
Grab the hard drive and left hard drive bracket together.
-
Tilt the left side up away from the rear case, and slide the assembly to the left.
-
Remove the hard drive and left hard drive bracket from the iMac.
-
-
-
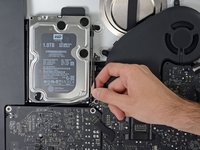
Remove the left hard drive bracket.
-
-
-
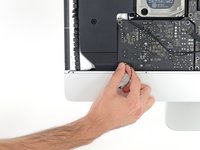
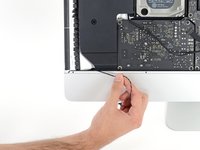
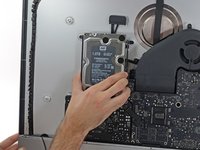
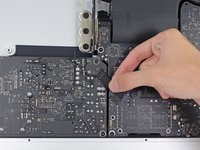
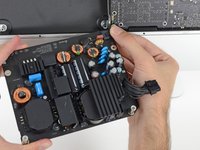
Disconnect the power supply control cable from the power supply.
-
-
-
Remove the following four screws securing the power supply to the rear case (size T8 or T10 depending on the exact model):
-
Two 23.7 mm Torx screws
-
Two 7.3 mm Torx screws
-
-
-
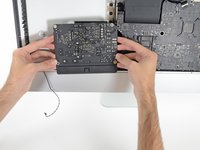
Move the power supply board towards the left edge of the case and up to free it from the notch in the logic board.
-
-
-
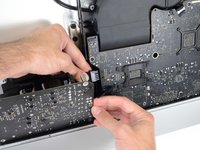
Depress the tab on the DC power cable connector, then pull it straight out of its socket on the back of the logic board.
-
-
-
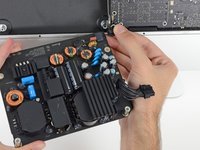
Flip the top of the power supply towards you, like opening a mailbox, to reveal the AC inlet cable connector.
-
Disconnect the AC inlet cable connector.
-
-
-
Remove two 9.8 mm T8 screws.
-
-
-
Gently rock the right speaker slightly to the right, to allow access to its cable's connection on the logic board.
-
-
-
Use a spudger to loosen the right speaker cable's connector from its socket on the logic board.
-
Pull the connector to the right to remove it from its socket.
-
-
-
Lift the speaker straight up and remove it from the iMac.
-
-
-
Use the tip of a spudger to disconnect the fan cable's connector from its socket on the logic board.
-
-
-
Peel the black tape connecting the fan to the exhaust duct back slightly.
-
Leave the tape in place on the exhaust duct—you only need to expose the joint to free the fan.
-
-
-
Remove three 12.4 mm T10 screws securing the fan to the rear case.
-
-
-
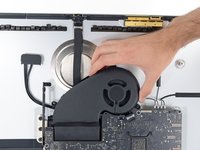
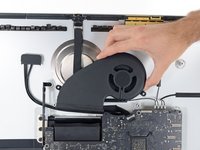
Remove the fan from the iMac.
-
-
-
Use a T5 Torx screwdriver to remove the two 4 mm screws securing the AirPort/Bluetooth antenna cables.
-
-
-
Use the point of a spudger to disconnect each of the four antenna connectors from the AirPort/Bluetooth card.
-
Leftmost
-
Top
-
Upper right
-
Lower right
-
-
-
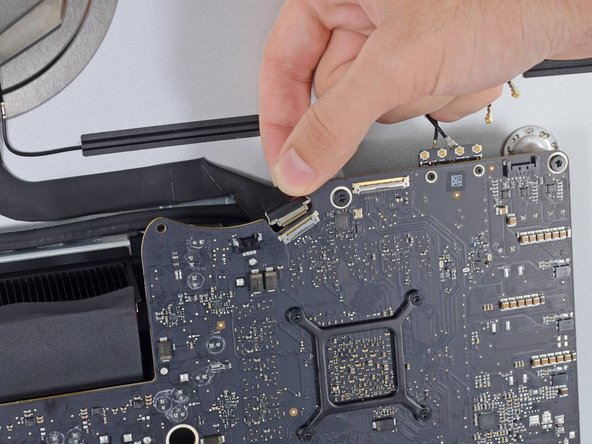
Flip up the metal retaining bracket on the iSight camera cable.
-
Pull the camera cable connector straight out of its socket, toward the top of the iMac.
-
-
-
Use the flat end of a spudger to disconnect the headphone jack cable connector from its socket on the logic board.
-
Gently push the cable out of the way.
-
-
crwdns2935267:0crwdne2935267:0Tweezers$4.99
-
Use the tip of a spudger to flip open the retaining flap on the microphone ribbon cable ZIF socket.
-
Use tweezers to gently pull the microphone ribbon cable straight out of its socket.
-
-
-
Remove the following screws securing the logic board:
-
Two 23.7 mm T8 screws
-
One 20.1 mm T25 spacer screw
-
One 17.6 mm T8 screw
-
One 7.2 mm T8 screw
-
Three 7.1 mm T8 screws
-
One captive T8 screw
-
-
-
Pull the hard drive SATA cable and connector through the right hard drive bracket. Move the cable to the right side of the iMac, out of the way of the exhaust port.
-
-
-
Use a T8 Torx screwdriver to remove the two 5.6 mm screws from the top of the heat sink exhaust duct.
-
-
-
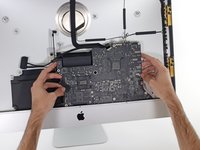
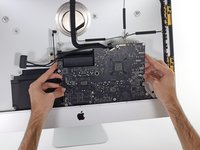
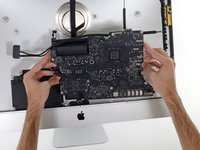
Tilt the logic board slightly forward.
-
Lift the logic board straight up and out of the iMac. Be careful not to snag it on any of the screw posts attached to the inside of the rear case.
-
-
-
When reassembling your iMac, be very careful to align the exterior I/O ports correctly. The logic board can sit crooked even when secured with all its screws.
-
You can use a USB flashdrive or ethernet cable to ensure the logic board is seated correctly while you screw it in.
-
-
-
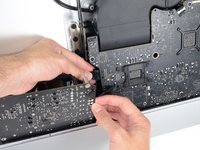
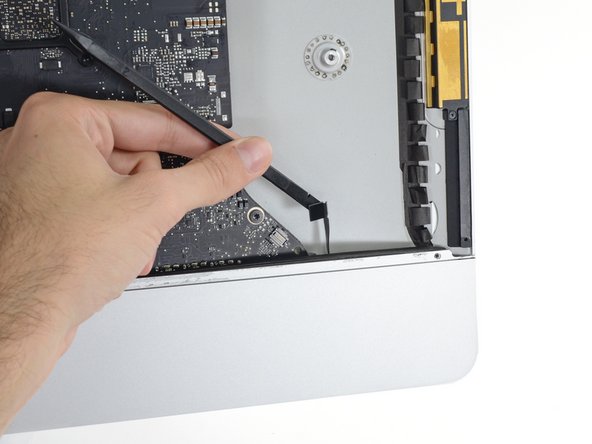
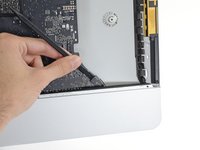
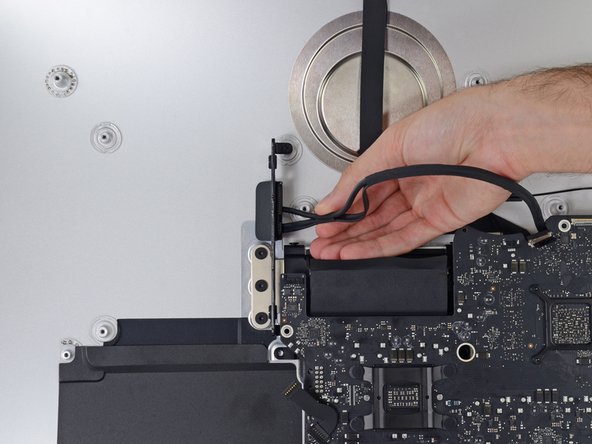
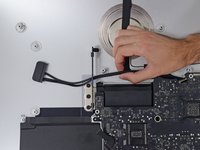
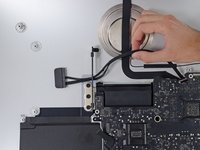
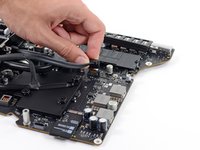
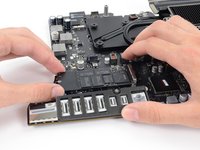
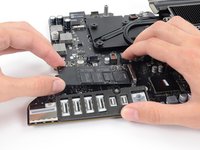
Pull up on the SATA power cable connector to disconnect it.
-
Unplug the SATA data cable connector by depressing its locking tab and pulling straight up on the connector.
-
Remove the SATA cable from the logic board assembly to get it out of the way and prevent it from being damaged.
-
-
-
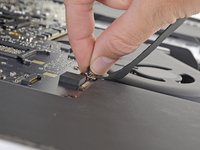
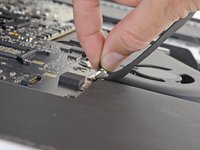
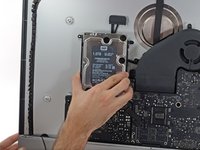
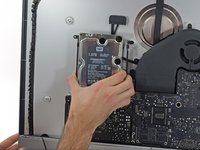
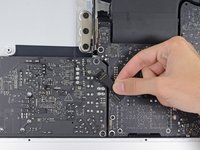
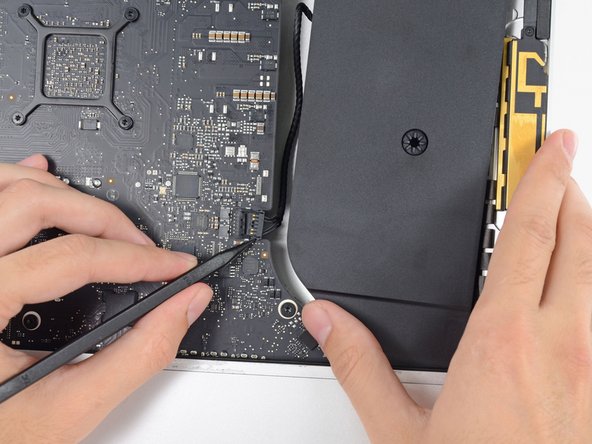
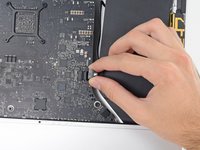
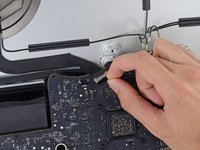
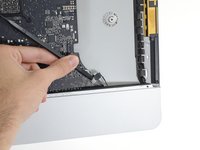
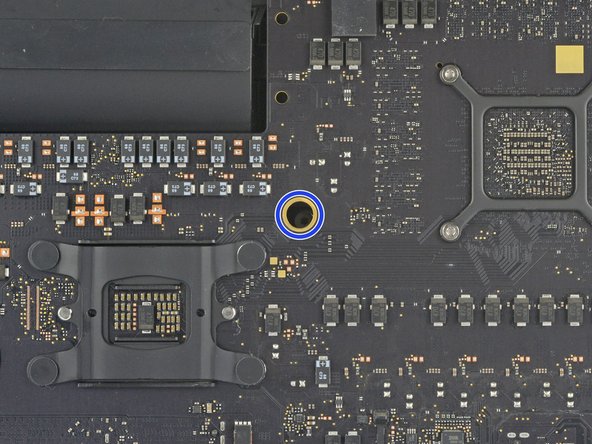
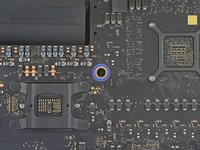
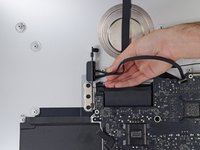
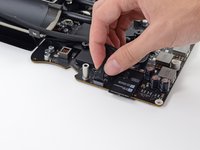
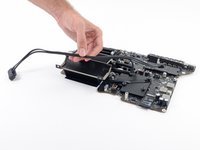
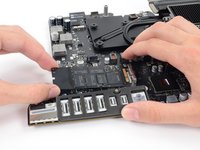
Remove the single 5.3 mm T8 screw securing the SSD to the logic board.
-
-
-
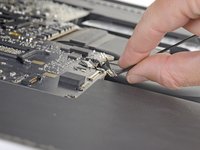
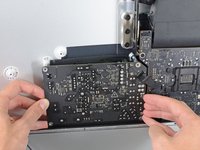
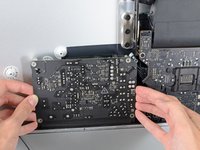
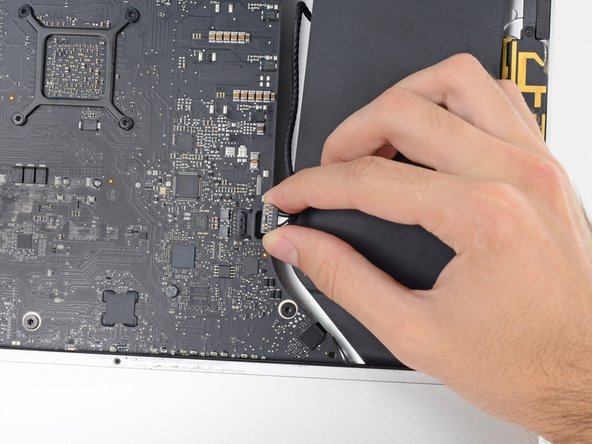
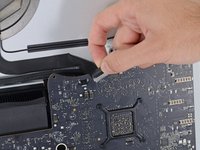
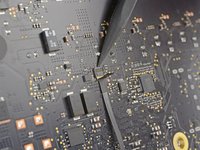
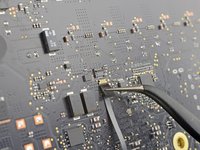
Lift the end of the SSD up slightly and pull it straight out of its socket on the logic board.
-


Compare your new replacement part to the original part—you may need to transfer remaining components or remove adhesive backings from the new part before installing.
To reassemble your device, follow the above steps in reverse order.
Take your e-waste to an R2 or e-Stewards certified recycler.
Repair didn’t go as planned? Check out our Answers community for troubleshooting help.
crwdns2935221:0crwdne2935221:0
crwdns2935229:049crwdne2935229:0

crwdns2947412:011crwdne2947412:0
is there any way to replace the I.O without swapping the motherboard?
Crystal Haugh - crwdns2934203:0crwdne2934203:0 crwdns2950251:0crwdne2950251:0
From cutting through the adhesive to the smoke test this was just under a four hour job for me. One adhesive strip left a complete layer of glue on one side of the screen, and it took me the better part of an hour, about half my supply of wipes, and a plastic razor blade just to clean that one edge up. I’d break the time down as: removing, cleaning, or reapplying adhesives, 2 hours; non-adhesive disassembly, 50 minutes; reassembly, 40 minutes; “oh crap, where’s that tool?” 15 minutes; and about 10 minutes for cleanup, including vacuuming out the fan, heat sink, and vents.
Ed Poe - crwdns2934203:0crwdne2934203:0 crwdns2950251:0crwdne2950251:0
Hi there, I need your professional help. I followed all instructions to change my iMac 2017 27" 5K fusion drive with a Samsung EVO 970 PLUS 2TB (with upgraded firmware) for macOS bootable drive and extra EVO 860 SSD 4TB data drive. Then updated to Monterey. My first test was 1200w 2900r, which was different from the youtube video which was roughly 3Krw. Why was that? Then after a few days of work, the mac froze during youtube watch and again during excel spreadsheet, and restarted with a "?" in a folder. I made an online hardware check all OK, then performed first aid, and again all OK. Then rebooted to the same "?" screen. And then rebooted again and now it works. So far! I see in the system prefs - Link Width x1. I made the speed test again and the reading now is roughly 700rw. Screenshots and sys error report bellow. What have I done wrong? And what to do to fix it all? Thanks!
Peter Lane - crwdns2934203:0crwdne2934203:0 crwdns2950251:0crwdne2950251:0
Did anyone already thought or experienced to just cut out a square at the back of the frame? its not elegant but my imacs back just faces the wall :) for thermal reasons i can imagine just to stick it back.
dave777 - crwdns2934203:0crwdne2934203:0 crwdns2950251:0crwdne2950251:0
It's a shame Apple couldn't manage to put this on the front of the logic board--such a pain (by design).
maccentric - crwdns2934203:0crwdne2934203:0 crwdns2950251:0crwdne2950251:0