crwdns2915892:0crwdne2915892:0
A zipper pull is a piece of cording or ribbon that attaches to a zipper slider to make it easier to grab on to - especially while wearing mittens or gloves!
This guide will demonstrate how to attach a new pull when it has gone missing or become damaged.
Read through the entire guide before starting the repair, and gather the necessary tools and materials. While Patagonia-specific materials are ideal, they are not required. Patagonia replacement parts can be obtained by calling or messaging Patagonia Customer Service.
Alternatively, Patagonia products can be taken to a local retail store for repair evaluation or sent in to Patagonia through their mail-in repair service.
Let's get fixing!
WARNING! Small Parts. Patagonia does not recommend conducting these repairs on garments intended for children age 3 or under. Instead, we recommend return of the product for professional repair services.
crwdns2942213:0crwdne2942213:0
crwdns2936621:0crwdne2936621:0
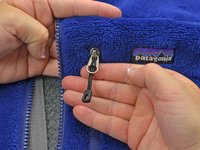
Zipper pull replacement overview.
-
-
If you need to remove a damaged zipper pull, skip to Step 6.
-
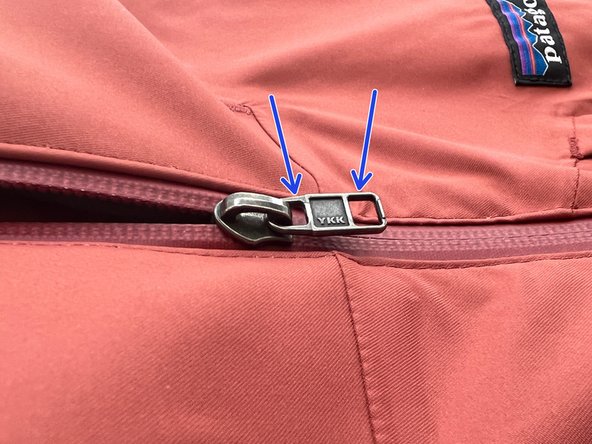
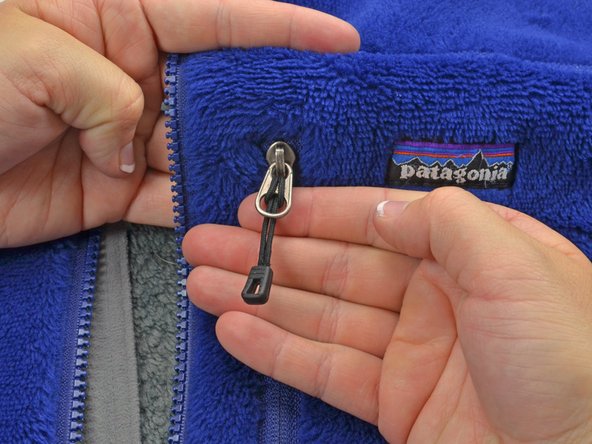
Locate the zipper slider that is missing a pull. The slider has a tab with two holes, one where the tab is attached to the slider body and one at the end of the tab.
-
-
-
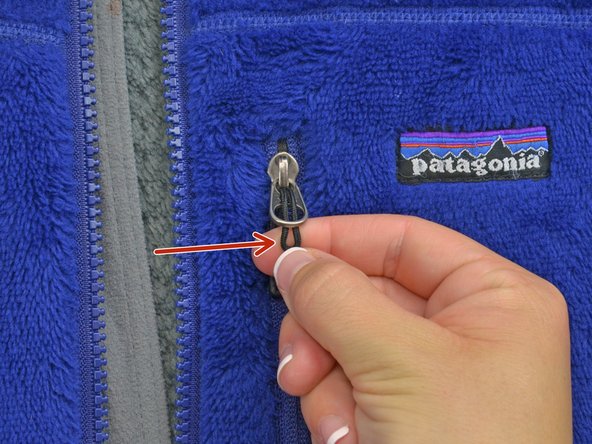
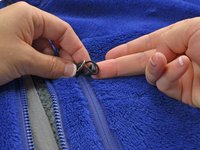
Pinch the paracord end of the pull and slide it into the tab hole that's closer to the slider.
-
Pull the paracord through the tab hole.
-
-
-
-
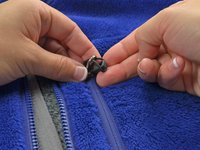
Pinch the paracord end of the pull and thread it through the other hole on the slider tab, the one furthest from the slider body.
-
-
-
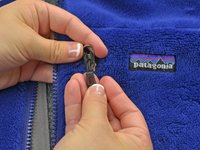
Thread the rubber end of the paracord pull through the loop emerging from the slider tab.
-
-
-
While holding the slider, pull the rubber end of the zipper pull to tighten it. The zipper pull is now inserted and should lay flat on the slider tab.
-
-
-
To take off a damaged zipper pull, do these same steps in reverse.
-
Discard the damaged pull responsibly.
-


crwdns2935221:0crwdne2935221:0
crwdns2935229:06crwdne2935229:0

crwdns2947410:01crwdne2947410:0
Awesome! Thanks for the training!
Kathleen Hutton - crwdns2934203:0crwdne2934203:0 crwdns2950251:0crwdne2950251:0