crwdns2915892:0crwdne2915892:0
Many drone repairs are relatively simple, replacing a motor is a crucial fix when your drone experiences reduced performance or stops flying altogether. Motors are responsible for the drone's lift and stability, so a faulty motor can make the difference between smooth flights and frustrating crashes. It may seem like a daunting task, but replacing a motor is straightforward with the right tools and instructions.
crwdns2942213:0crwdne2942213:0
-
-
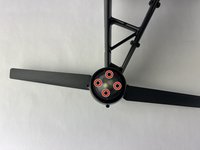
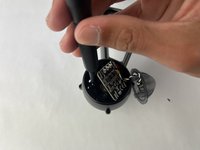
Remove the propeller from the side where the motor is not working.
-
-
-
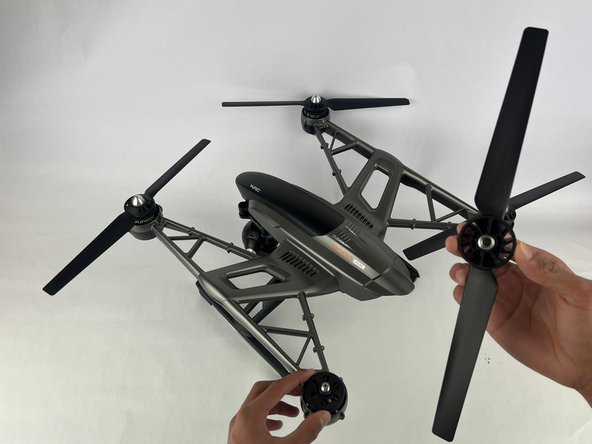
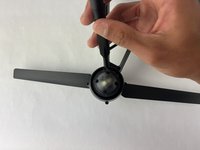
Grab the motor with one hand and propeller with the other.
-
Turn the propeller counterclockwise to separate the propeller from the drone.
-
-
-
-
Use a Phillips #00 screwdriver and remove the four screws that secure the light cover.
-
-
-
Use the plastic opening tool to pry up and out the PCB.
-
-
-
Use a 2mm Hex screwdriver to remove the four screws that are located below the PCB.
-
-
-
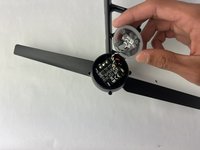
Flip the drone over then replace the motor with a new one.
-


To reassemble your device, follow the above steps in reverse order.
Take your e-waste to an R2 or e-Stewards certified recycler.
Repair didn’t go as planned? Try some basic troubleshooting or ask our Answers community for help.
crwdns2935221:0crwdne2935221:0
crwdns2935227:0crwdne2935227:0

crwdns2935287:0crwdne2935287:0

Cuesta, Team 10-5, Krynen Fall 2024 crwdns2935289:0Cuesta, Team 10-5, Krynen Fall 2024crwdne2935289:0
CUESTA-KRYNEN-F24S10G5
crwdns2931471:04crwdne2931471:0
crwdns2935297:06crwdne2935297:0